> ## Documentation Index
> Fetch the complete documentation index at: https://docs.apinizer.com/llms.txt
> Use this file to discover all available pages before exploring further.
# Private Key Management
> You can define and manage keys used in policies. You can perform key addition, deletion, and update operations with secret, private, and public key support. These operations can only be performed by Admin users.
## Creating a New Key
Click the **Create** button from the **Management → Secrets Management → Keys** screen. Fill in the information under **Definition**. Then click the **New Key Definition** button.
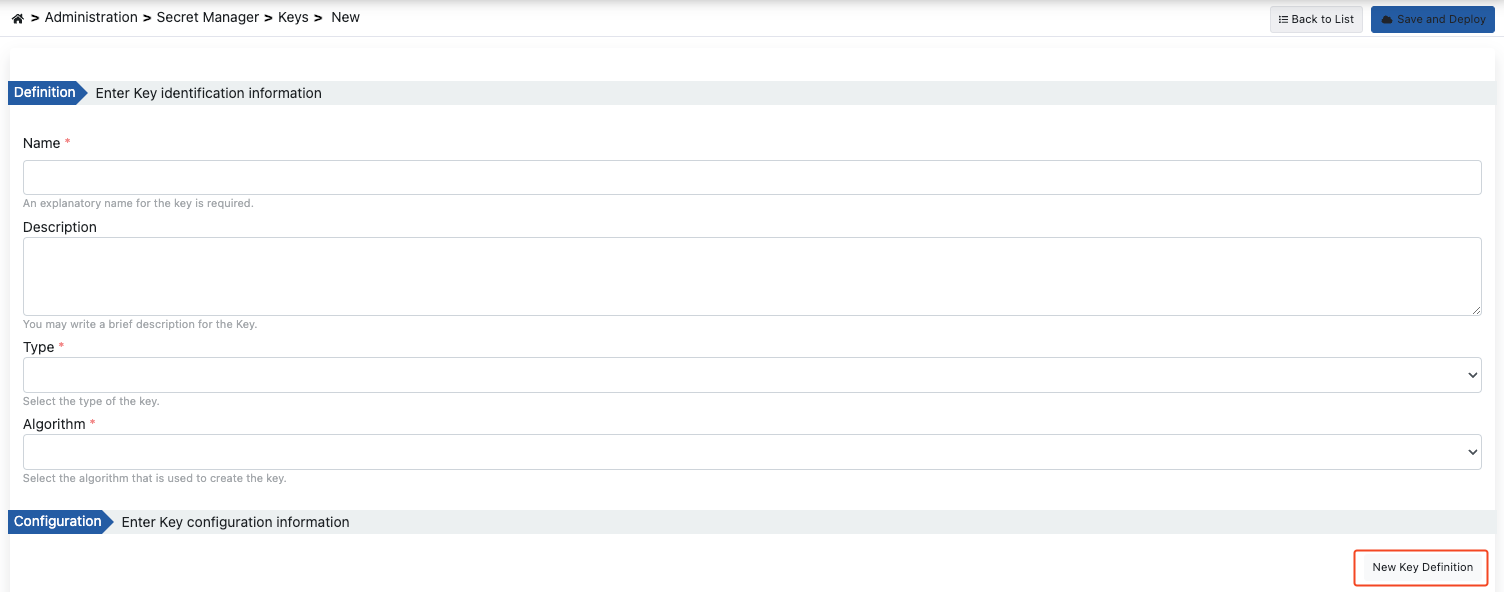 The fields used for key creation configuration:
| Field | Description |
| ----------------------- | -------------------------------------------------------------------------------------------------------------------------------------------------------------------- |
| Name | Name information of the created key. |
| Description | A description can be written to facilitate management related to the created key. |
| Key Type | The type of the key is selected. Three options are available:
The fields used for key creation configuration:
| Field | Description |
| ----------------------- | -------------------------------------------------------------------------------------------------------------------------------------------------------------------- |
| Name | Name information of the created key. |
| Description | A description can be written to facilitate management related to the created key. |
| Key Type | The type of the key is selected. Three options are available:
• Secret Key
• Private Key
• Public Key |
| Algorithm *(Algorithm)* | The algorithm of the key is selected. Options vary according to the type of the key:
• For secret key: AES, DES, DESede
• For private and public keys: RSA |
Fill in the configuration information for the Key in the opened window. Then click the **Save** button. The saved **Key Definition** is listed in the table opened under **Configuration**.
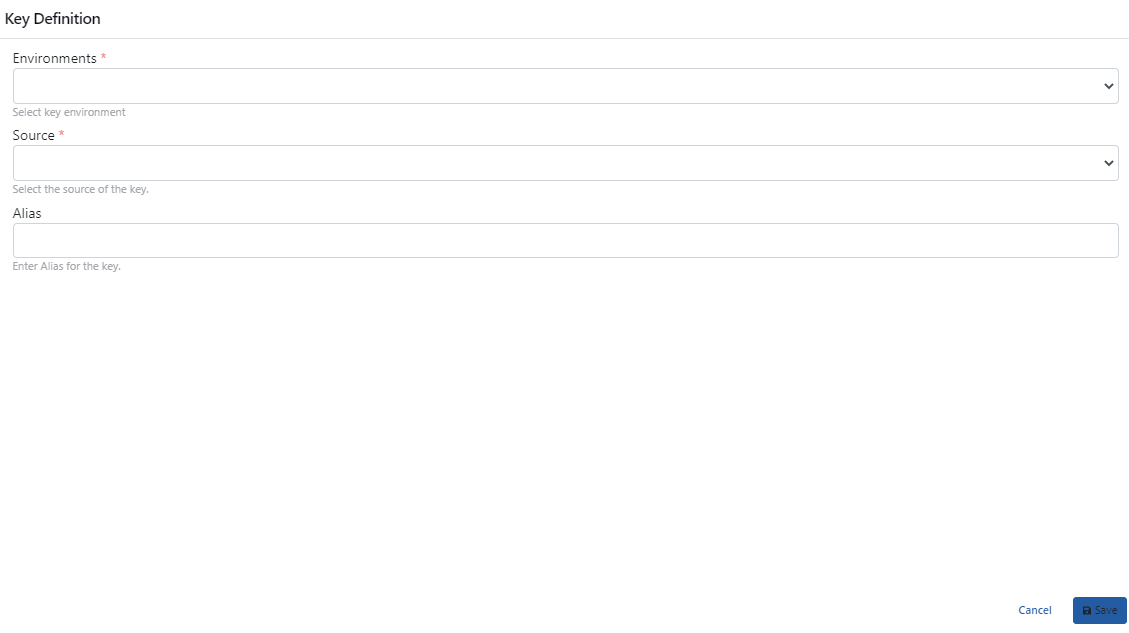 The fields used for key definition configuration:
| Field | Description |
| ----------------------------- | ---------------------------------------------------------------------------------------------------------------------------------------------------------------------- |
| Environments *(Environments)* | The previously defined environment where the key will be used is selected. |
| Source *(Source)* | The source from which the key will be obtained. Two options are available:
The fields used for key definition configuration:
| Field | Description |
| ----------------------------- | ---------------------------------------------------------------------------------------------------------------------------------------------------------------------- |
| Environments *(Environments)* | The previously defined environment where the key will be used is selected. |
| Source *(Source)* | The source from which the key will be obtained. Two options are available:
• Import from File
• Paste from Clipboard |
| File *(File)* | When the Import from File option is selected, the file containing the key is selected by clicking the "Select File" button. Allowed formats: pem, crt, cer, cert, der. |
| Key Content *(Key Content)* | When the Paste from Clipboard option is selected, this is the field where the key will be pasted. |
| Alias | The alias information of the key is entered. |
After completing the definition and configuration information, click the **Save and Deploy** button to deploy.
 ## Key Editing
To edit an existing key, click the **Edit** button from that key's menu.
## Key Editing
To edit an existing key, click the **Edit** button from that key's menu.
 After clicking the "Edit" button to edit the key, the steps followed during creation are followed.
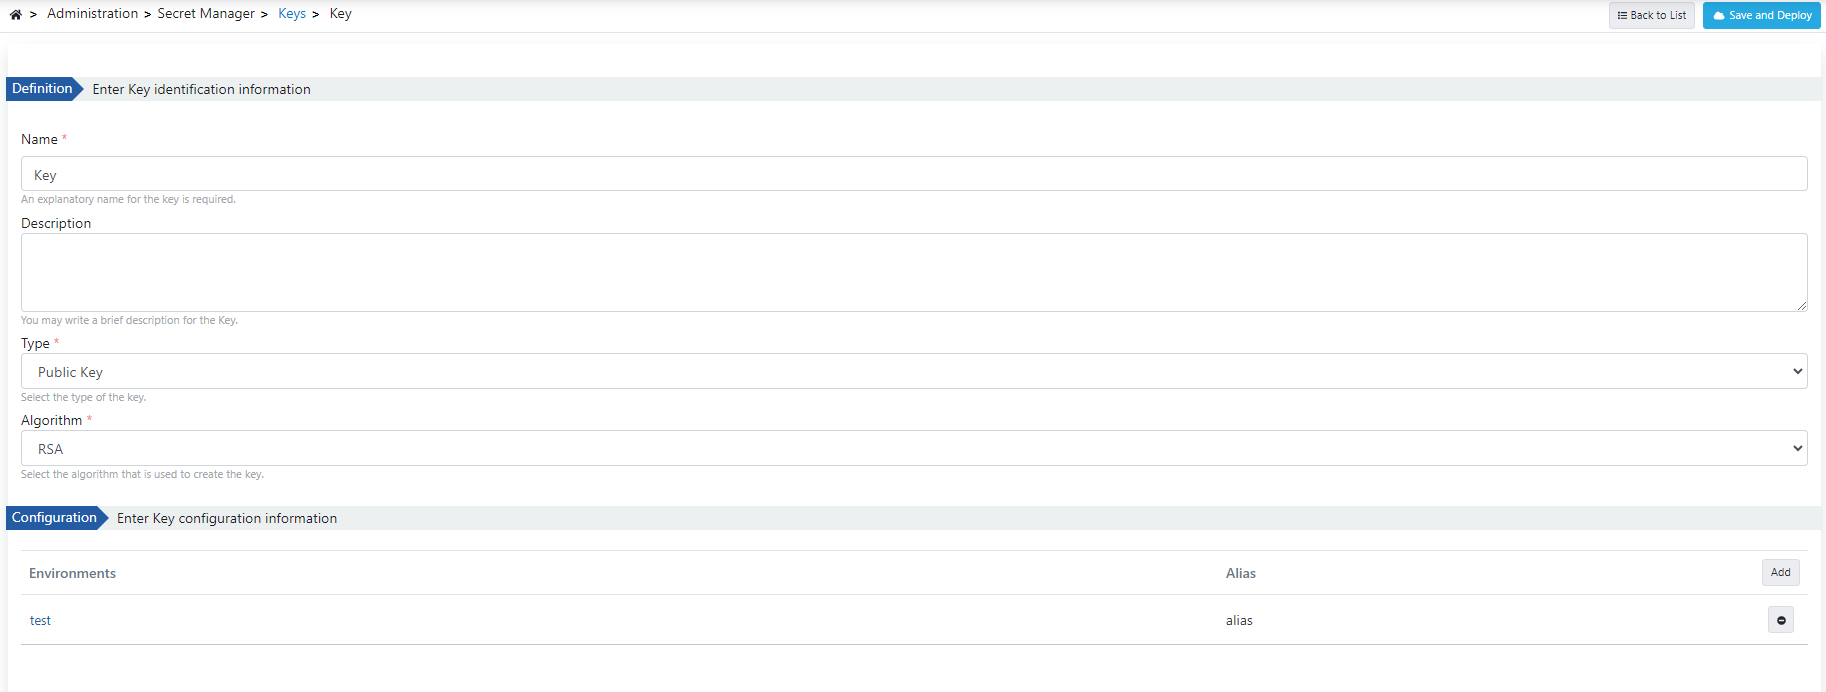 To edit the configuration content of an existing key, click on the Environment to be edited and perform the editing operation.
Click the **Save** button to save the changes you made.
To edit the configuration content of an existing key, click on the Environment to be edited and perform the editing operation.
Click the **Save** button to save the changes you made.
 ### Updating Related JWKs
When a key (Public Key or Private Key) is updated and the **Save and Deploy** button is clicked, if there are JWKs created from this key, the system automatically detects related JWKs and presents the user with options.
When a key is updated, JWKs created from this key can also be automatically updated or the relationship can be disconnected.
#### JWK Connection Dialog
When a key is updated and related JWKs are detected, the following dialog opens:
### Updating Related JWKs
When a key (Public Key or Private Key) is updated and the **Save and Deploy** button is clicked, if there are JWKs created from this key, the system automatically detects related JWKs and presents the user with options.
When a key is updated, JWKs created from this key can also be automatically updated or the relationship can be disconnected.
#### JWK Connection Dialog
When a key is updated and related JWKs are detected, the following dialog opens:
 **Dialog Content:**
* **Title**: "JWK Connection"
* **Warning Message**: "This Key is used in X JWK(s). What would you like to do?"
* **Options**:
* **Update related JWKs**: Ensures that changes in the key are reflected to related JWKs as well.
* **Update key only and disconnect**: Updates the key but disconnects the relationship with JWKs.
* **Cancel**: Cancels the operation.
#### Update Flow
Edit the key information and click the **Save and Deploy** button.
The system checks for JWKs created from this key.
If there are related JWKs, the JWK Connection dialog opens.
The user selects one of three options: Update, Disconnect, or Cancel.
When Update or Disconnect is selected, a confirmation dialog opens. The user confirms the operation by entering the key name.
After confirmation, the selected operation is performed and the key is updated.
Updating related JWKs may affect all policies and connections using these JWKs. Evaluate the impacts before proceeding.
## Key Deletion
To delete an existing key, click the **Delete** button from that key's menu.
**Dialog Content:**
* **Title**: "JWK Connection"
* **Warning Message**: "This Key is used in X JWK(s). What would you like to do?"
* **Options**:
* **Update related JWKs**: Ensures that changes in the key are reflected to related JWKs as well.
* **Update key only and disconnect**: Updates the key but disconnects the relationship with JWKs.
* **Cancel**: Cancels the operation.
#### Update Flow
Edit the key information and click the **Save and Deploy** button.
The system checks for JWKs created from this key.
If there are related JWKs, the JWK Connection dialog opens.
The user selects one of three options: Update, Disconnect, or Cancel.
When Update or Disconnect is selected, a confirmation dialog opens. The user confirms the operation by entering the key name.
After confirmation, the selected operation is performed and the key is updated.
Updating related JWKs may affect all policies and connections using these JWKs. Evaluate the impacts before proceeding.
## Key Deletion
To delete an existing key, click the **Delete** button from that key's menu.
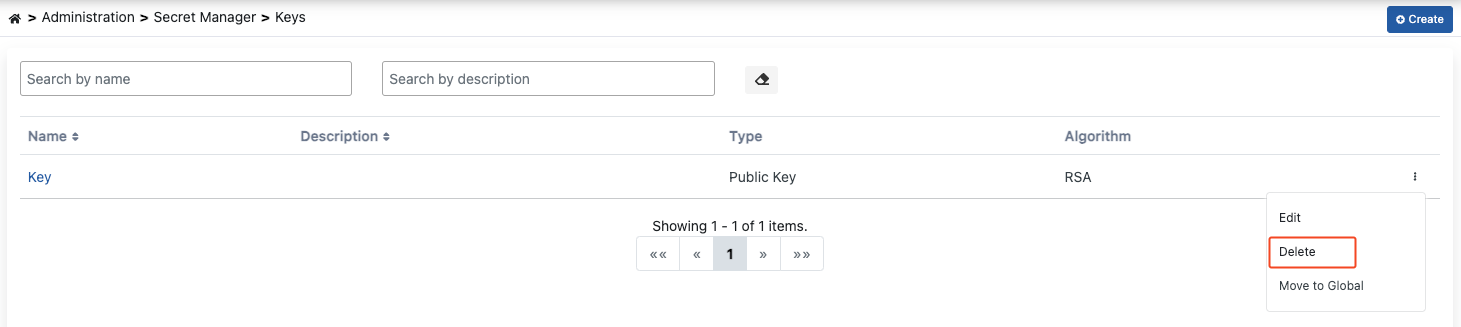 The system checks for JWKs created from this key. If there are related JWKs, the JWK Connection dialog opens.
If there are related JWKs, the following options are presented:
* **Delete JWKS**: Delete related JWKs as well
* **Delete Disconnect**: Delete only the key, keep JWKs (relationship is disconnected)
* **Cancel**: Cancel the operation
When Delete JWKS or Delete Disconnect is selected, a confirmation dialog opens. The user confirms the operation by entering the key name.
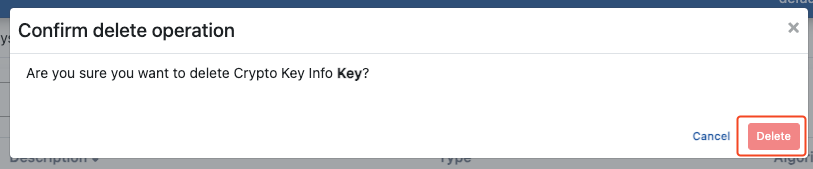
Click the **Delete** button again in the opened window to confirm.
The system checks for JWKs created from this key. If there are related JWKs, the JWK Connection dialog opens.
If there are related JWKs, the following options are presented:
* **Delete JWKS**: Delete related JWKs as well
* **Delete Disconnect**: Delete only the key, keep JWKs (relationship is disconnected)
* **Cancel**: Cancel the operation
When Delete JWKS or Delete Disconnect is selected, a confirmation dialog opens. The user confirms the operation by entering the key name.
Click the **Delete** button again in the opened window to confirm.
 ### Deleting Related JWKs
When a key is deleted, if there are JWKs created from this key, the system automatically detects related JWKs and presents the user with options.
When a key is deleted, related JWKs may also be deleted or the relationship may be disconnected. This operation cannot be undone. Evaluate the impacts before proceeding.
#### Deletion Flow
Start the key deletion operation.
The system checks for JWKs created from this key.
If there are related JWKs, the JWK Connection dialog opens.
The user selects one of three options: Delete JWKS, Delete Disconnect, or Cancel.
When Delete JWKS or Delete Disconnect is selected, a confirmation dialog opens. The user confirms the operation by entering the key name.
After confirmation, the selected operation is performed and the key is deleted.
### Deleting Related JWKs
When a key is deleted, if there are JWKs created from this key, the system automatically detects related JWKs and presents the user with options.
When a key is deleted, related JWKs may also be deleted or the relationship may be disconnected. This operation cannot be undone. Evaluate the impacts before proceeding.
#### Deletion Flow
Start the key deletion operation.
The system checks for JWKs created from this key.
If there are related JWKs, the JWK Connection dialog opens.
The user selects one of three options: Delete JWKS, Delete Disconnect, or Cancel.
When Delete JWKS or Delete Disconnect is selected, a confirmation dialog opens. The user confirms the operation by entering the key name.
After confirmation, the selected operation is performed and the key is deleted.