> ## Documentation Index
> Fetch the complete documentation index at: https://docs.apinizer.com/llms.txt
> Use this file to discover all available pages before exploring further.
# Creating API from Script with API Creator
> You can create REST APIs with a function-as-a-service approach with Script-2-API. You can write endpoint business logic in Javascript or Groovy language, process incoming message elements with script and send the result to the client
Elements of the incoming message (header, parameter, body) are processed with the selected script language and the result is sent to the client.
Changes cannot be made to the original form of the incoming request message, only reading can be done on this data. The response to be returned to the client is prepared within the script.
## Creating New Script-2-API
**Development → API Creator → Script-2-API** item is selected in the main menu.
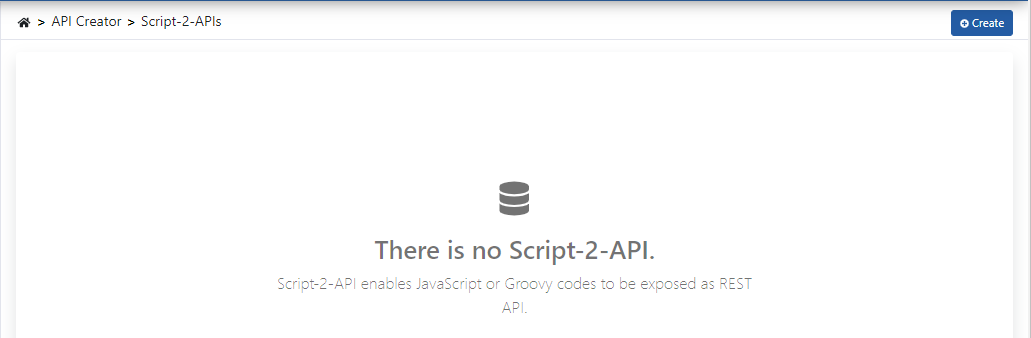 The **+Create** button at the top right of the opened interface is clicked.
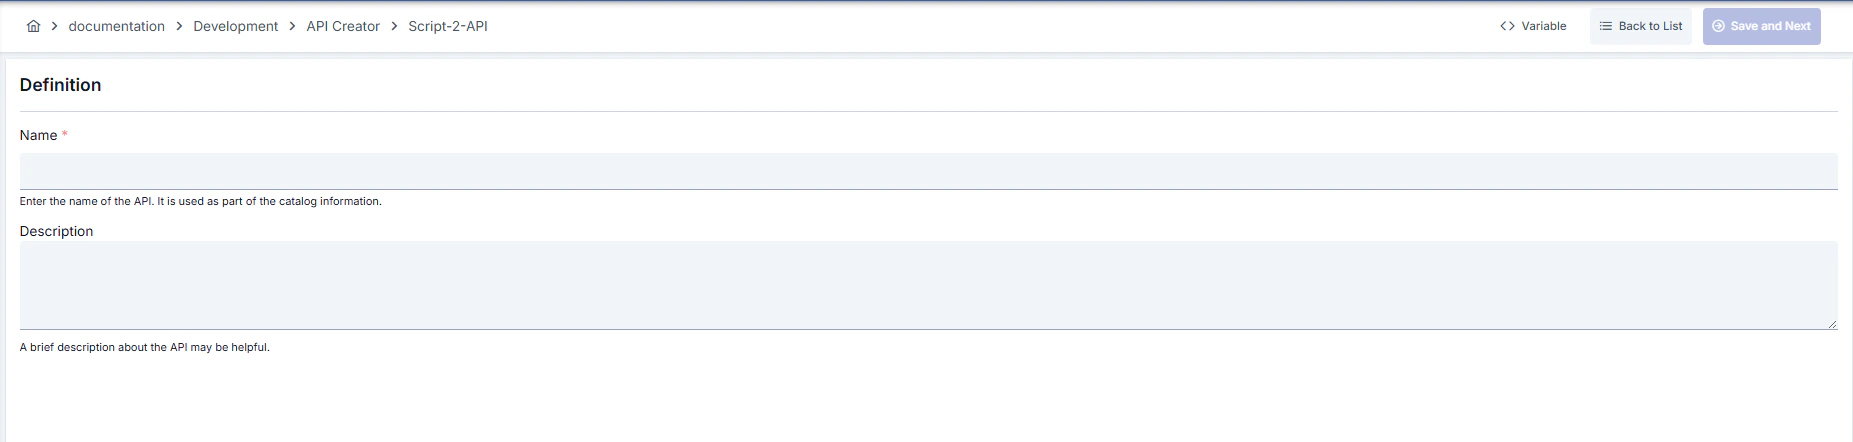
Required fields for the new *API* to be created are filled and the **→Save and Next** button at the top right is clicked, starting the *API* creation process.
The **+Create** button at the top right of the opened interface is clicked.
Required fields for the new *API* to be created are filled and the **→Save and Next** button at the top right is clicked, starting the *API* creation process.
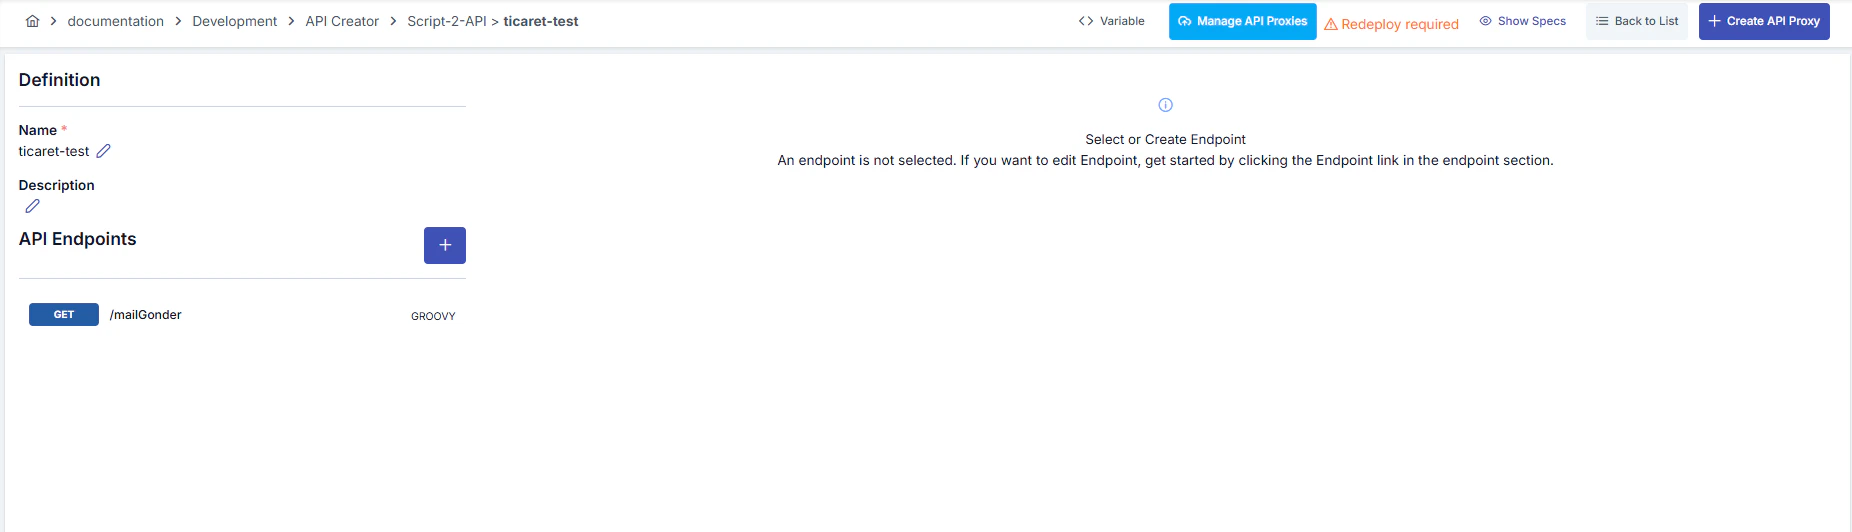
 After the API is saved, endpoint definition for the API begins. If there is no endpoint, press the add button inside the API for the first time to add, if there is at least one, press the add button that appears in the endpoints section.
 ## Endpoint Creation
The following information is entered to define an *Endpoint*:
## Endpoint Creation
The following information is entered to define an *Endpoint*:
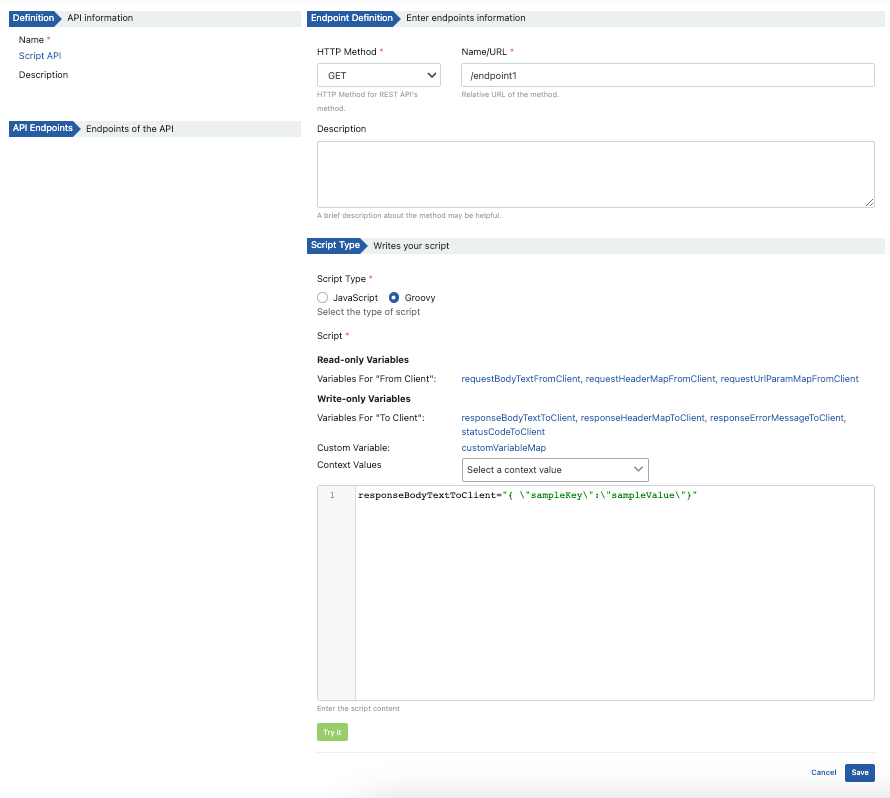 Fields used for endpoint creation configuration are explained below, categorized:
**Field:** HTTP Method
HTTP Method is selected for REST APIs: GET, POST, PUT, HEAD, OPTIONS, DELETE, PATCH, TRACE, ALL
**Field:** Name/URL
Endpoint access address. When API Proxy is created, the endpoint is accessed through this address.
**Field:** Description
Definition information of the API endpoint.
**Field:** Script Type
Type of the Script to be written. Can be Javascript or Groovy.
**Field:** Script
Information about the script to be executed.
**Field:** Variables
List of read-only and write-only variables that can be accessed in the request and response pipeline. When the relevant variable is clicked, the variable is added to the point where the cursor is located in the Script field.
**Field:** Try It
Opens a new window to allow testing of the script to be executed.
## Variables
Various keywords are used for access to message header, parameter, and body parts on script for read and write operations to be performed.
Variables used to access data coming from client to Apinizer:
**Variable:** `requestHeaderMapFromClient`
**Data Type:** `Map`
**Operation:** Read
Used to read request headers.
**Variable:** `requestUrlParamMapFromClient`
**Data Type:** `Map`
**Operation:** Read
Used to read URL parameters.
**Variable:** `requestBodyTextFromClient`
**Data Type:** `String`
**Operation:** Read
Used to read request body.
**Variable:** `contextValues`
**Data Type:** `String`
**Operation:** Read
Used to access message information.
**Variable:** `customVariableMap`
**Data Type:** `Map`
**Operation:** Read, Write
Used to read and write custom variables.
Variables used to create data to be sent from Apinizer to client:
**Variable:** `responseHeaderMapToClient`
**Data Type:** `Map`
**Operation:** Write
Used to create response headers.
**Variable:** `responseBodyTextToClient`
**Data Type:** `String`
**Operation:** Write
Used to create response body.
**Variable:** `statusCodeToClient`
**Data Type:** `Integer`
**Operation:** Write
Used to set HTTP status code.
**Variable:** `contextValues`
**Data Type:** `String`
**Operation:** Read
Used to access message information.
**Variable:** `customVariableMap`
**Data Type:** `Map`
**Operation:** Read, Write
Used to read and write custom variables.
If script type is Groovy:
* **JsonSlurper** when message body is JSON
* **XMLSlurper** when message body is XML
Using these makes message processing quite easy.
## Creating API Proxy from Script-2-API
After the API's definitions are completed, it's time to open this API as an API Proxy.
At least one *endpoint* of the API created with Script-2-API must exist to create an API Proxy from Script-2-API.
To open Script-2-API as an API Proxy for access, press the **Create Proxy** button shown in the following visual.
Fields used for endpoint creation configuration are explained below, categorized:
**Field:** HTTP Method
HTTP Method is selected for REST APIs: GET, POST, PUT, HEAD, OPTIONS, DELETE, PATCH, TRACE, ALL
**Field:** Name/URL
Endpoint access address. When API Proxy is created, the endpoint is accessed through this address.
**Field:** Description
Definition information of the API endpoint.
**Field:** Script Type
Type of the Script to be written. Can be Javascript or Groovy.
**Field:** Script
Information about the script to be executed.
**Field:** Variables
List of read-only and write-only variables that can be accessed in the request and response pipeline. When the relevant variable is clicked, the variable is added to the point where the cursor is located in the Script field.
**Field:** Try It
Opens a new window to allow testing of the script to be executed.
## Variables
Various keywords are used for access to message header, parameter, and body parts on script for read and write operations to be performed.
Variables used to access data coming from client to Apinizer:
**Variable:** `requestHeaderMapFromClient`
**Data Type:** `Map`
**Operation:** Read
Used to read request headers.
**Variable:** `requestUrlParamMapFromClient`
**Data Type:** `Map`
**Operation:** Read
Used to read URL parameters.
**Variable:** `requestBodyTextFromClient`
**Data Type:** `String`
**Operation:** Read
Used to read request body.
**Variable:** `contextValues`
**Data Type:** `String`
**Operation:** Read
Used to access message information.
**Variable:** `customVariableMap`
**Data Type:** `Map`
**Operation:** Read, Write
Used to read and write custom variables.
Variables used to create data to be sent from Apinizer to client:
**Variable:** `responseHeaderMapToClient`
**Data Type:** `Map`
**Operation:** Write
Used to create response headers.
**Variable:** `responseBodyTextToClient`
**Data Type:** `String`
**Operation:** Write
Used to create response body.
**Variable:** `statusCodeToClient`
**Data Type:** `Integer`
**Operation:** Write
Used to set HTTP status code.
**Variable:** `contextValues`
**Data Type:** `String`
**Operation:** Read
Used to access message information.
**Variable:** `customVariableMap`
**Data Type:** `Map`
**Operation:** Read, Write
Used to read and write custom variables.
If script type is Groovy:
* **JsonSlurper** when message body is JSON
* **XMLSlurper** when message body is XML
Using these makes message processing quite easy.
## Creating API Proxy from Script-2-API
After the API's definitions are completed, it's time to open this API as an API Proxy.
At least one *endpoint* of the API created with Script-2-API must exist to create an API Proxy from Script-2-API.
To open Script-2-API as an API Proxy for access, press the **Create Proxy** button shown in the following visual.
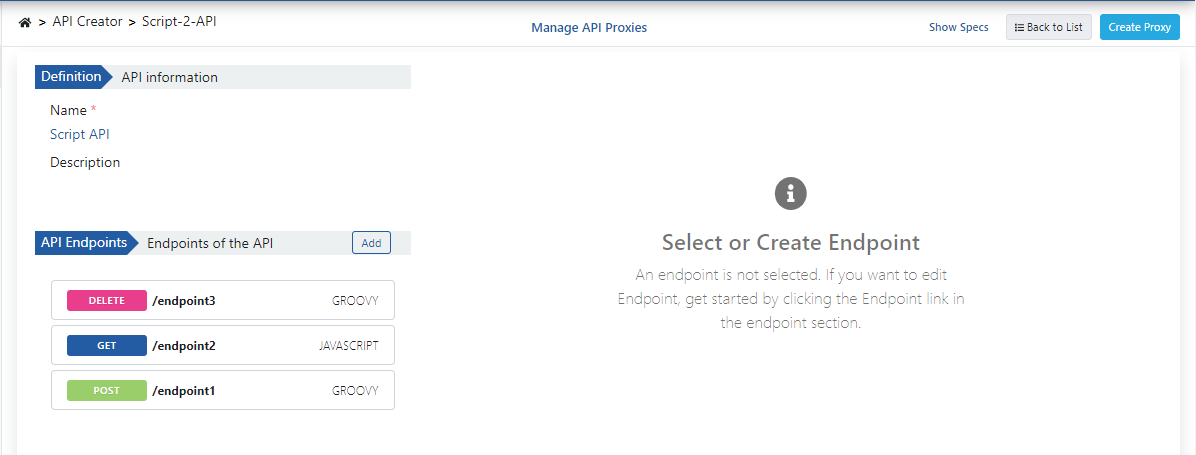 The API Proxy is created by entering the required fields for the API Proxy on the screen that appears and clicking the **Save** button.
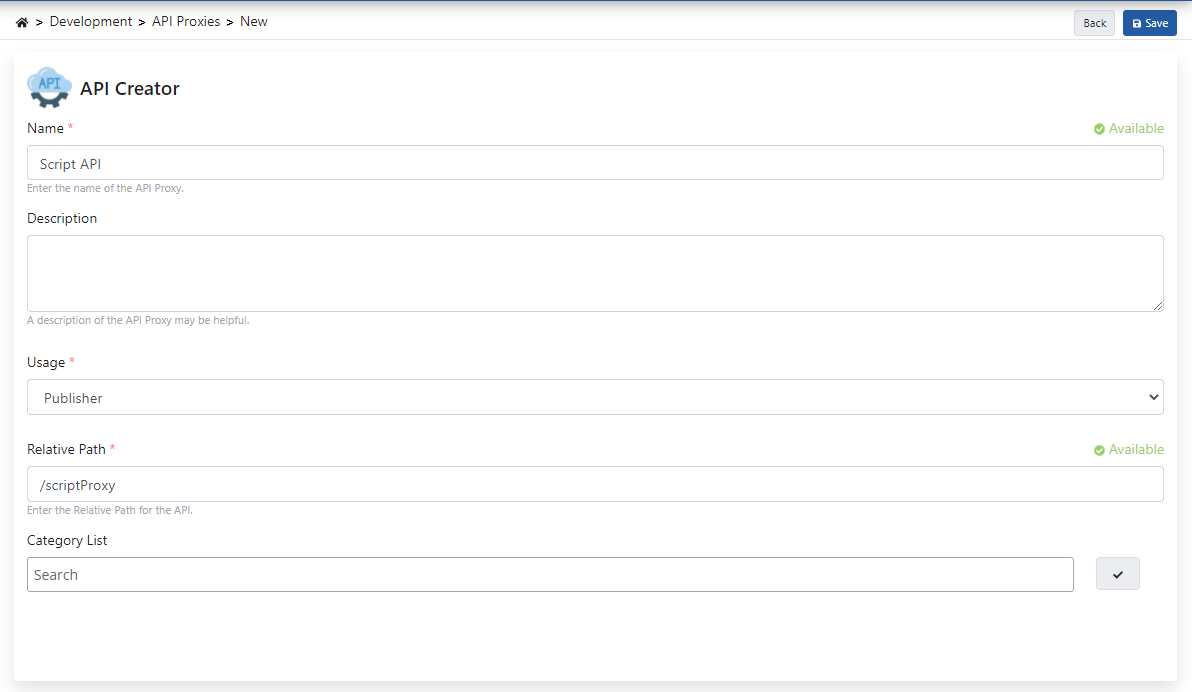 After this step, what can be done is the same as the API Proxy document. You can review the [API Proxy Creation](/en/develop/api-proxy-creation/api-proxy-creation) page for detailed information.
You can create multiple API Proxies for one Script-2-API.
## Deploy/Redeploy
You can manage the deployment status of API Proxies created with Script-2-API from the API Proxies page or by selecting the relevant API on the Script-2-API page.
To manage from the Script-2-API page, use the window opened by clicking the **Manage API Proxies** link located at the top of the page. In the opened window, you can perform Deploy, Redeploy, and Undeploy operations for API *Proxy*s created from this API. You can visit our Revision, Deployment, Redeployment, Undeployment pages for more detailed information on this topic.
After this step, what can be done is the same as the API Proxy document. You can review the [API Proxy Creation](/en/develop/api-proxy-creation/api-proxy-creation) page for detailed information.
You can create multiple API Proxies for one Script-2-API.
## Deploy/Redeploy
You can manage the deployment status of API Proxies created with Script-2-API from the API Proxies page or by selecting the relevant API on the Script-2-API page.
To manage from the Script-2-API page, use the window opened by clicking the **Manage API Proxies** link located at the top of the page. In the opened window, you can perform Deploy, Redeploy, and Undeploy operations for API *Proxy*s created from this API. You can visit our Revision, Deployment, Redeployment, Undeployment pages for more detailed information on this topic.
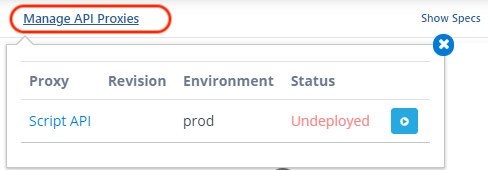 After the above operation, confirmation is required. Information about the deployment operation is created and the **(Deploy) Deploy** button is clicked.
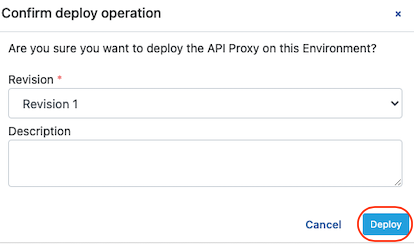 When a new endpoint is added to Script-2-API or changes are made within an endpoint, all API Proxies created from this API must be redeployed for the changes to take effect.
When you add a new endpoint or update an existing endpoint, a notification like the following will appear.
When a new endpoint is added to Script-2-API or changes are made within an endpoint, all API Proxies created from this API must be redeployed for the changes to take effect.
When you add a new endpoint or update an existing endpoint, a notification like the following will appear.
 By saying **Redeploy**, changes are applied to API Proxies.
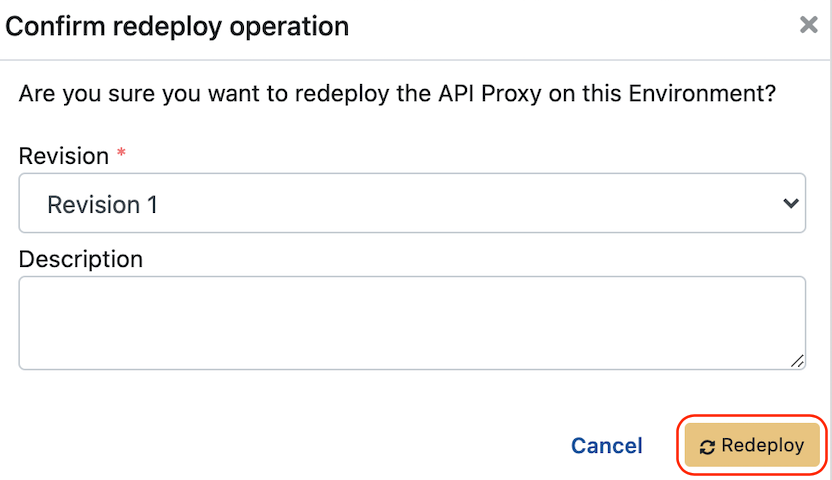
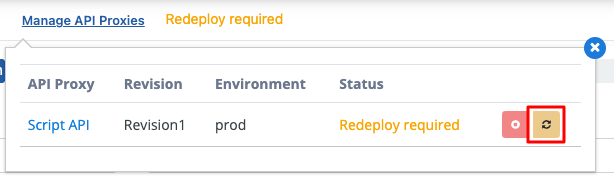 After the above operation, confirmation is required. Information about the redeployment operation is created and the **(Redeploy) Redeploy** button is clicked.
From the Script-2-API page, go to the API Proxy by clicking the API Proxy's name.
After the above operation, confirmation is required. Information about the redeployment operation is created and the **(Redeploy) Redeploy** button is clicked.
From the Script-2-API page, go to the API Proxy by clicking the API Proxy's name.
 Similarly, to go to the Script-2-API page from the API Proxy page, go by clicking the Script-2-API name in the API Proxy as shown below.
 ## Script-2-API Deletion
When a Script API is deleted, all API Proxies connected to it are first removed (undeploy) and then deleted.
## Script-2-API Deletion
When a Script API is deleted, all API Proxies connected to it are first removed (undeploy) and then deleted.
