> ## Documentation Index
> Fetch the complete documentation index at: https://docs.apinizer.com/llms.txt
> Use this file to discover all available pages before exploring further.
# API Manager LDAP Integration
> Explains how to add LDAPs login information in Apinizer and how to login to Apinizer with your LDAP users as an example.
This document explains how to add LDAPs login information in Apinizer and how to login to Apinizer with your LDAP users as an example.
## 1) Adding LDAPs Connection Information
Open **Connection Management → LDAP/Active Directory** page and add your information.
In the **Server Address** field, start with **ldaps\://** and add **ldap domain** and then **636** **port**.
An example image containing LDAPs connection settings is provided below:
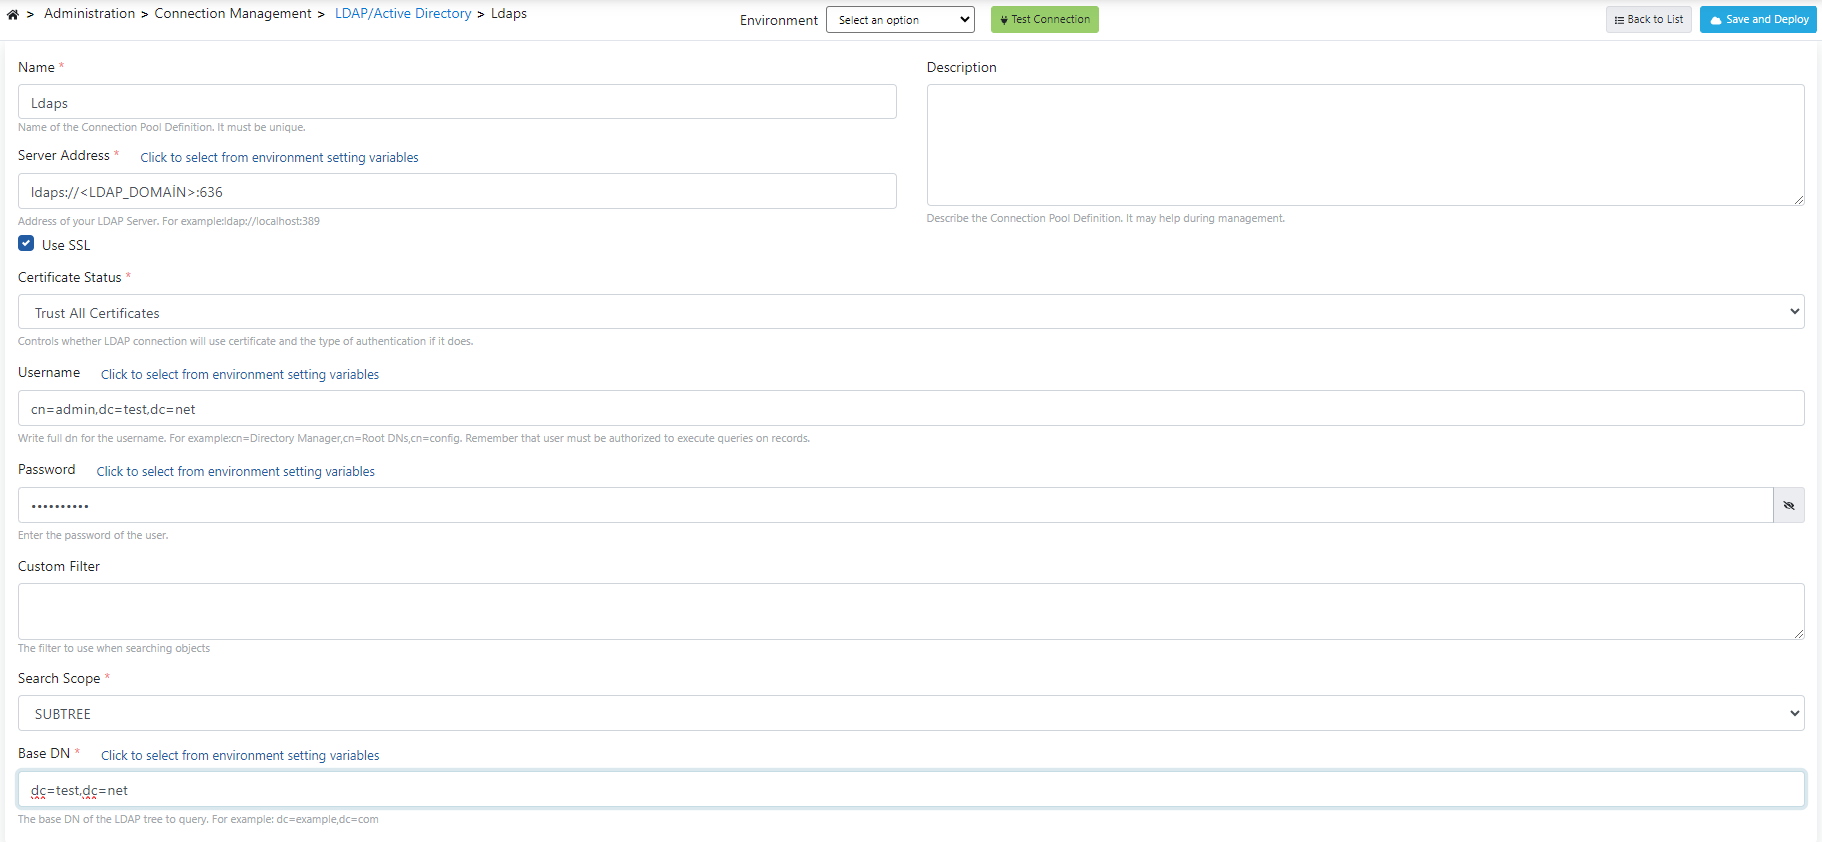 Check the **Use SSL** button for SSL usage.
If **Certificate Required** is selected in the **Certificate Status** field, see [this address](/en/admin/secrets-management/certificates) to add certificate.
You can also make a limitation in the search by using the **Custom Filter** field.
For example, the filter **(&(objectClass=inetOrgPerson)(mail=[example@example.com](mailto:example@example.com)))** will work for users belonging to **"inetOrgPerson"** class and with email address **"[example@example.com](mailto:example@example.com)"**.
In LDAP, users and groups are usually stored under different organizational units.
Therefore, different **base DN** addresses can be given for users and groups:
* Base DN for users: `ou=Users,dc=example,dc=com`
* Base DN for groups: `ou=Groups,dc=example,dc=com`
After completing the entry of your LDAP information, select one from the **Environment** field on the same page and click the **Test Connection** button, and when the operation is successful, an output like in the example image below will be seen.
Check the **Use SSL** button for SSL usage.
If **Certificate Required** is selected in the **Certificate Status** field, see [this address](/en/admin/secrets-management/certificates) to add certificate.
You can also make a limitation in the search by using the **Custom Filter** field.
For example, the filter **(&(objectClass=inetOrgPerson)(mail=[example@example.com](mailto:example@example.com)))** will work for users belonging to **"inetOrgPerson"** class and with email address **"[example@example.com](mailto:example@example.com)"**.
In LDAP, users and groups are usually stored under different organizational units.
Therefore, different **base DN** addresses can be given for users and groups:
* Base DN for users: `ou=Users,dc=example,dc=com`
* Base DN for groups: `ou=Groups,dc=example,dc=com`
After completing the entry of your LDAP information, select one from the **Environment** field on the same page and click the **Test Connection** button, and when the operation is successful, an output like in the example image below will be seen.
 You can complete adding LDAPs information to your system by clicking the **Save and Deploy** button.
## 2) LDAPs Login Settings
This section contains LDAP connection configurations that will enable integration with identity management systems in organizations that can be accessed via LDAP connection so that users can login to Apinizer.
Open **Administration → System Settings → LDAP Settings** page.
You can complete adding LDAPs information to your system by clicking the **Save and Deploy** button.
## 2) LDAPs Login Settings
This section contains LDAP connection configurations that will enable integration with identity management systems in organizations that can be accessed via LDAP connection so that users can login to Apinizer.
Open **Administration → System Settings → LDAP Settings** page.
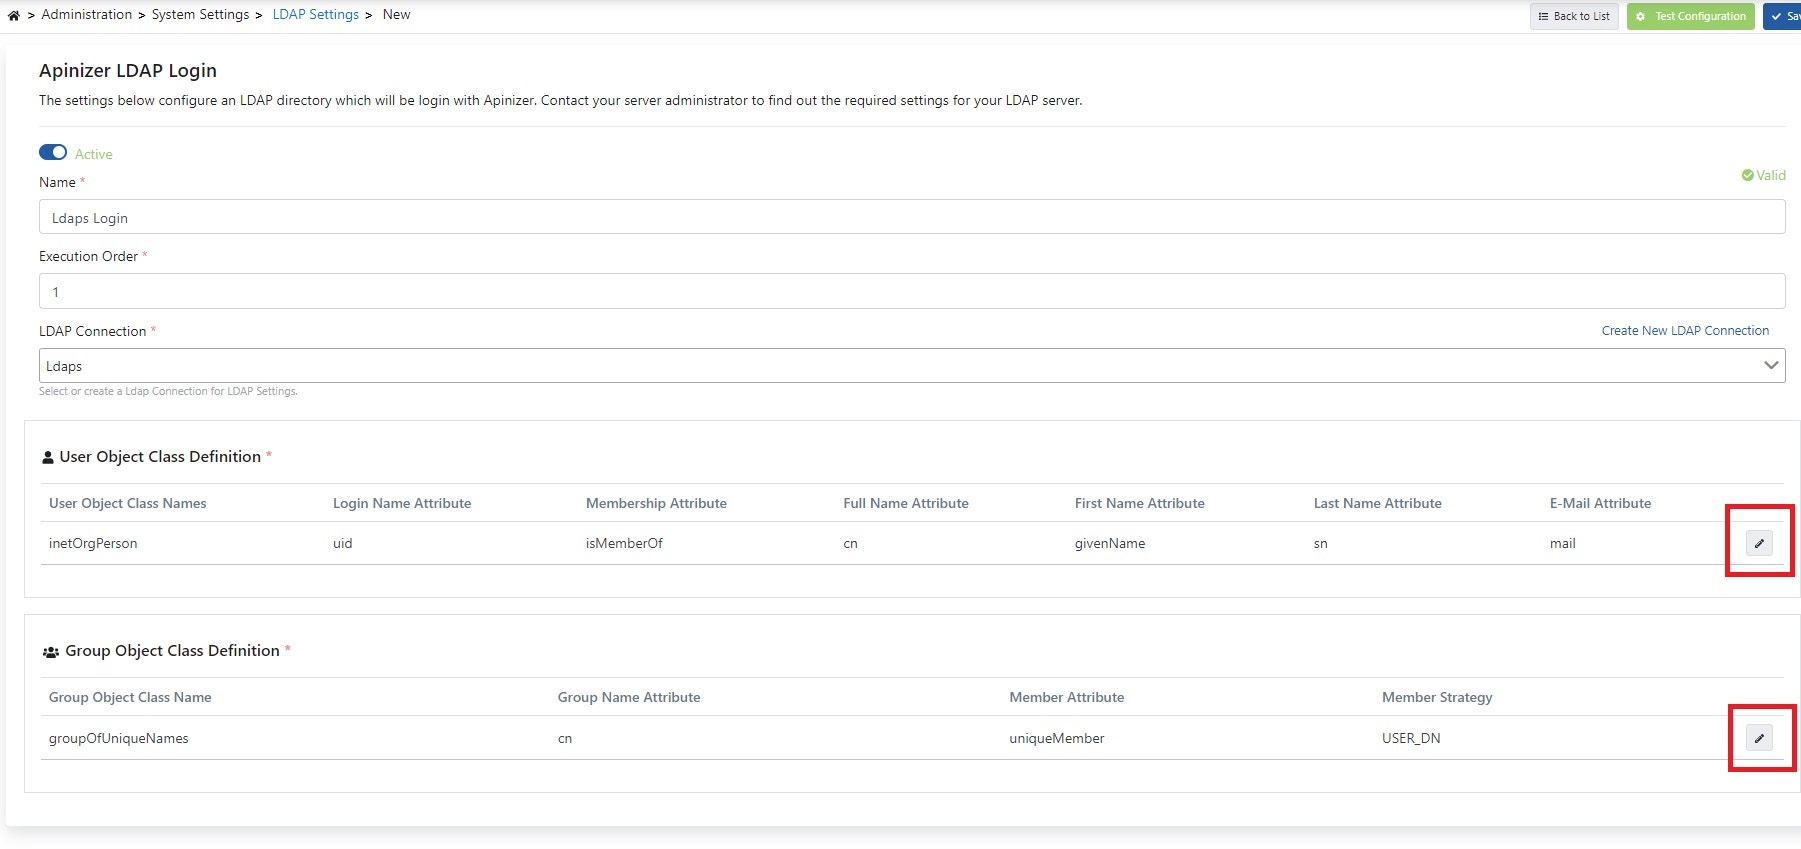 Give a name to the connection as in the image above and select the LDAP connection you added in the previous step from the **LDAP Connection** section. Click the edit button marked with red areas and enter the relevant information.
Example usage for the **User Object Class Definition** popup page is shown in the image below:
Give a name to the connection as in the image above and select the LDAP connection you added in the previous step from the **LDAP Connection** section. Click the edit button marked with red areas and enter the relevant information.
Example usage for the **User Object Class Definition** popup page is shown in the image below:
 You can view how to fill the relevant fields for **User** in the example image above by connecting to your existing LDAP application.
One of the parts to pay attention to is that **object class** value is written in the **User Object Class Name** field.
Only **attribute** expression is written in other fields specified as **Attribute**.
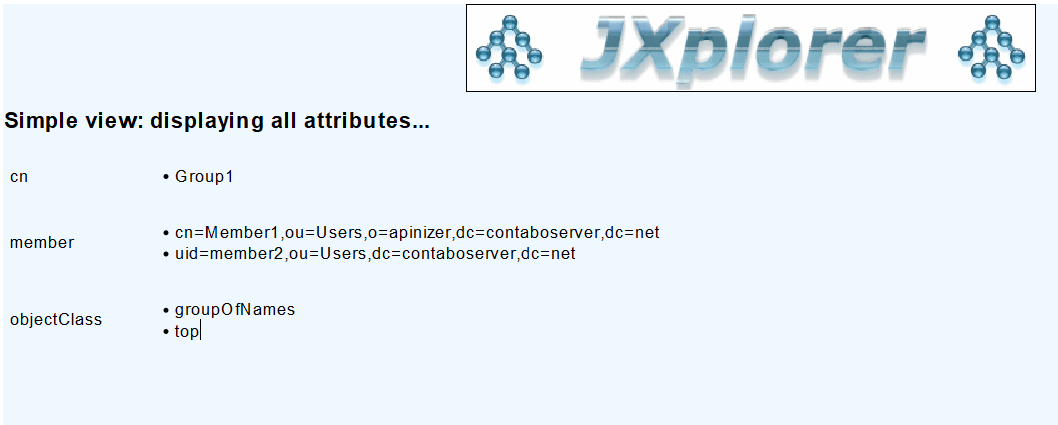
For this example, you can make an LDAP connection using the JXplorer application and examine its usage from the image below.
You can view how to fill the relevant fields for **User** in the example image above by connecting to your existing LDAP application.
One of the parts to pay attention to is that **object class** value is written in the **User Object Class Name** field.
Only **attribute** expression is written in other fields specified as **Attribute**.
For this example, you can make an LDAP connection using the JXplorer application and examine its usage from the image below.
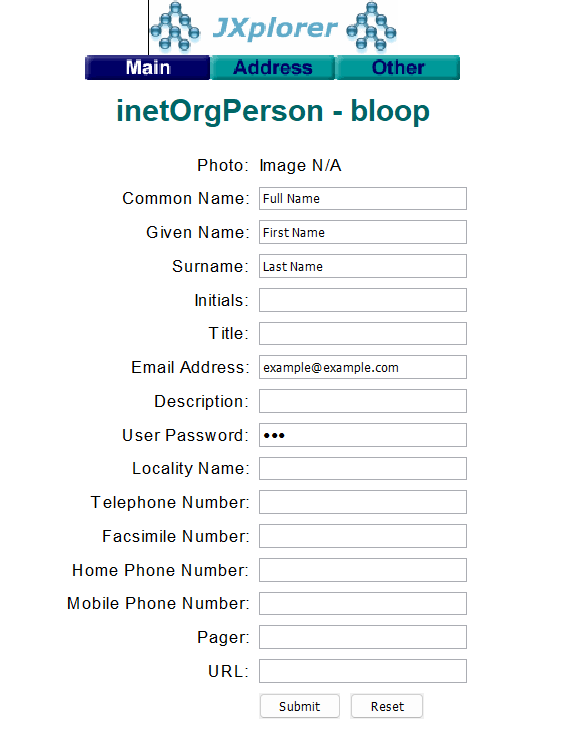 According to the example image above, you can see that Object Class Name is **inetOrgPerson** for user. This information may vary according to your relevant **LDAP** application.
Example usage for the **Group Object Class Definition** popup page is shown in the image below:
According to the example image above, you can see that Object Class Name is **inetOrgPerson** for user. This information may vary according to your relevant **LDAP** application.
Example usage for the **Group Object Class Definition** popup page is shown in the image below:
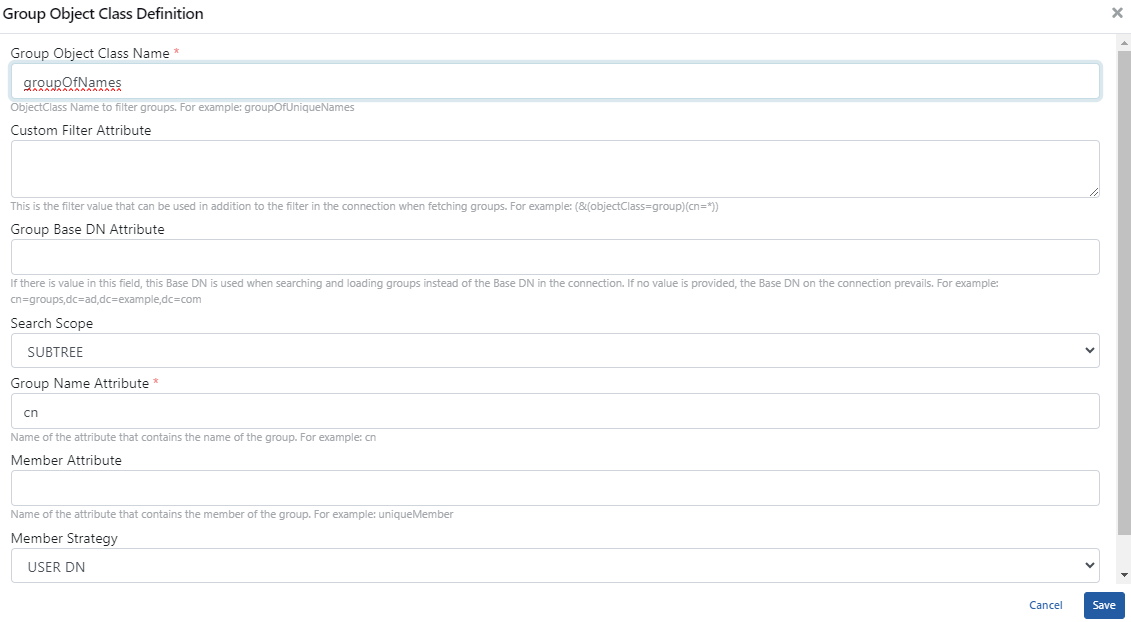 You can view how to fill the relevant fields for **Group** in the example image above by connecting to your existing LDAP application.
One of the parts to pay attention to is that **object class** value is written in the **Group Object Class Name** field.
You can view how to fill the relevant fields for **Group** in the example image above by connecting to your existing LDAP application.
One of the parts to pay attention to is that **object class** value is written in the **Group Object Class Name** field.
 After entering the information, click the **Test Configuration** button located at the top right corner as in the image below.
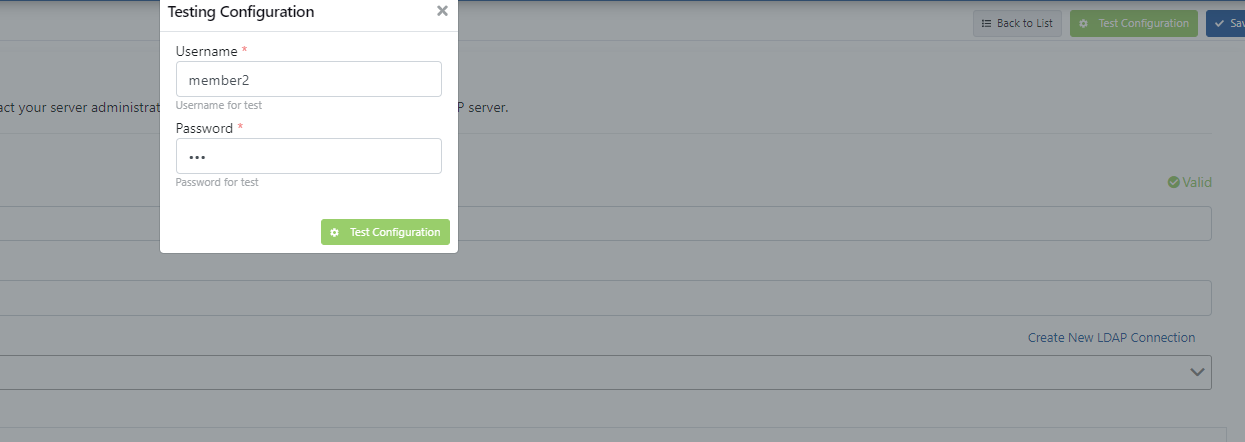 When test login is performed with the **LDAP user** whose **uid** value is **member2** as specified in the example image above and their password as login information on the opened page, it will return **Success** response.
Test with your user information in your LDAP application.
After seeing the successful response, save the information by clicking the **Save** button.
## 3) Authorizing LDAP Users or Group Members in Project
This section explains authorization operations for LDAP users and groups on a project basis.
Select a project from the area where your projects are located as in the image below.
When test login is performed with the **LDAP user** whose **uid** value is **member2** as specified in the example image above and their password as login information on the opened page, it will return **Success** response.
Test with your user information in your LDAP application.
After seeing the successful response, save the information by clicking the **Save** button.
## 3) Authorizing LDAP Users or Group Members in Project
This section explains authorization operations for LDAP users and groups on a project basis.
Select a project from the area where your projects are located as in the image below.
 After selecting a project, to give user permission to your project:
Open **Project Settings → Members** page.
Write your LDAP user in the **LDAP User Members** field as in the image below and click the **Search in LDAP** button.
After selecting a project, to give user permission to your project:
Open **Project Settings → Members** page.
Write your LDAP user in the **LDAP User Members** field as in the image below and click the **Search in LDAP** button.
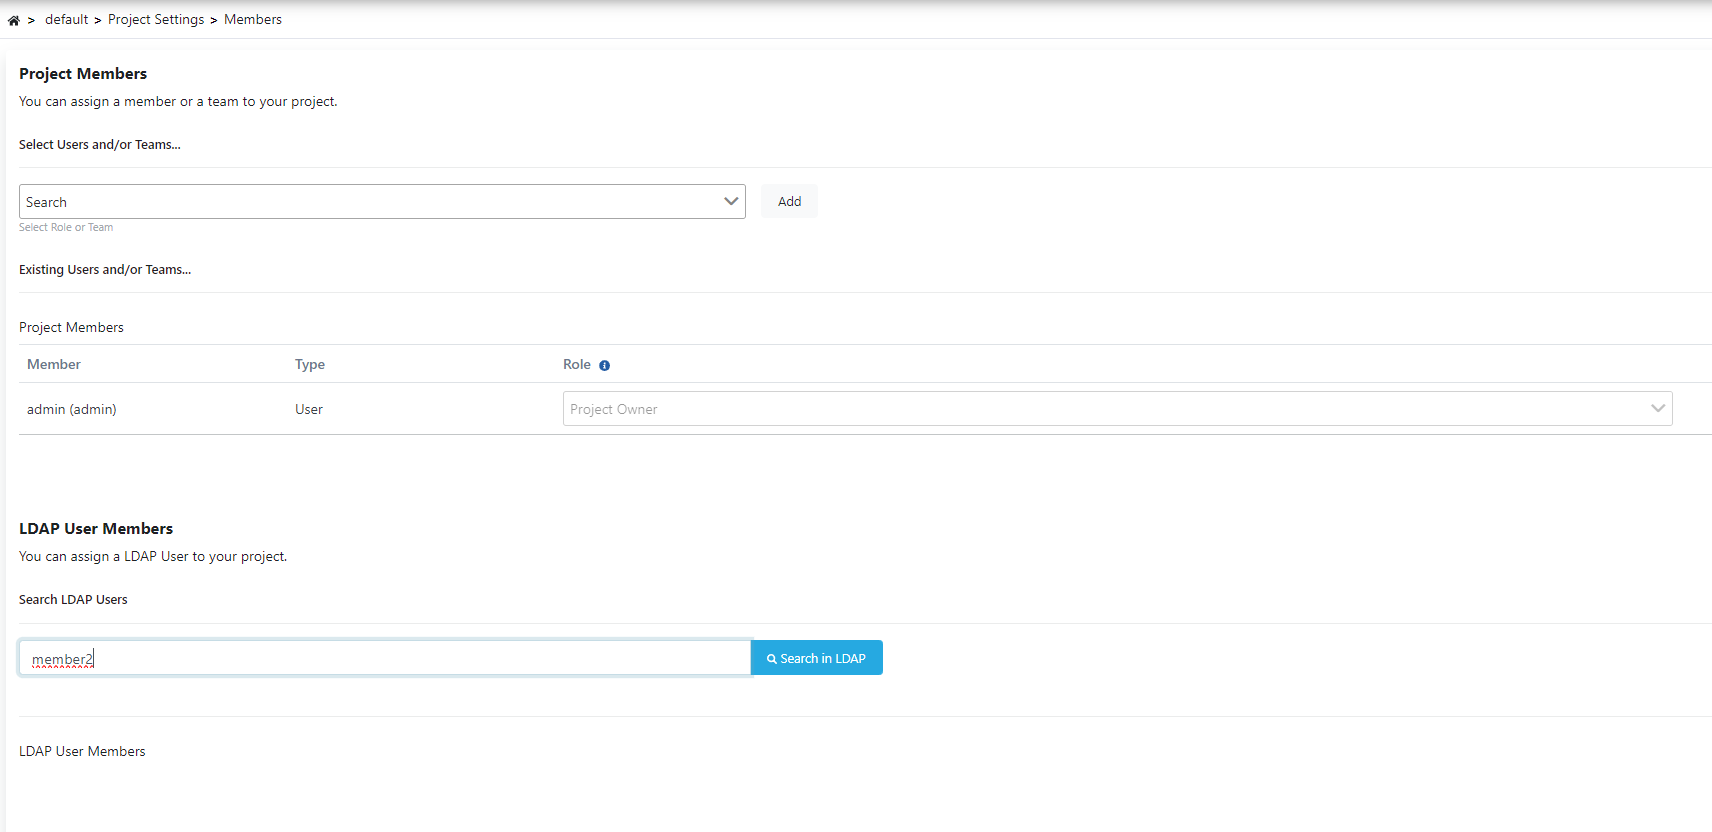 Your LDAP user will appear on the screen as in the image below, you can select a permission in the **Choose** field and add it with **Add**.
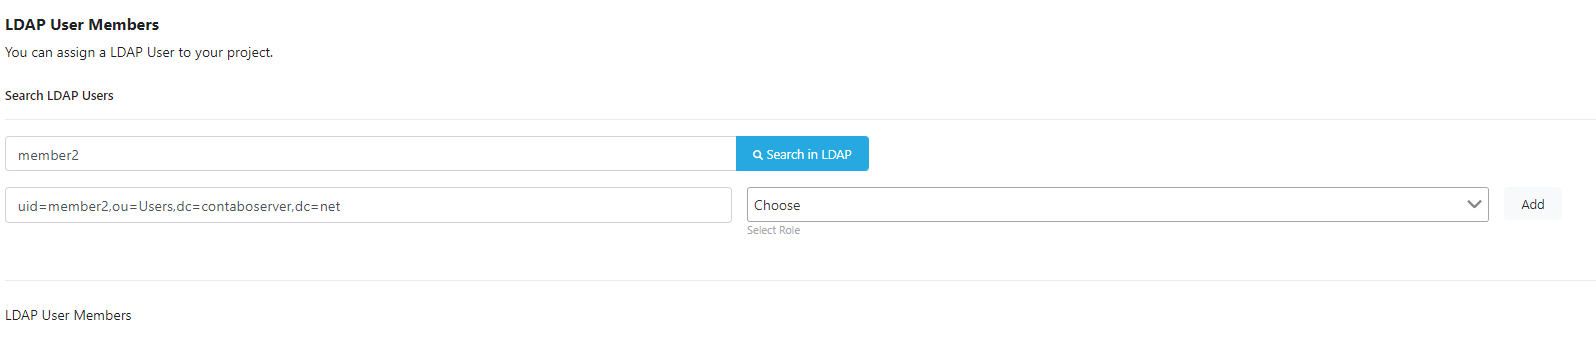 You can add **permissions within group members** in the field shown in the image below.
 After completing the permission granting operations, you can complete the saving operation by clicking the **Save Changes** button located at the top right of the page.
After this stage, the relevant users or groups will have the permissions you specified in your project.
After completing the permission granting operations, you can complete the saving operation by clicking the **Save Changes** button located at the top right of the page.
After this stage, the relevant users or groups will have the permissions you specified in your project.