> ## Documentation Index
> Fetch the complete documentation index at: https://docs.apinizer.com/llms.txt
> Use this file to discover all available pages before exploring further.
# Multi-Region Apinizer
> Can explain step by step how Apinizer works on multi-region Kubernetes architecture. Provides installation and configuration of Apinizer components in Kubernetes clusters in different geographical regions. Provides necessary steps and configuration details for multi-region installation.
This document only describes **operations specific to Apinizer that need to be done**. Details about Kubernetes cluster and Apinizer installation are not within the scope of this document and are presented in a separate document.
Learn Kubernetes cluster installation
Learn Apinizer installation
## Disabling Kubernetes Namespace and Resource Management Feature
In multi-region installation, the Kubernetes namespace and resource management feature through Apinizer Manager Console must be disabled.
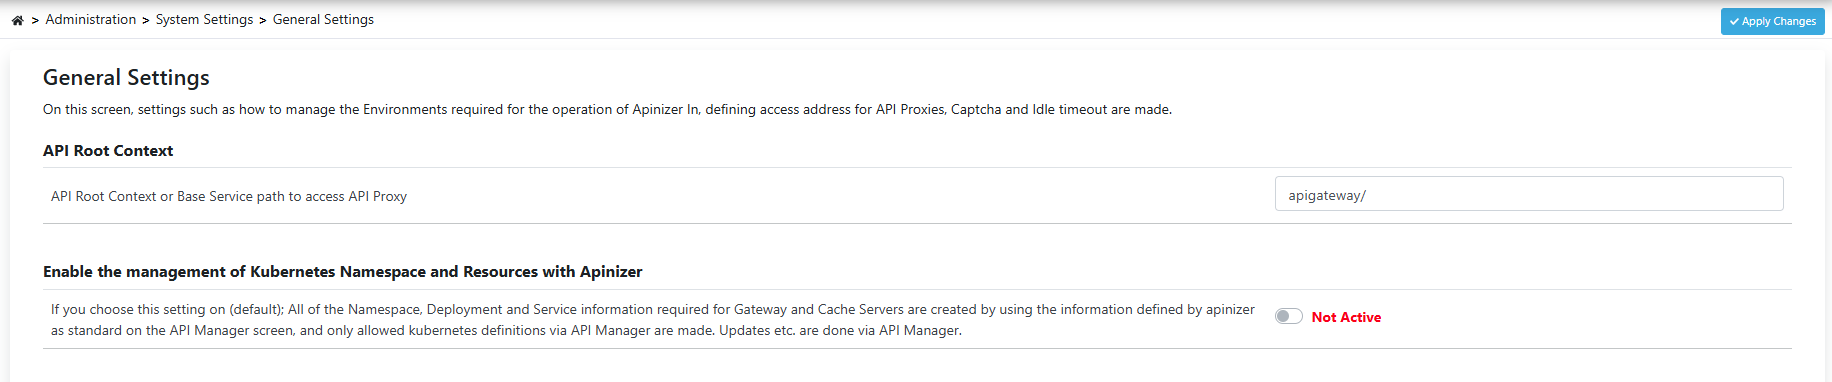
When the **"Enable the management of Kubernetes Namespace and Resources with Apinizer"** setting is disabled in the Apinizer interface, Apinizer no longer automatically creates or updates namespaces and resources on Kubernetes.
In this case:
* Management of Kubernetes resources (Deployment, Service, Secret, Role, etc.) must be performed **manually through YAML files**.
* This method provides more flexibility and control in multi-cluster structures and facilitates Multi Region installation.
Open the Administration menu in Apinizer Manager Console.
Go to General Settings tab under System Settings.
Disable (disable) the "Enable the management of Kubernetes Namespace and Resources with Apinizer" option.
Save the changes made.
 ## Environment Creation
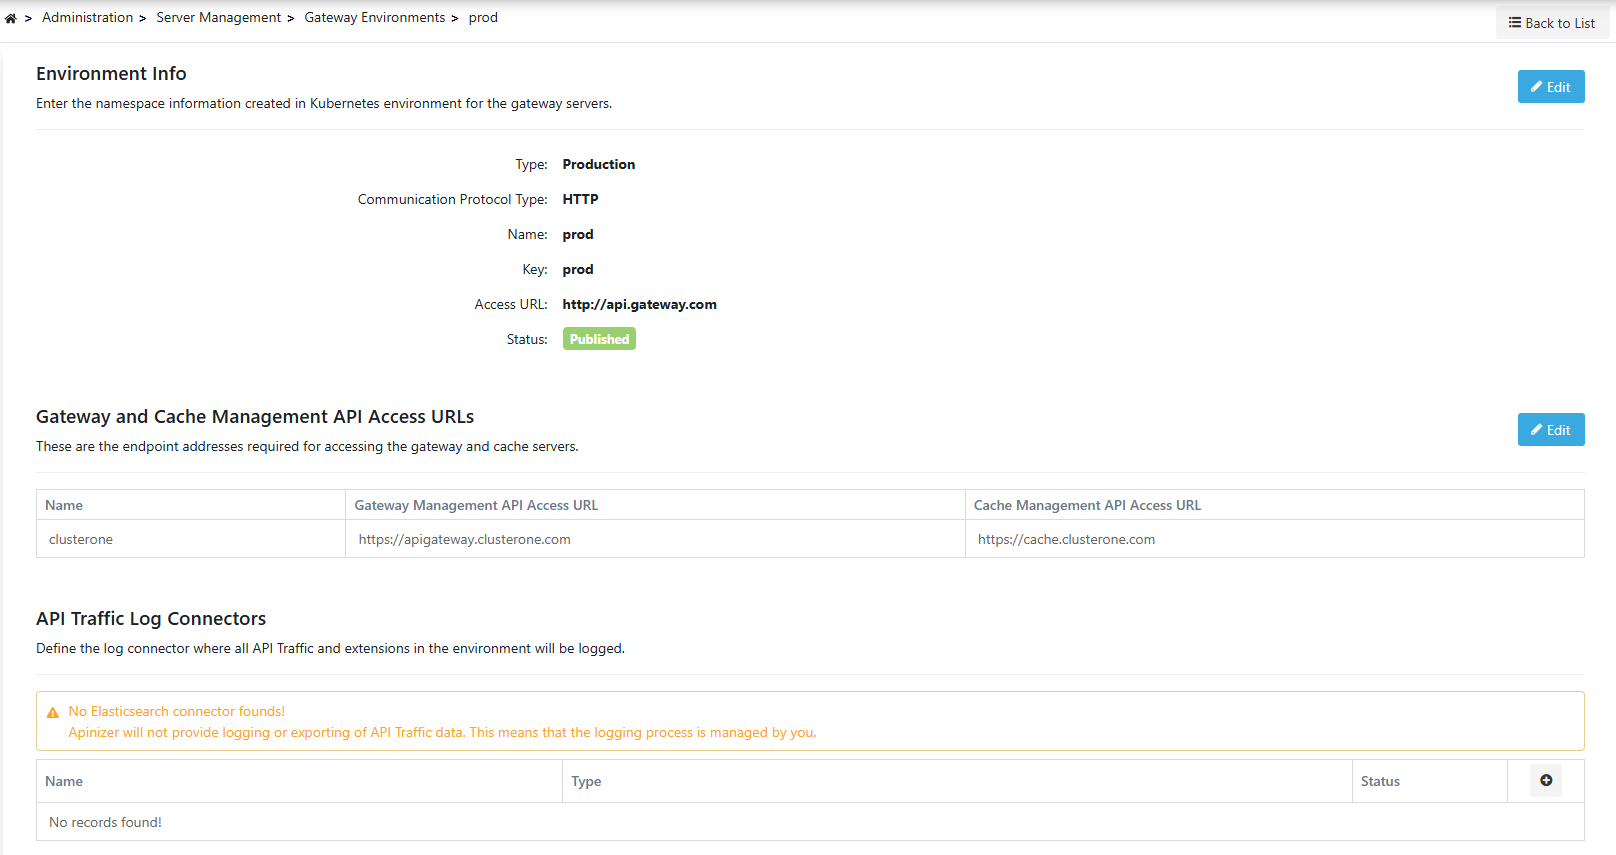
Environment is created through Apinizer Manager Console for multi-region configuration. With this operation, information about which environment (namespace) and which clusters Apinizer should access and manage is defined.
For example, you can define a new environment we installed in a different region to the cluster of an existing environment named prod with the following steps.
Open **Administration > Server Management > Gateway Environments** page.
## Environment Creation
Environment is created through Apinizer Manager Console for multi-region configuration. With this operation, information about which environment (namespace) and which clusters Apinizer should access and manage is defined.
For example, you can define a new environment we installed in a different region to the cluster of an existing environment named prod with the following steps.
Open **Administration > Server Management > Gateway Environments** page.
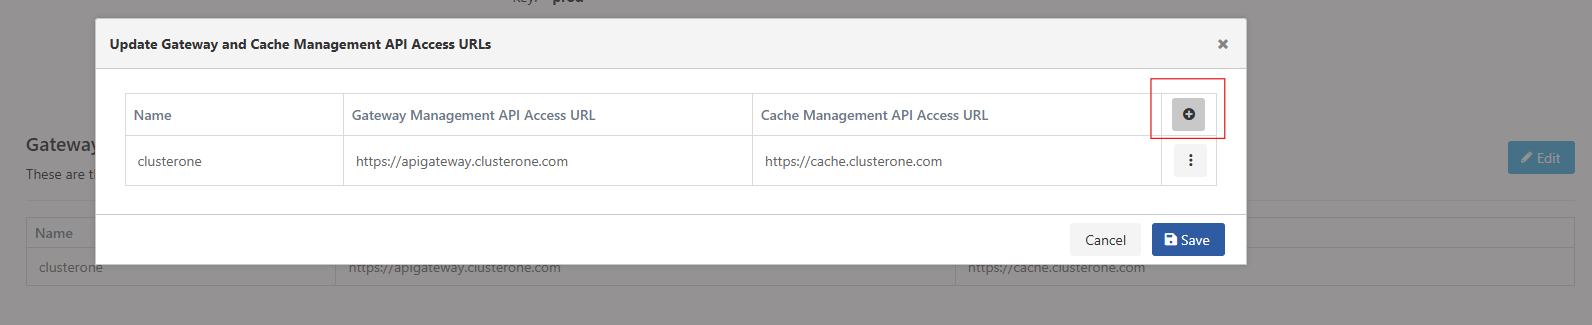
 In the **Gateway and Cache Management API Access URLs** section, define the management API access information of **Gateway** and **Cache** components belonging to the newly added cluster.
**Very Important**
In this step, **accessible Gateway and Cache addresses** by Apinizer Manager Console must be entered for each cluster.
In the **Gateway and Cache Management API Access URLs** section, define the management API access information of **Gateway** and **Cache** components belonging to the newly added cluster.
**Very Important**
In this step, **accessible Gateway and Cache addresses** by Apinizer Manager Console must be entered for each cluster.
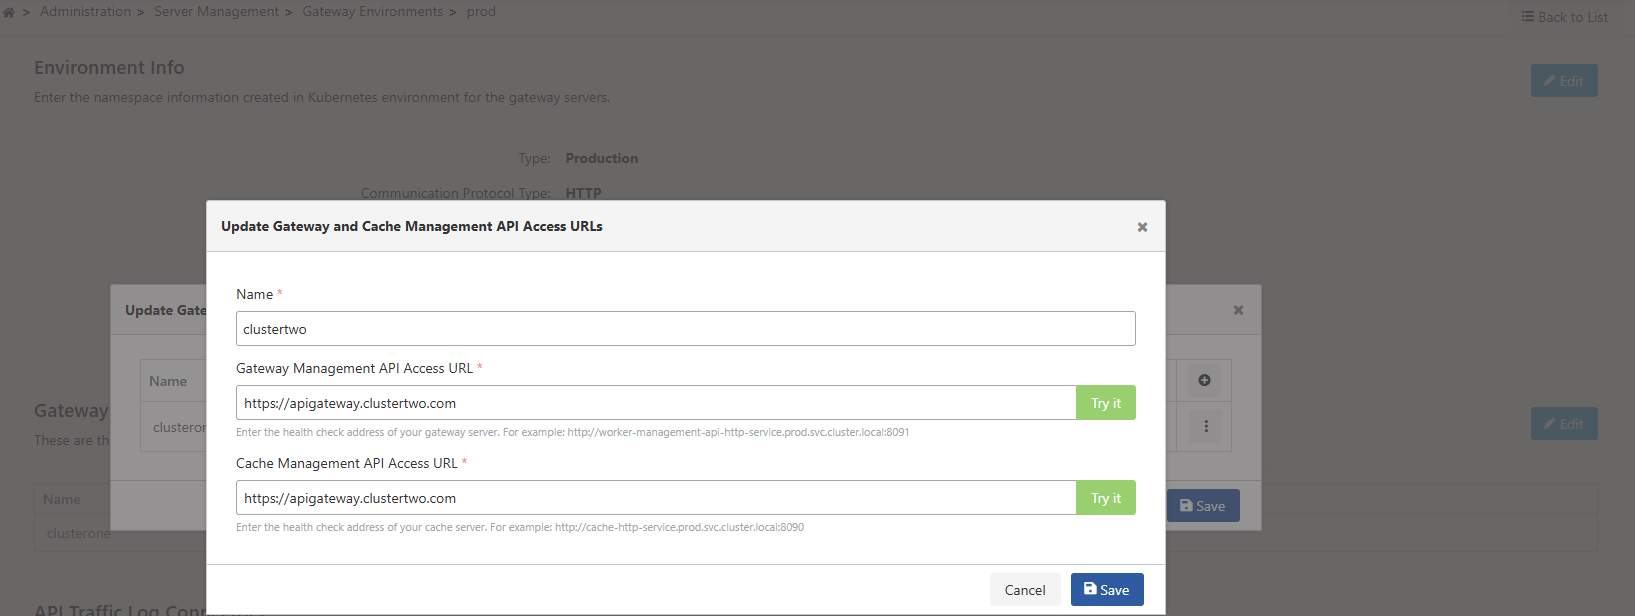
 Test that access is provided using the "Try it" button. If access is successful, save.
 ## Adding Cluster Information to YAML Files
To specify which cluster Apinizer Worker and Cache applications running in the same environment (namespace) but in different geographical environments belong to, the following setting must be made. With this setting, which cache each worker will connect to is also determined.
The following environment variable must be added to each **Worker Deployment** definition:
```yaml theme={null}
spec:
containers:
env:
- name: environmentClusterName
value:
```
**Very Important**
* `` is the name representing the cluster where the Cache that the Worker will connect to is located.
* This name must be exactly the same as the cluster name defined under **Gateway Environments** in the Apinizer interface.
* Each Worker component in each cluster only communicates with the Cache component located in its own region.
## Next Steps
Learn Apinizer installation
Learn API Portal installation
Learn API Integration installation
Learn Kubernetes installation
## Adding Cluster Information to YAML Files
To specify which cluster Apinizer Worker and Cache applications running in the same environment (namespace) but in different geographical environments belong to, the following setting must be made. With this setting, which cache each worker will connect to is also determined.
The following environment variable must be added to each **Worker Deployment** definition:
```yaml theme={null}
spec:
containers:
env:
- name: environmentClusterName
value:
```
**Very Important**
* `` is the name representing the cluster where the Cache that the Worker will connect to is located.
* This name must be exactly the same as the cluster name defined under **Gateway Environments** in the Apinizer interface.
* Each Worker component in each cluster only communicates with the Cache component located in its own region.
## Next Steps
Learn Apinizer installation
Learn API Portal installation
Learn API Integration installation
Learn Kubernetes installation