> ## Documentation Index
> Fetch the complete documentation index at: https://docs.apinizer.com/llms.txt
> Use this file to discover all available pages before exploring further.
# Mock API Usage
> Enables using Mock API in the Apinizer Platform. You can simulate the behavior of a real API, return different responses based on conditions, and create APIs for testing and development purposes without coding.
Mock API enables simulating the behavior of a real API. When you make an HTTP call to a method you created without any software development, a previously specified response is returned.
This content explains, in order, creating a blank Mock API, returning responses based on conditions from methods, and creating, deploying, and testing the API as an API Proxy.
Thanks to conditions added to the response, Apinizer enables **receiving different responses based on conditions** depending on header, body, or parameter values of the request.
## 1. Creating Mock API
An API is to be created to manage employee records.
Since method and response information for the API will be created through the interface instead of an API definition document, **Blank** is selected as the **type**.
By default, the feature to create methods for the API's CRUD operations is enabled.
Fill in the Mock API name and description fields, then click the **Save and Next** button.
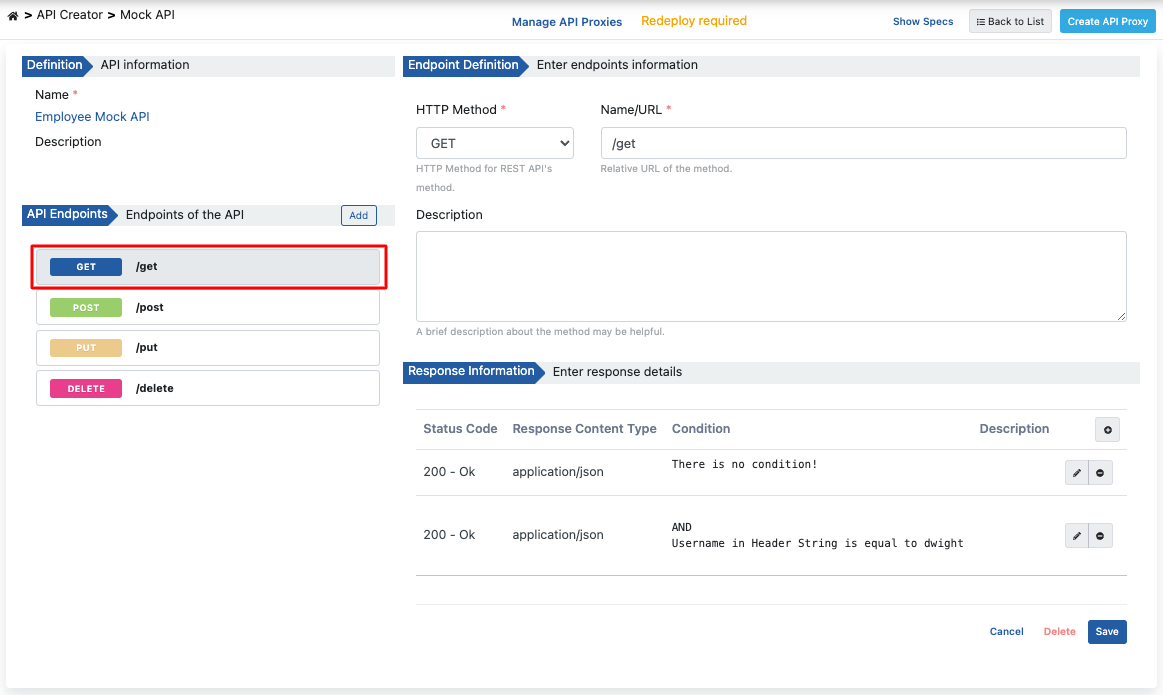
**The image below shows Mock API settings:**
 When Mock API is created, API and method information appears on the left, and the definition information of the selected method appears on the right.
 ## 2. Returning Different Responses Based on Conditions
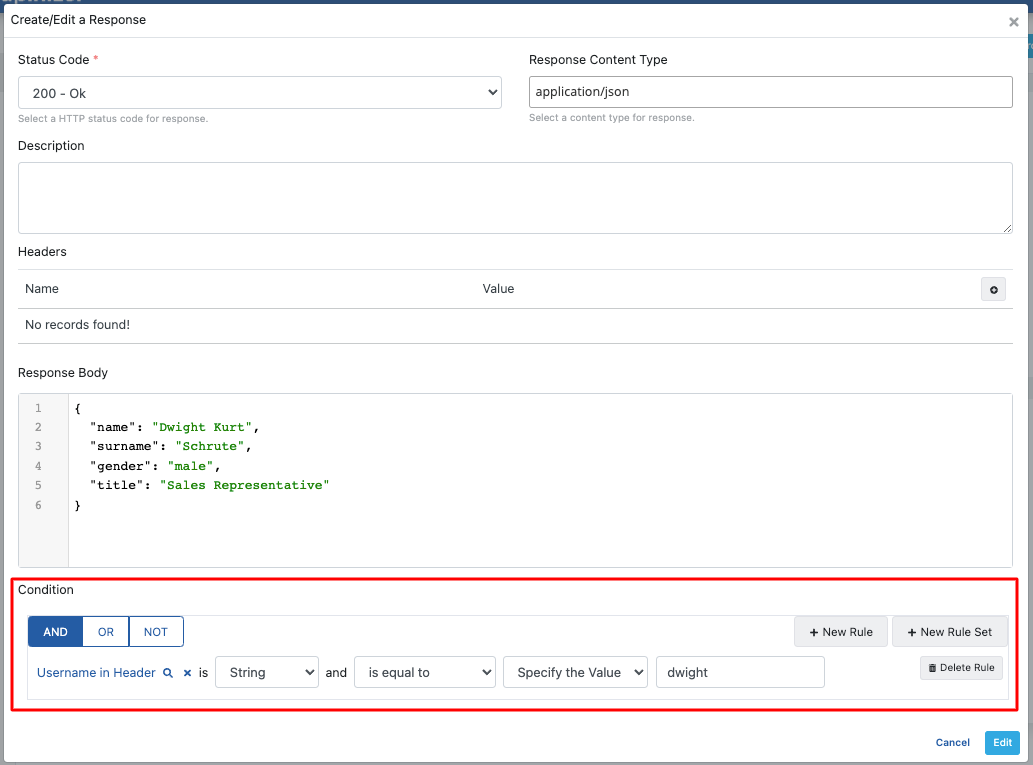
When a request is sent to the relevant method by default (without defining any condition), it is intended to return a successful status code and the list of all employees as a response.
## 2. Returning Different Responses Based on Conditions
When a request is sent to the relevant method by default (without defining any condition), it is intended to return a successful status code and the list of all employees as a response.
 The following condition is created to return only this employee's information when the value of the **username** header is **dwight**.
 ## 3. Viewing API Definition Documents
Click the **Show Specs** link to access the API definition files for Employee Mock API.
## 3. Viewing API Definition Documents
Click the **Show Specs** link to access the API definition files for Employee Mock API.
 **The image below shows the Spec Information dialog:**
 ## 4. Creating API Proxy
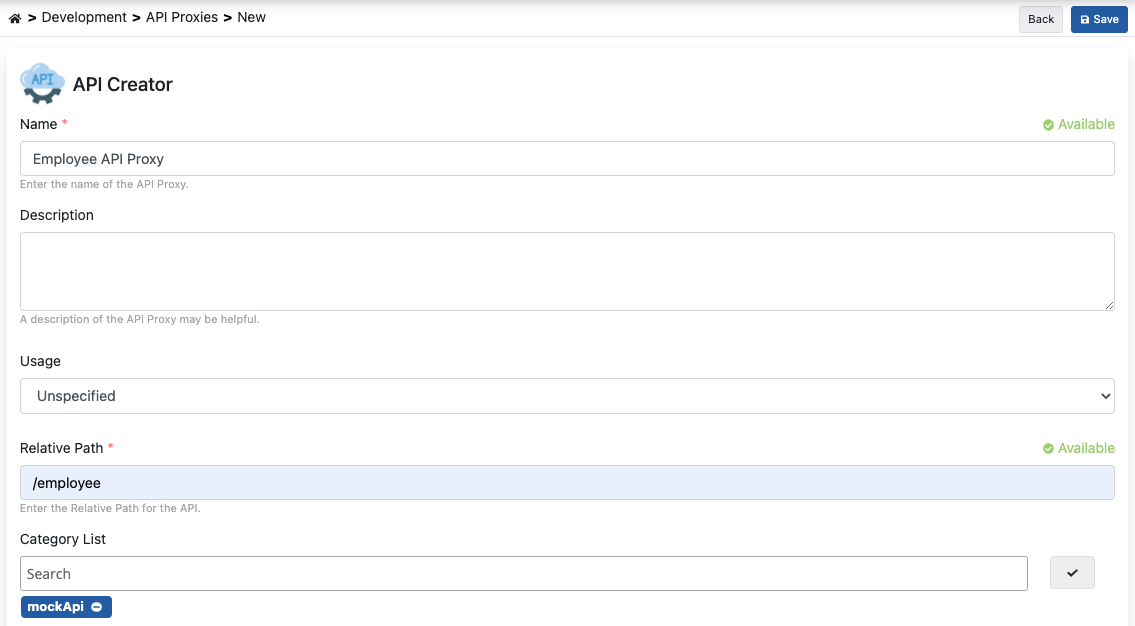
You can instantly create an API Proxy by clicking the **Create API Proxy** button from the Mock API screen.
## 4. Creating API Proxy
You can instantly create an API Proxy by clicking the **Create API Proxy** button from the Mock API screen.
 When creating the API Proxy, fill in the input fields shown in the image below and click the **Save** button.
 ### 4.1 Deploying the API Proxy
Employee API Proxy can be quickly deployed to a defined environment and made available for client consumption.
This operation can be managed through the dialog opened by the **Deploy** button on the API Proxy screen.
### 4.1 Deploying the API Proxy
Employee API Proxy can be quickly deployed to a defined environment and made available for client consumption.
This operation can be managed through the dialog opened by the **Deploy** button on the API Proxy screen.
 This operation can also be managed from the Mock API screen via the **Manage API Proxies** link.
 ## 5. Testing
When sent without adding the parameters expected by the relevant method as a condition, the following response body listing all employees is returned.
## 5. Testing
When sent without adding the parameters expected by the relevant method as a condition, the following response body listing all employees is returned.
 When the parameters expected by the relevant method as a condition are added to the request and executed, the following customized response is returned.
