> ## Documentation Index
> Fetch the complete documentation index at: https://docs.apinizer.com/llms.txt
> Use this file to discover all available pages before exploring further.
# Application of JSON Transformation and Script Policy on Created Mock API
> Detailed scenario guide including Mock API creation on Apinizer, application of JSON Transformation and Script policies, API Proxy creation and testing steps.
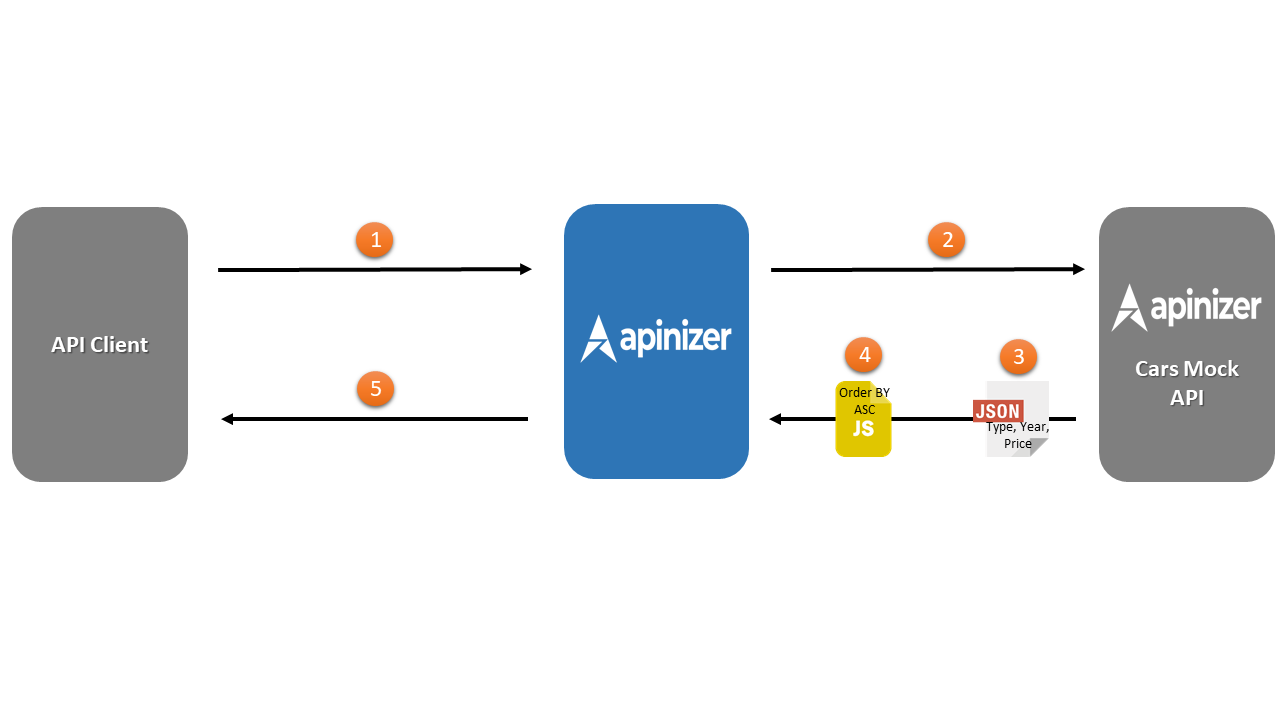
In this scenario, the application of **JSON Transformation** and **Script** policies to a Mock API created on Apinizer will be tested.
The numbering in the diagram below corresponds to the **order of operations**.
* **API Client** makes a request to **Apinizer**.
* **Apinizer** makes a request to **Cars Mock API**.
* The **tip, yıl, fiyat** **keys** in the response returned from **Cars Mock API** are converted to **type, year, price key** expressions by applying the **JSON Transformation policy** and transmitted to Apinizer.
* The operation of the **Script policy** is **optional.** Because this policy works if there is any **Order By parameter** in the **request coming from the API Client**.
* **Response is given from Apinizer to API Client**.
 ## Creating Mock API
First, the design of the **Mock API** to be requested is performed.
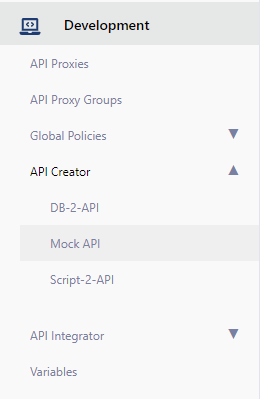
For this, the **Mock API** option found in the **API Creator** menu under the **Development** menu is selected.
## Creating Mock API
First, the design of the **Mock API** to be requested is performed.
For this, the **Mock API** option found in the **API Creator** menu under the **Development** menu is selected.
 Since no **Mock API** has been created before, the text **No records found** appears on the page.
Click the **Create** button in the top right corner and start creating **Mock API**.
Since no **Mock API** has been created before, the text **No records found** appears on the page.
Click the **Create** button in the top right corner and start creating **Mock API**.
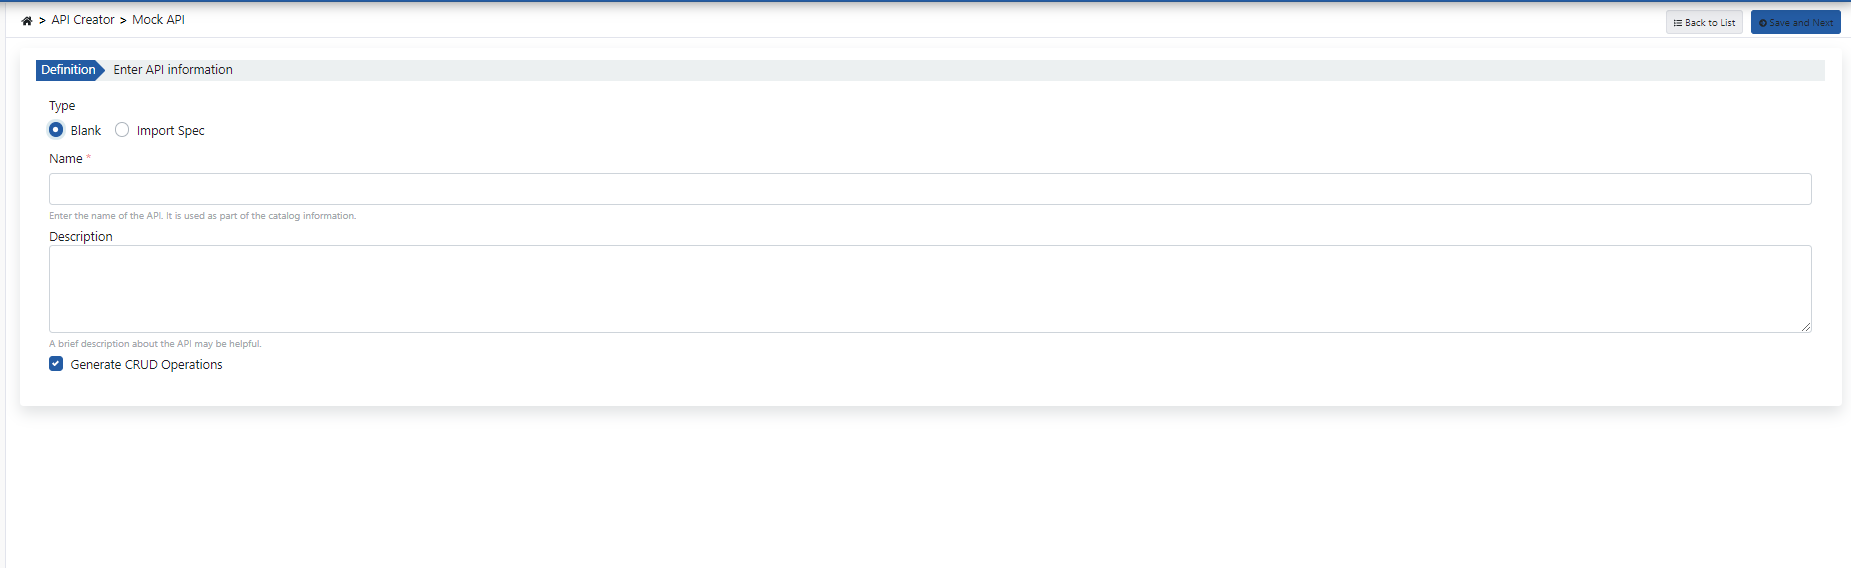
 If the expressions on this screen are examined one by one,
* There are two different options for creating **Mock API**.
* When the **Blank** expression is selected, **Name** and **Description** expressions are present.
* The API's name is determined with the **Name** field.
* Descriptions for this API can be written with the **Description** expression.
* With the **Generate Crud Operations** expression, it is specified that **GET**, **POST**, **DELETE**, **PUT** operations will come ready in the Mock API to be created.
If the expressions on this screen are examined one by one,
* There are two different options for creating **Mock API**.
* When the **Blank** expression is selected, **Name** and **Description** expressions are present.
* The API's name is determined with the **Name** field.
* Descriptions for this API can be written with the **Description** expression.
* With the **Generate Crud Operations** expression, it is specified that **GET**, **POST**, **DELETE**, **PUT** operations will come ready in the Mock API to be created.
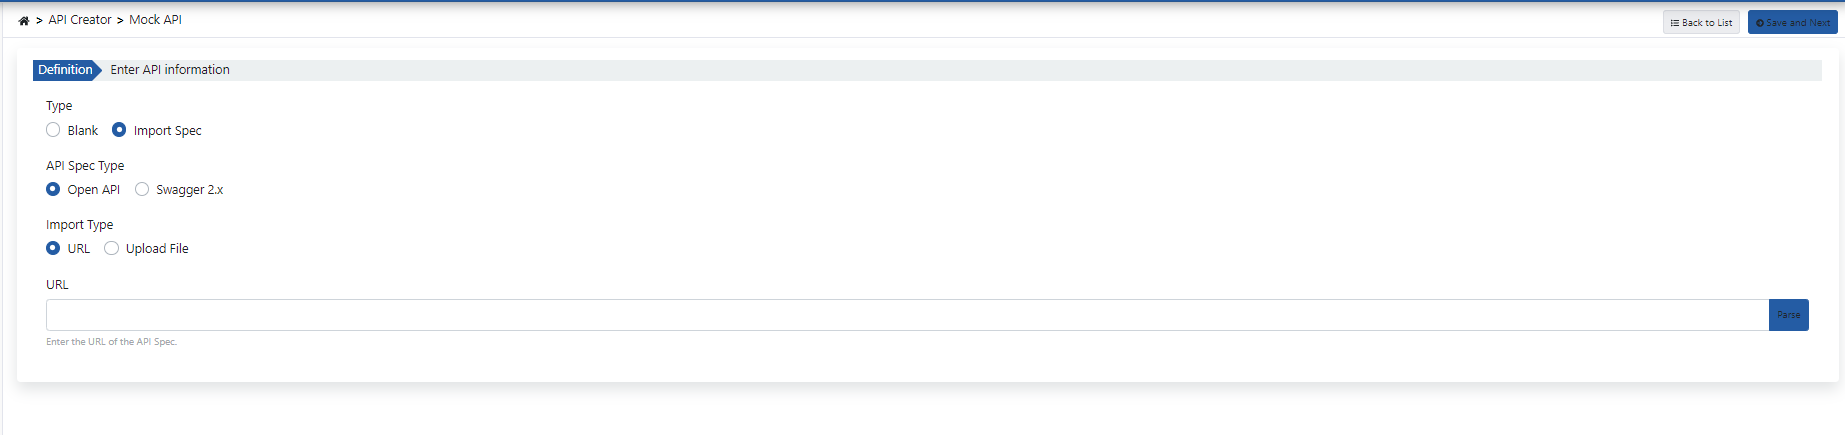
 * If the **Import Spec** option is selected, the page will be created as in the image below.
* With this expression, an existing **API** can be included in Apinizer.
* The options under the **API Spec Type** expression specify what type the API to be added is.
* **Import Type** specifies how the addition operation will be performed.
In this scenario, an empty **Mock API** will be created, so the "Blank" expression is selected and the relevant fields are filled as shown in the image.
Click the **Save and Next** button to save the operation and proceed to the next step.
* If the **Import Spec** option is selected, the page will be created as in the image below.
* With this expression, an existing **API** can be included in Apinizer.
* The options under the **API Spec Type** expression specify what type the API to be added is.
* **Import Type** specifies how the addition operation will be performed.
In this scenario, an empty **Mock API** will be created, so the "Blank" expression is selected and the relevant fields are filled as shown in the image.
Click the **Save and Next** button to save the operation and proceed to the next step.
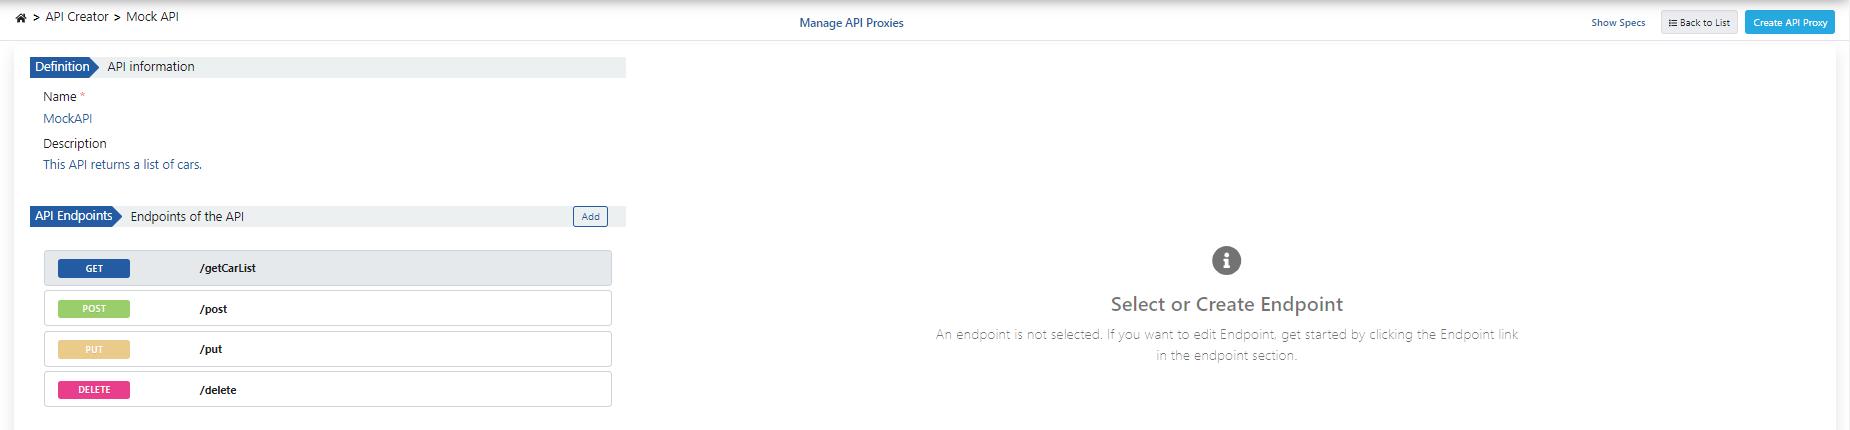
 If the expressions on this screen are examined one by one,
* The name and description information belonging to the API is seen in the **Definition - API Information** field.
* In the **API Endpoints -Endpoints of the API** field, the **endpoints** that the **Mock API** has are located.
* A new endpoint can be added with the **Add** button found in this field, or changes can be made on existing endpoints by selecting them.
If the expressions on this screen are examined one by one,
* The name and description information belonging to the API is seen in the **Definition - API Information** field.
* In the **API Endpoints -Endpoints of the API** field, the **endpoints** that the **Mock API** has are located.
* A new endpoint can be added with the **Add** button found in this field, or changes can be made on existing endpoints by selecting them.
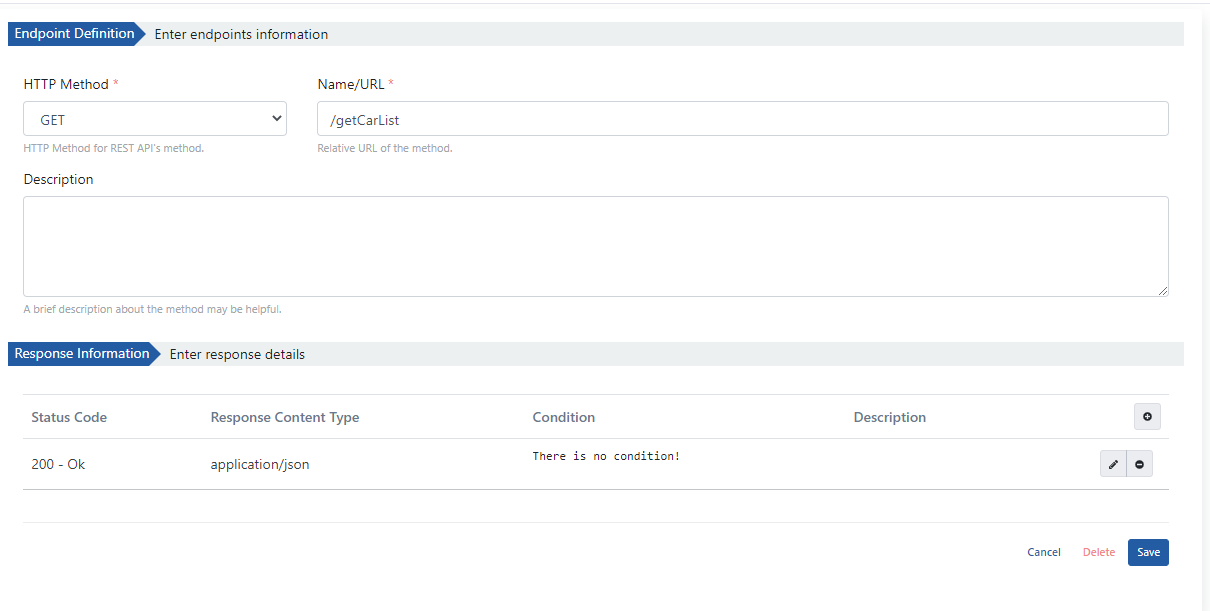
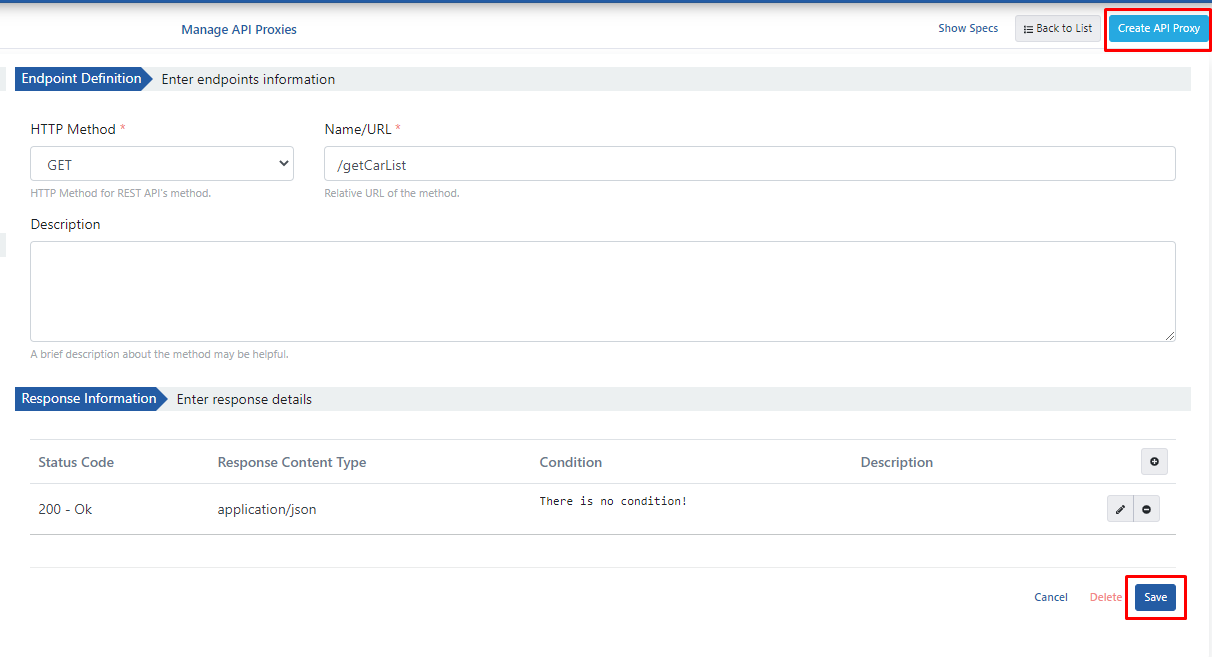
 In this scenario, tests will be performed through an endpoint named "/getCarList" of type "GET".
If the fields on the page that will appear after selecting the relevant endpoint are examined;
* The type of endpoint to be created is determined with the **HTTP Method** field.
* The endpoint's name is specified in the field right next to it.
* A description can be added to this endpoint with the **Description** expression.
* The responses to be received when a request is made are determined with the **Response Information - Enter Response Details** field.
* New responses can also be created with the button containing "+" in this field.
* In this scenario, a **response** design that only returns **"200"** response will be performed.
* The button containing a pencil icon enables editing operations of the relevant response to be returned.
In this scenario, tests will be performed through an endpoint named "/getCarList" of type "GET".
If the fields on the page that will appear after selecting the relevant endpoint are examined;
* The type of endpoint to be created is determined with the **HTTP Method** field.
* The endpoint's name is specified in the field right next to it.
* A description can be added to this endpoint with the **Description** expression.
* The responses to be received when a request is made are determined with the **Response Information - Enter Response Details** field.
* New responses can also be created with the button containing "+" in this field.
* In this scenario, a **response** design that only returns **"200"** response will be performed.
* The button containing a pencil icon enables editing operations of the relevant response to be returned.
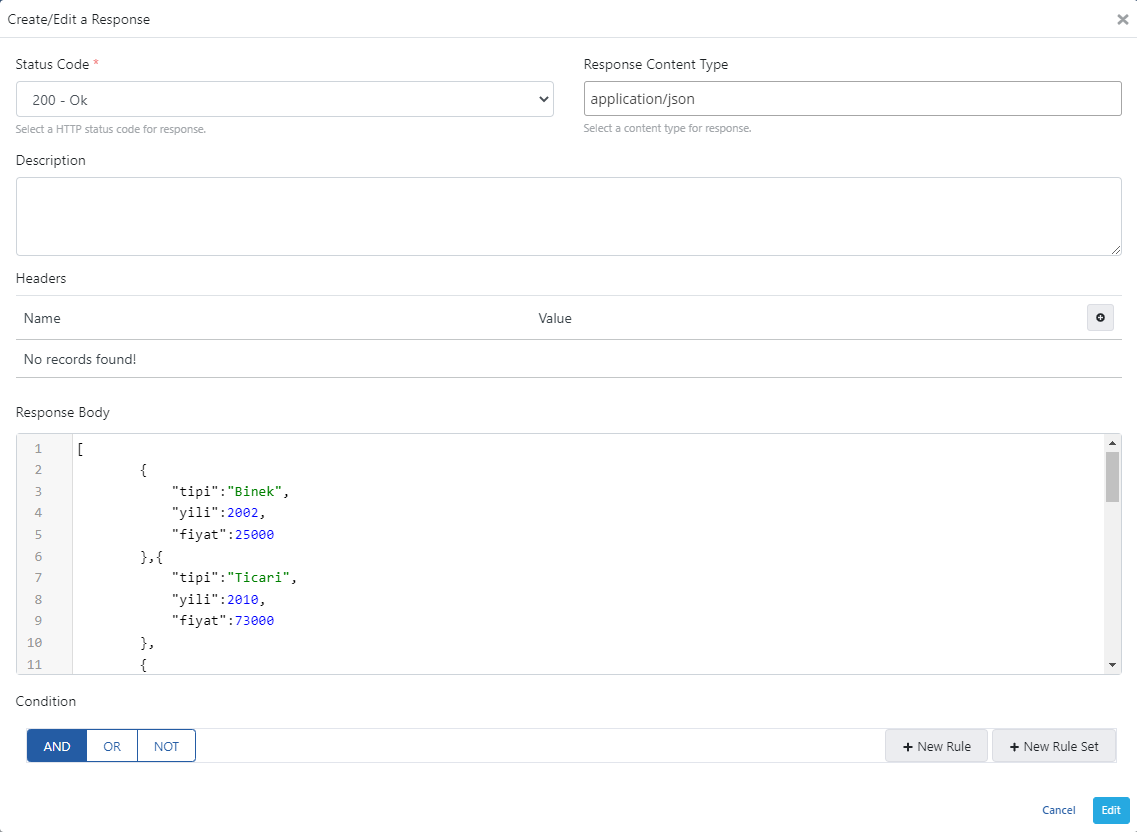
 If the expressions on this screen are examined one by one,
* The response to be received when making a request to the endpoint is specified in **Response Body**.
* A list with type, year, and price is found in this field.
* The type of response to be returned is determined with the **Status Code** field, and the type of content to be returned is determined with the **Response Content Type** field.
* If a **Headers** parameter will be sent in the response, it is specified in the **Headers** field.
* If a condition is desired to be created in this response, a rule definition can be made from the **Condition** field.
* After these changes, click the **Edit** button to save the edits.
If the expressions on this screen are examined one by one,
* The response to be received when making a request to the endpoint is specified in **Response Body**.
* A list with type, year, and price is found in this field.
* The type of response to be returned is determined with the **Status Code** field, and the type of content to be returned is determined with the **Response Content Type** field.
* If a **Headers** parameter will be sent in the response, it is specified in the **Headers** field.
* If a condition is desired to be created in this response, a rule definition can be made from the **Condition** field.
* After these changes, click the **Edit** button to save the edits.
 Click the **Save** button in the bottom right corner to save the changes.
An API Proxy is also created from Mock API with the **Create API Proxy** button in the top right corner.
Click the **Save** button in the bottom right corner to save the changes.
An API Proxy is also created from Mock API with the **Create API Proxy** button in the top right corner.
 ## Creating API Proxy from Mock API
The proxy's usage and category are determined.
A suitable **Relative Path** is given to the proxy and the **Save** button in the top right corner is clicked.
## Creating API Proxy from Mock API
The proxy's usage and category are determined.
A suitable **Relative Path** is given to the proxy and the **Save** button in the top right corner is clicked.
 Click the **Deploy** button and the **proxy** is deployed.
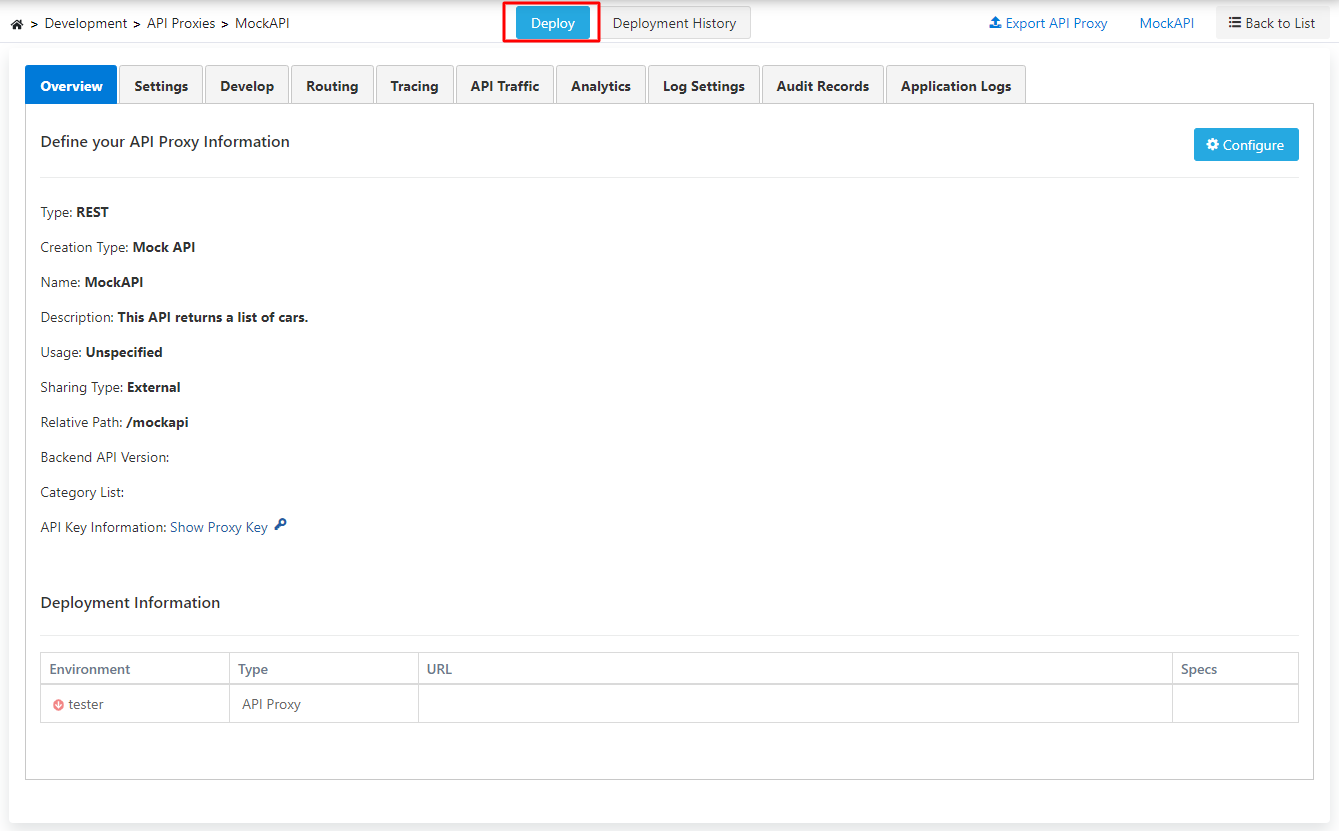 The **/getCarList** endpoint under the **Develop** menu is selected and the **Test Endpoint** button is clicked.
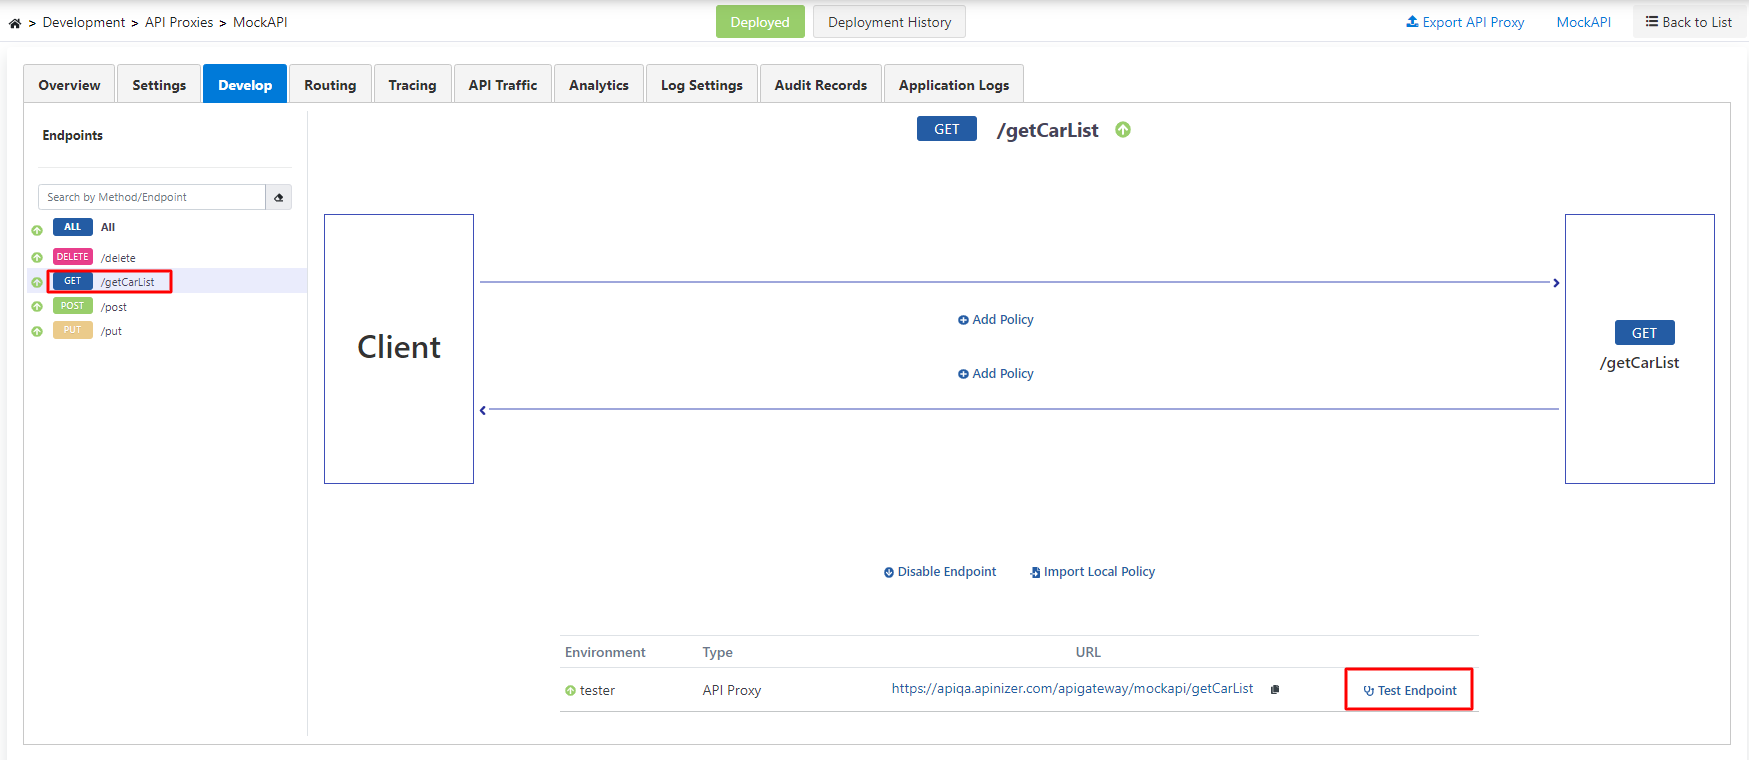 In the first test to be performed, no policy application will be made in any way.
When a request is made to the address in the URL field, **JSON data** in the **Response** field is seen as a response.
If the returned response is examined, it returns a list containing **"tip"**, **"yil"**, and **"fiyat"** **key** expressions.
In the first test to be performed, no policy application will be made in any way.
When a request is made to the address in the URL field, **JSON data** in the **Response** field is seen as a response.
If the returned response is examined, it returns a list containing **"tip"**, **"yil"**, and **"fiyat"** **key** expressions.
 ## Adding JSON Transformation Policy
A policy must be added to enable the **key** expressions in the scenario to change.
This policy will be in the field that will go as a response from the API to the Client.
Click the **Add Policy** expression in the field seen in the image below.
## Adding JSON Transformation Policy
A policy must be added to enable the **key** expressions in the scenario to change.
This policy will be in the field that will go as a response from the API to the Client.
Click the **Add Policy** expression in the field seen in the image below.
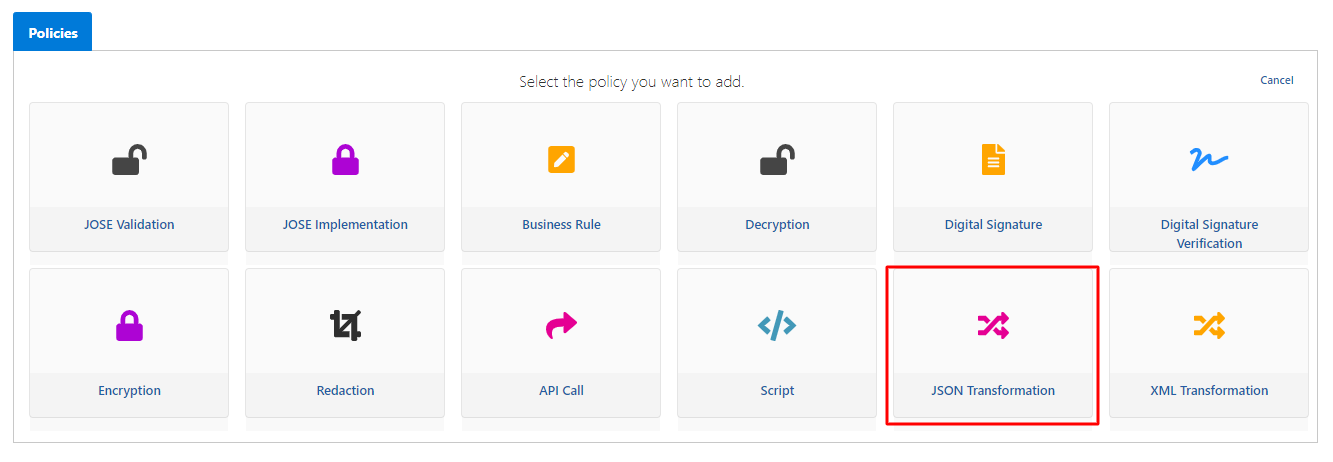
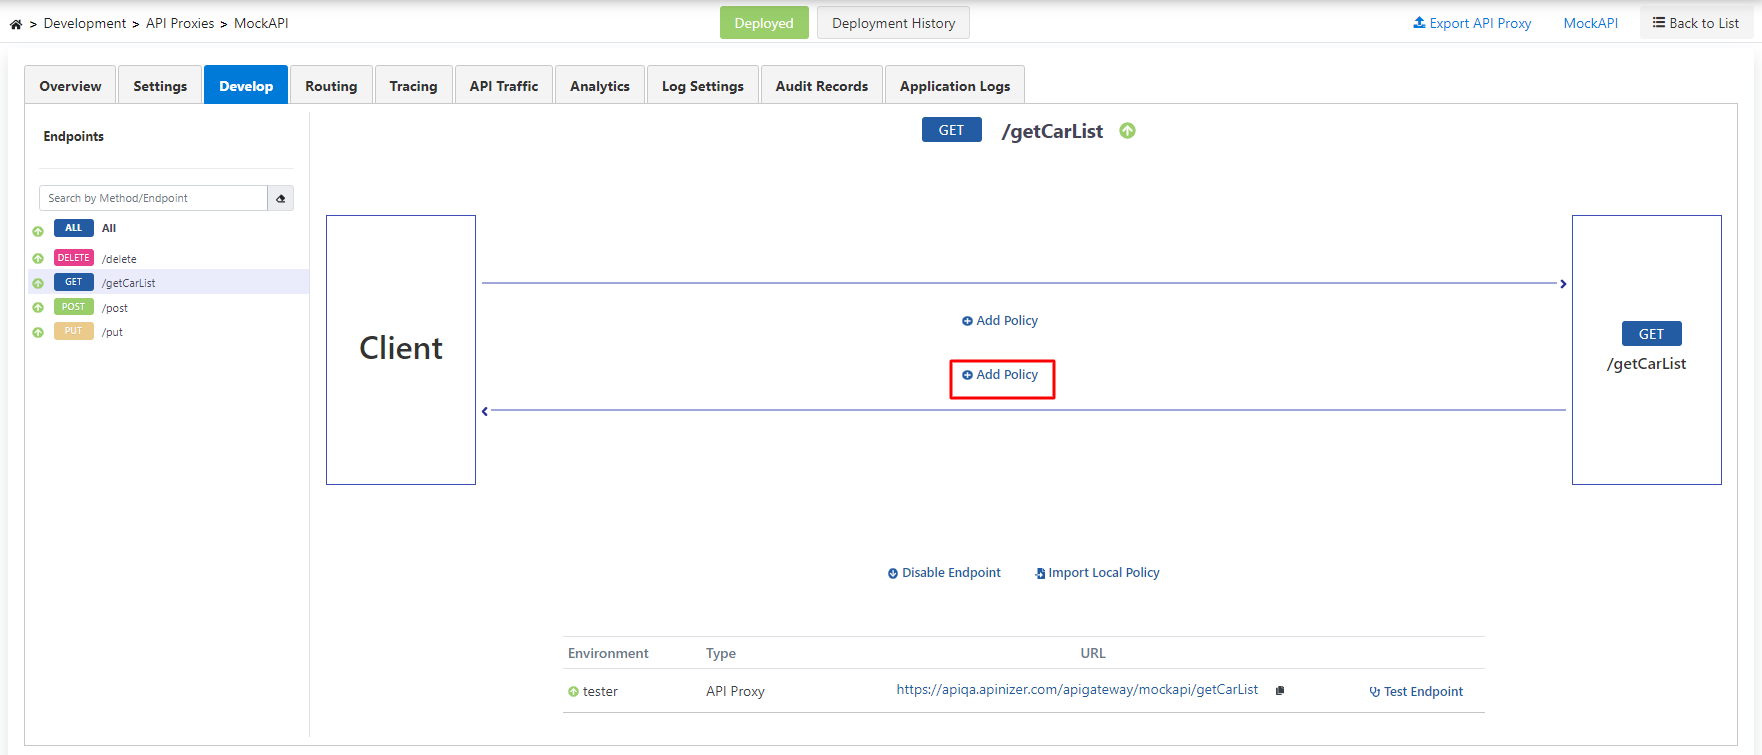 On the opened screen, the **JSON Transformation** policy marked in the image below is selected.
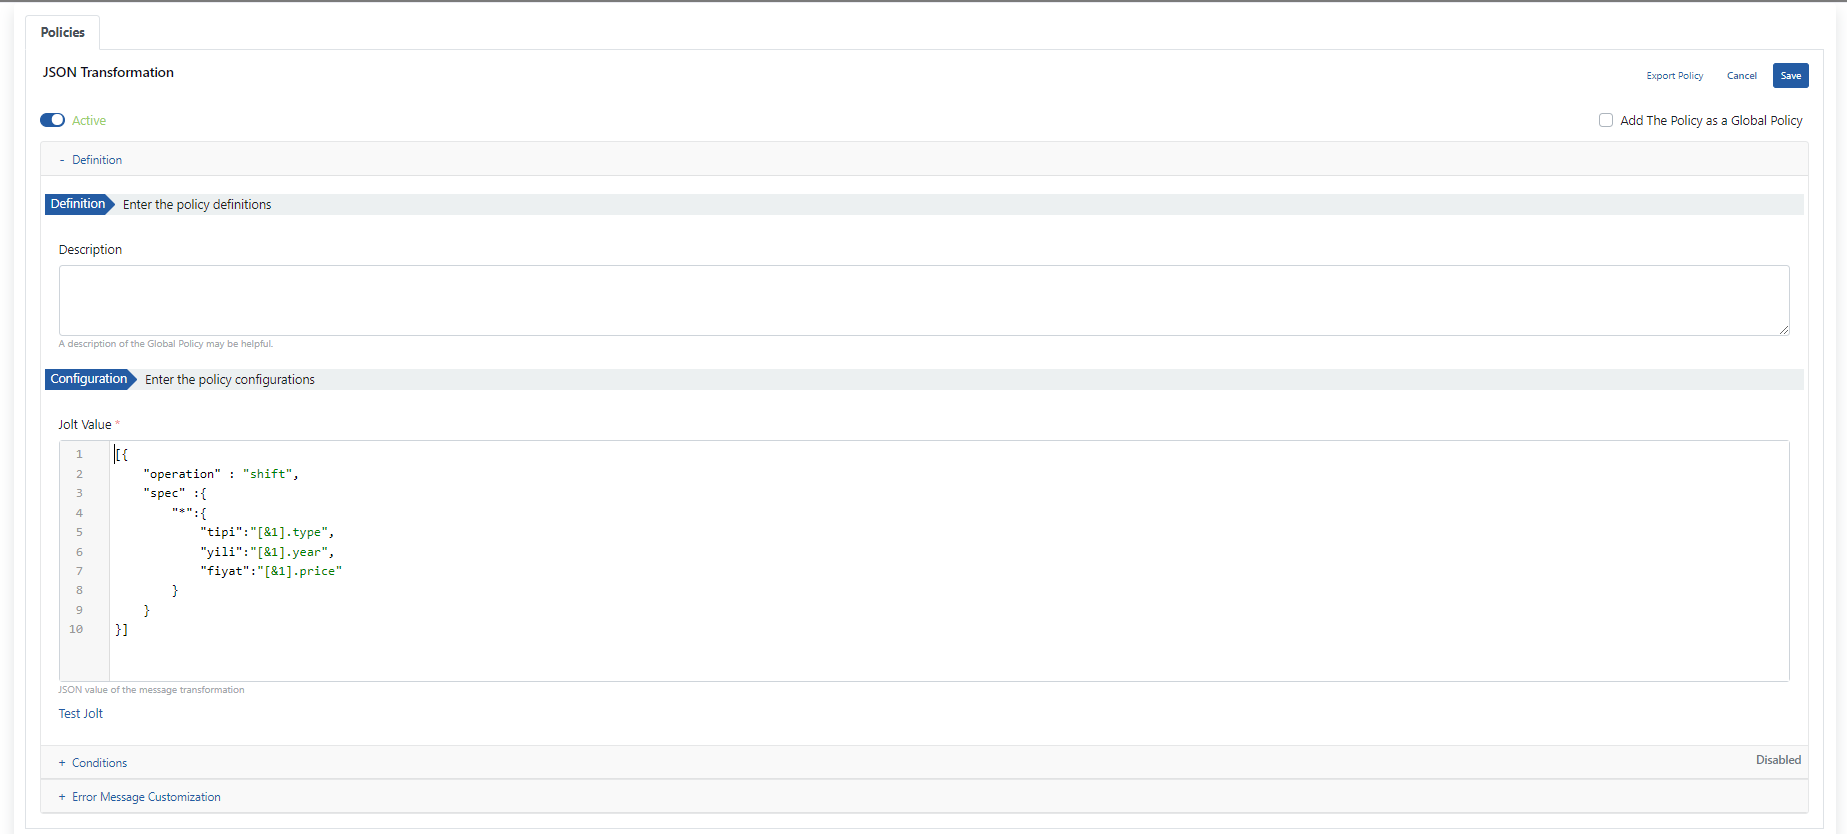
 If the expressions on this screen are examined;
* A description can be added to the policy to be used with the **Description** field.
* The **Jolt Value** required for the message to be changed is written with the **Configuration - Enter the policy configurations** field.
* The written configuration is tested with the **Test Jolt** expression.
* The created policy is saved by clicking the **Save** button.
* Click the **Redeploy** button for the changes to take effect.
* Proceed to testing the selected endpoint.
If the expressions on this screen are examined;
* A description can be added to the policy to be used with the **Description** field.
* The **Jolt Value** required for the message to be changed is written with the **Configuration - Enter the policy configurations** field.
* The written configuration is tested with the **Test Jolt** expression.
* The created policy is saved by clicking the **Save** button.
* Click the **Redeploy** button for the changes to take effect.
* Proceed to testing the selected endpoint.
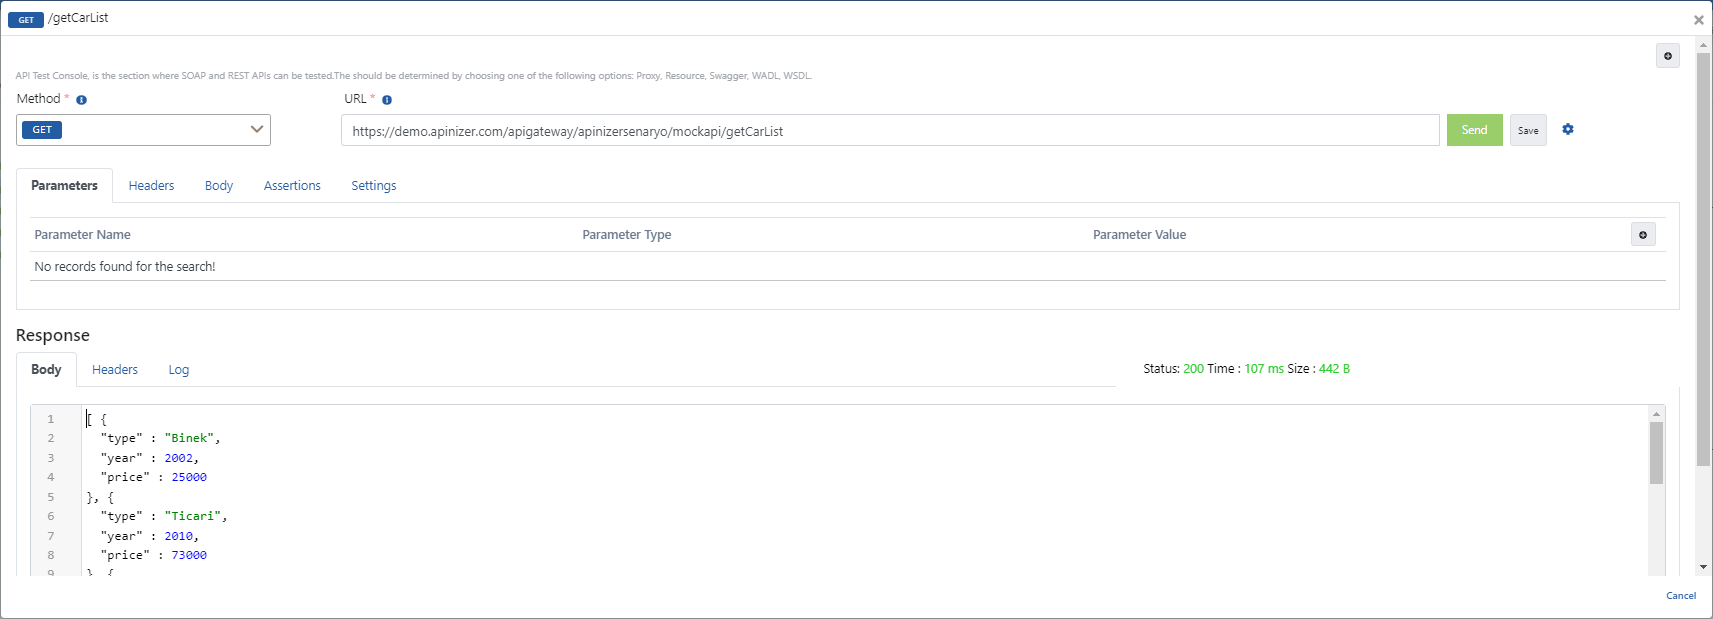
 As seen in the image below, when a request is made to the specified **endpoint**, it is seen that the **key** expressions in the response returning from **Mock API** have changed.
 ## Adding Script Policy
Next is the execution of the **script** that will sort according to the "Order By" parameter value to be sent from the client.
For this, the **Script policy** must be added to the field where the response sent from Mock API to the client is located.
Click the **Add Policy** expression and select the **Script policy** from here.
## Adding Script Policy
Next is the execution of the **script** that will sort according to the "Order By" parameter value to be sent from the client.
For this, the **Script policy** must be added to the field where the response sent from Mock API to the client is located.
Click the **Add Policy** expression and select the **Script policy** from here.
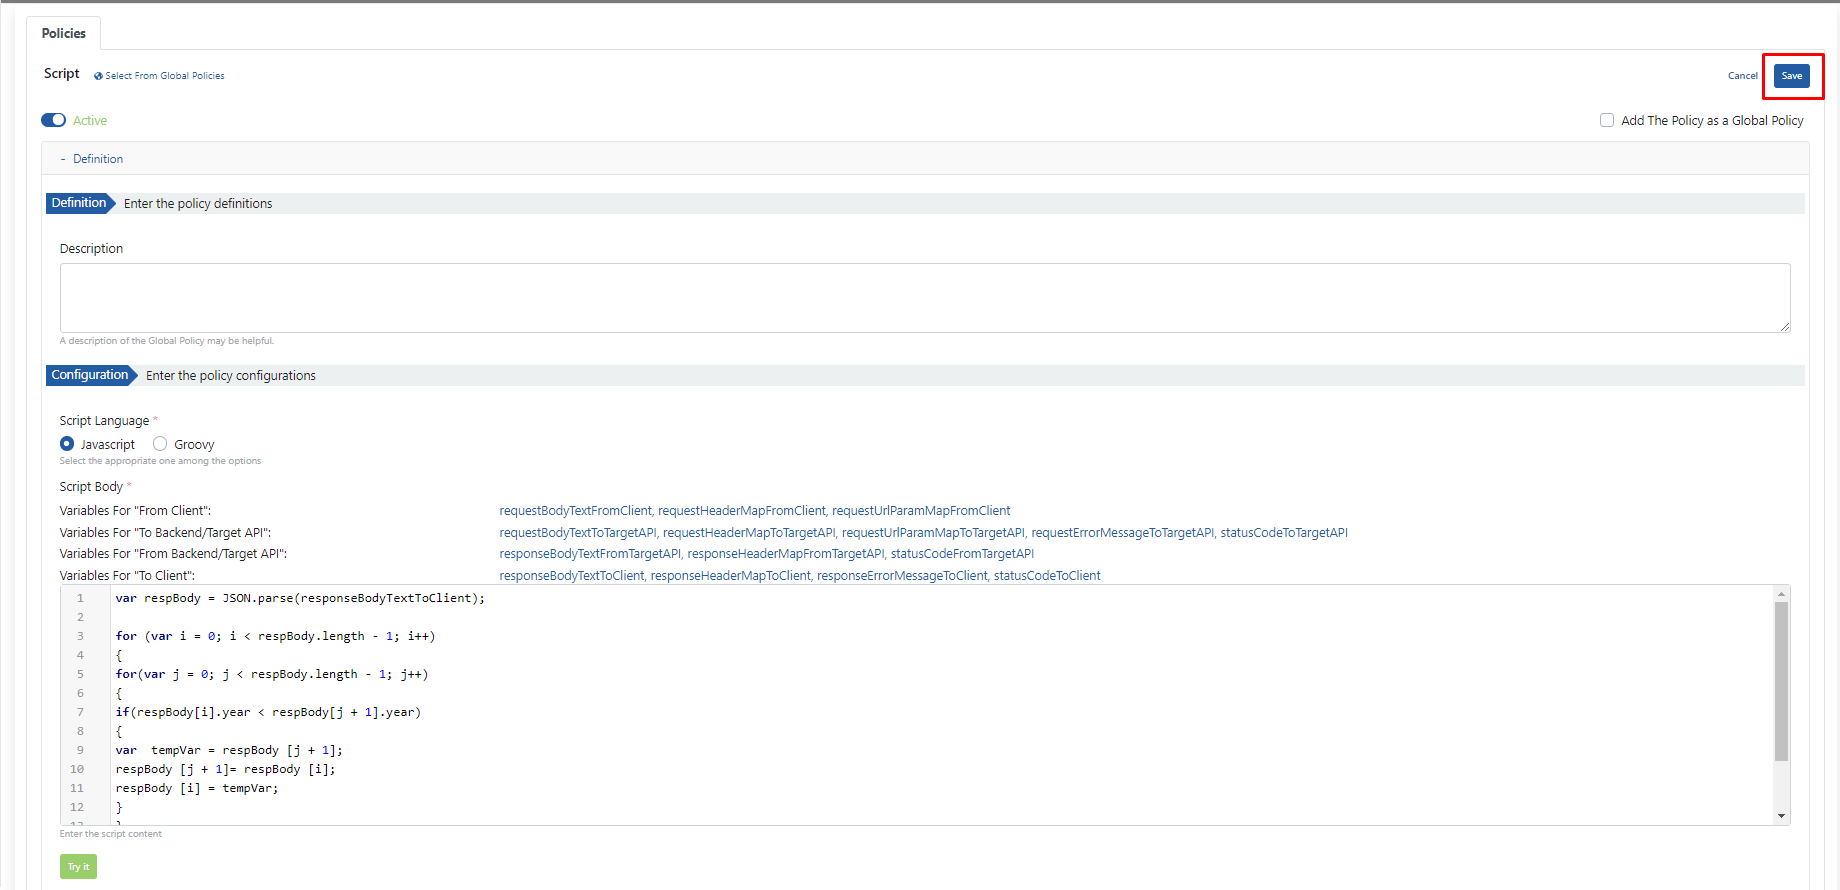
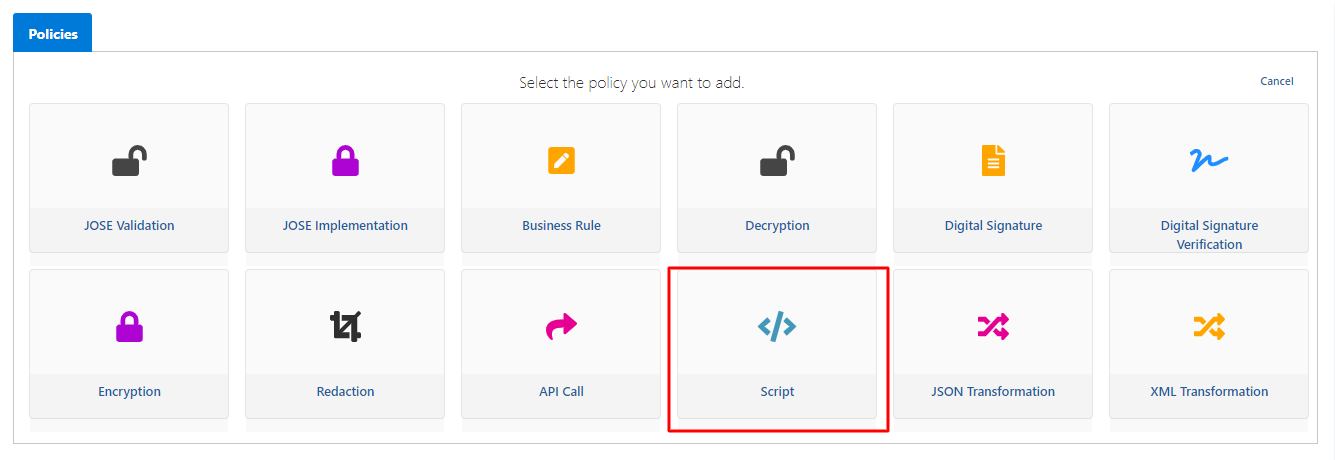 If the expressions on this screen are examined one by one,
* The programming language with which the **Script** to be created will be written is selected with the **Script Language** field.
* The **Script Body** field contains both the field where the script will be written and ready functions that facilitate use when writing scripts.
* In this scenario, the function named **ResponseBodyTextToClient** will be used.
* To get information about other ready functions, you can click [this link](/en/develop/policies/script).
* After writing the script to be used, click the **Save** button and the policy is saved.
If the expressions on this screen are examined one by one,
* The programming language with which the **Script** to be created will be written is selected with the **Script Language** field.
* The **Script Body** field contains both the field where the script will be written and ready functions that facilitate use when writing scripts.
* In this scenario, the function named **ResponseBodyTextToClient** will be used.
* To get information about other ready functions, you can click [this link](/en/develop/policies/script).
* After writing the script to be used, click the **Save** button and the policy is saved.
 After the last additions on the proxy, it is **Redeployed**.
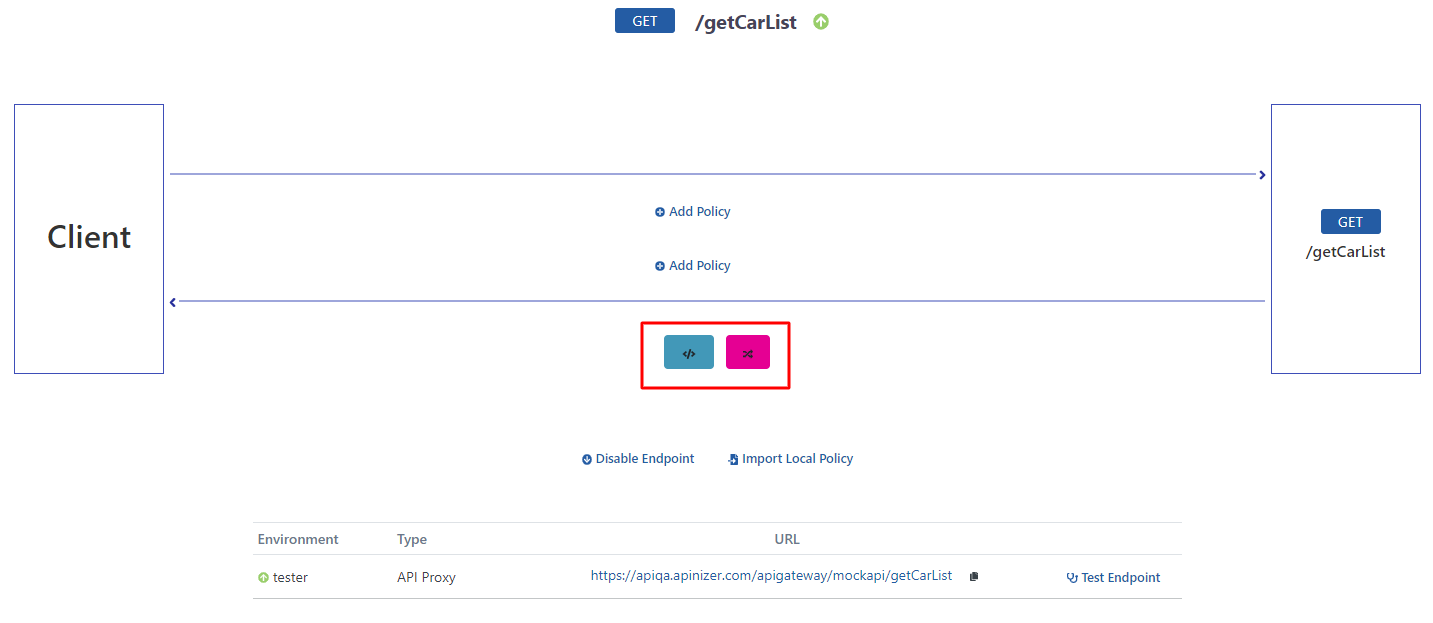
First, the **JSON Transformation** policy must be run and then the **Script** policy must be run.
For this, the icon belonging to the **JSON Transformation** policy must be moved to the end. The usage desired to be created is shown in the image below.
After the last additions on the proxy, it is **Redeployed**.
First, the **JSON Transformation** policy must be run and then the **Script** policy must be run.
For this, the icon belonging to the **JSON Transformation** policy must be moved to the end. The usage desired to be created is shown in the image below.
 ## Testing the API Proxy
Click the **Test Endpoint** expression.
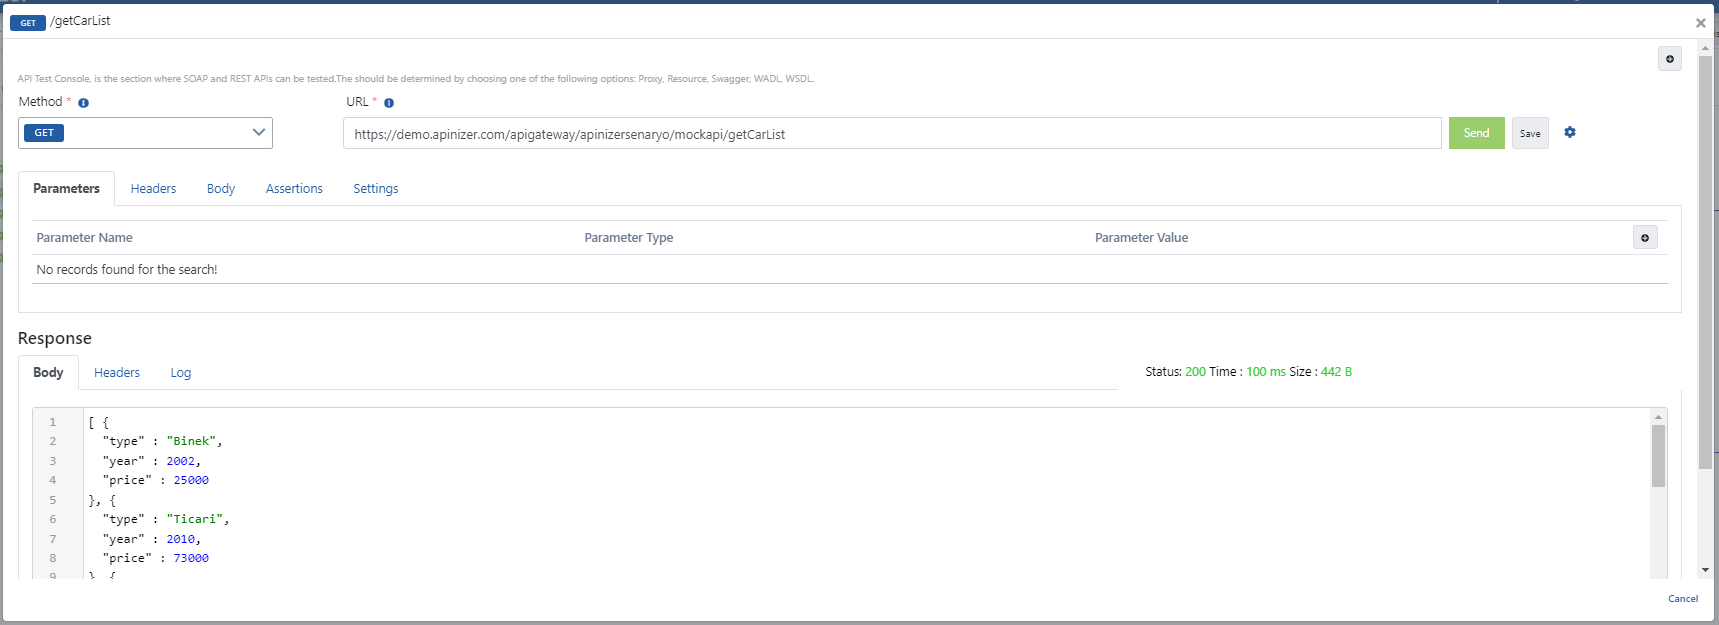
In the first test, no query parameters are sent to the mock API and the answer in the "Response" field is obtained.
## Testing the API Proxy
Click the **Test Endpoint** expression.
In the first test, no query parameters are sent to the mock API and the answer in the "Response" field is obtained.
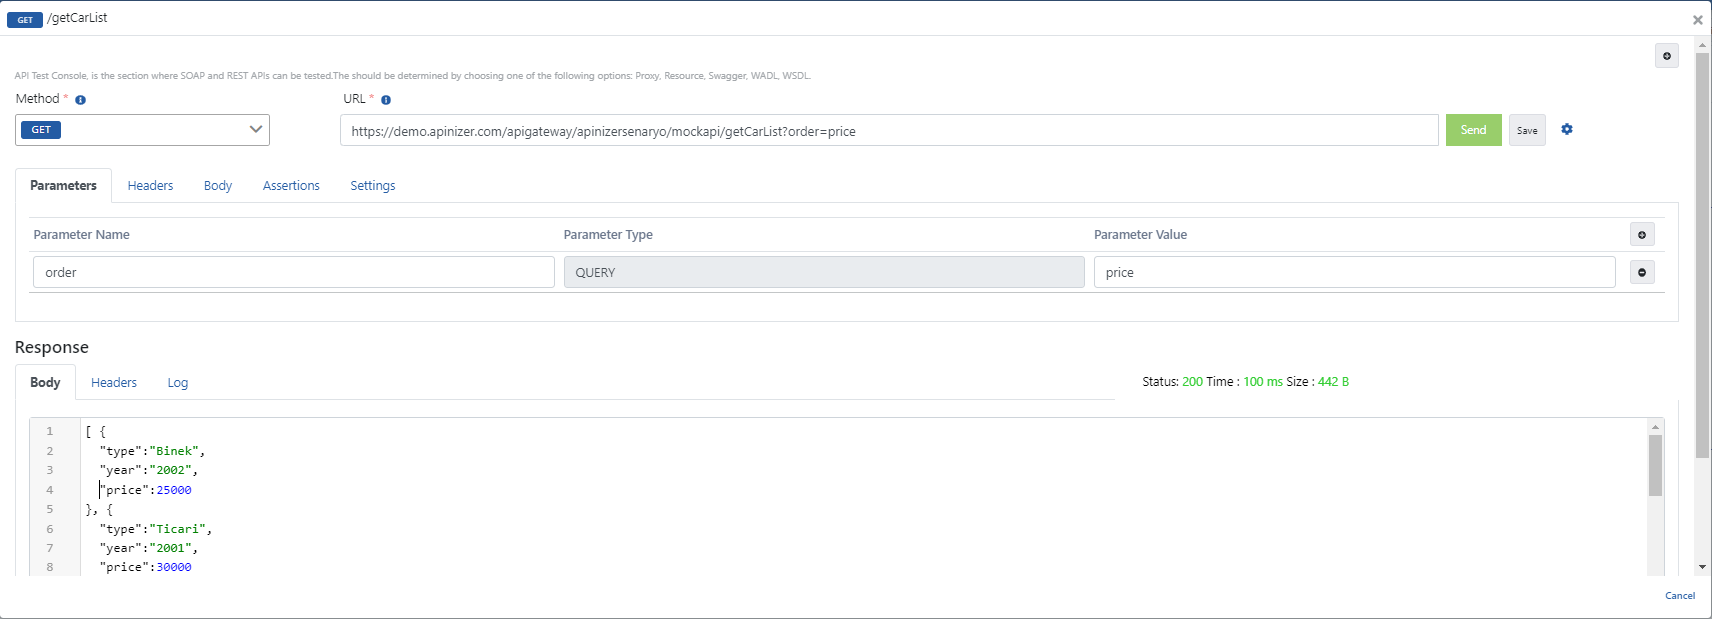
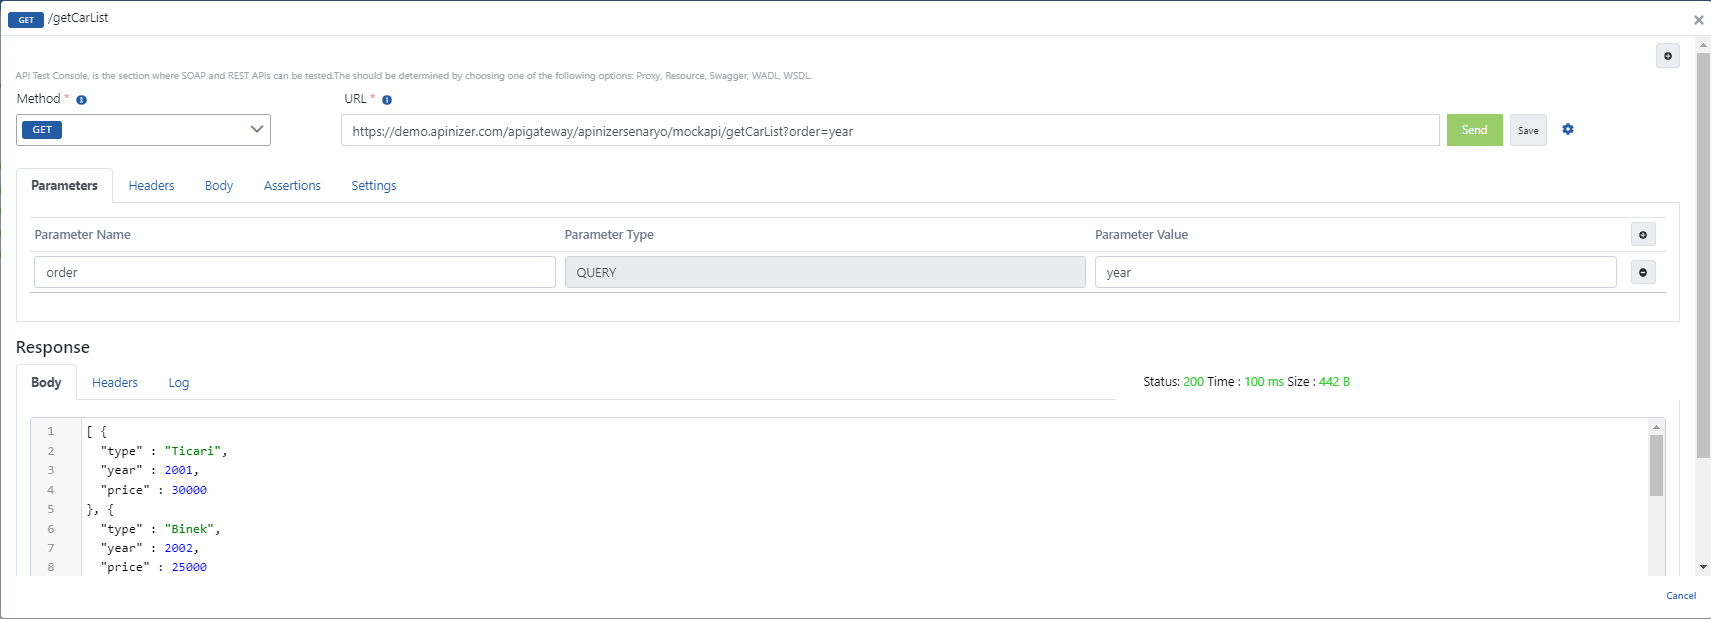
 Then, the **order=year** query parameter is added to sort the response to be received by year.
 Finally, the **order=price** query parameter is added to sort the response to be received by year.