> ## Documentation Index
> Fetch the complete documentation index at: https://docs.apinizer.com/llms.txt
> Use this file to discover all available pages before exploring further.
# Creating DB-2-API from MySQL Database
> Explains creating DB-2-API in Apinizer through MySQL database connection. Includes all steps from establishing database connection to defining endpoints, converting to API Proxy to testing.
The numbering in the diagram below corresponds to the **order of operations**.
* **API Client** makes a request to an **endpoint** in the **DB-2-API** on Apinizer.
* **Apinizer** sends this request to the **database**, and the query belonging to the relevant **endpoint** is executed on the database.
* The response to the relevant query from the **database** comes to **Apinizer**.
* **Apinizer sends the response to API Client**.
 Defining MySQL database connection in Apinizer.
Defining endpoints for GET, POST, PUT, DELETE operations.
Converting DB-2-API to API Proxy format.
Testing the created endpoints.
## Establishing Database Connection
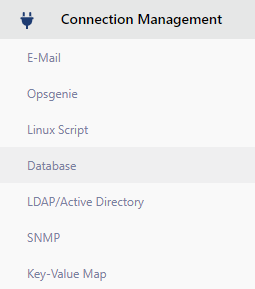
Select the **Database** expression under the **Connection Management** menu.
Defining MySQL database connection in Apinizer.
Defining endpoints for GET, POST, PUT, DELETE operations.
Converting DB-2-API to API Proxy format.
Testing the created endpoints.
## Establishing Database Connection
Select the **Database** expression under the **Connection Management** menu.
 Since no database connection has been made before, this page appears empty. Click the **Create** button in the top right corner.
Start creating MySQL database connection.
Since no database connection has been made before, this page appears empty. Click the **Create** button in the top right corner.
Start creating MySQL database connection.
 If the input fields on this page are examined;
* Write the name of the database you are connecting to with the **Name** field.
* A description is made for the connection to be created with the **Description** field.
* Select the type of connection to be created with **Database Type**.
* Write the address of the database to be connected to with the **JDBC URL** field. An example connection string is also in the input field.
* Enter the username required for the database to be connected to with the **Username** field, and write the password information to be entered during connection in the **Password** field.
* For information about other fields besides these fields, you can look at the [database connection](/en/integrations/connection-management/database) page.
After entering the required database connection information, test the connection with the **Test Connection** button in the middle above, click the **Save And Deploy** button, and create the connection.
If the input fields on this page are examined;
* Write the name of the database you are connecting to with the **Name** field.
* A description is made for the connection to be created with the **Description** field.
* Select the type of connection to be created with **Database Type**.
* Write the address of the database to be connected to with the **JDBC URL** field. An example connection string is also in the input field.
* Enter the username required for the database to be connected to with the **Username** field, and write the password information to be entered during connection in the **Password** field.
* For information about other fields besides these fields, you can look at the [database connection](/en/integrations/connection-management/database) page.
After entering the required database connection information, test the connection with the **Test Connection** button in the middle above, click the **Save And Deploy** button, and create the connection.
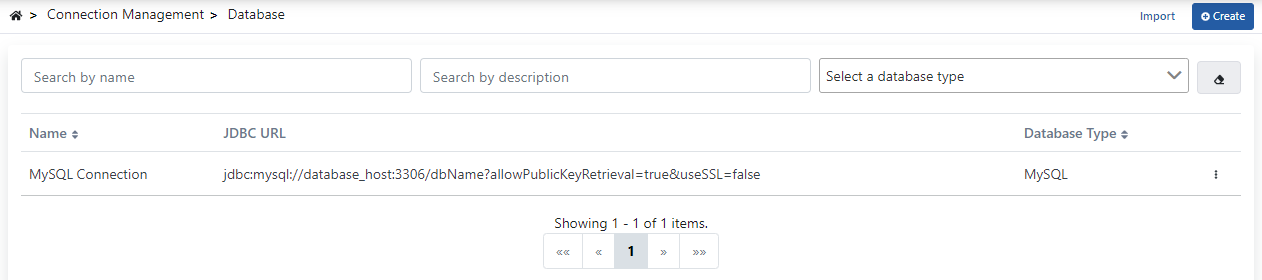
 The screenshot to be obtained after saving is shown in the image below.
 ## Creating DB-2-API
After the database connection is established, proceed to the DB-2-API creation stage.
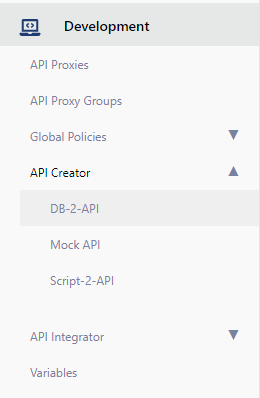
Select the **DB-2-API** option under the **API Creator** menu in the **Development** menu.
## Creating DB-2-API
After the database connection is established, proceed to the DB-2-API creation stage.
Select the **DB-2-API** option under the **API Creator** menu in the **Development** menu.
 After selecting the **DB-2-API** option, an empty page appears on the screen. This is because no DB-2-API has been created before.
Click the **Create** button in the top right corner on this screen to start creating DB-2-API.
After selecting the **DB-2-API** option, an empty page appears on the screen. This is because no DB-2-API has been created before.
Click the **Create** button in the top right corner on this screen to start creating DB-2-API.
 The page that appears after clicking the **Create** button is shown below.
 On the page that appears after clicking the **Create** button:
* The **Name** field must give a name to the **DB-2-API**. This field cannot be left empty.
* A description can be added as desired.
After filling in the **Name** field, click the **Save and Next** button and proceed to the next step.
Now you can create DB-2-API on this page.
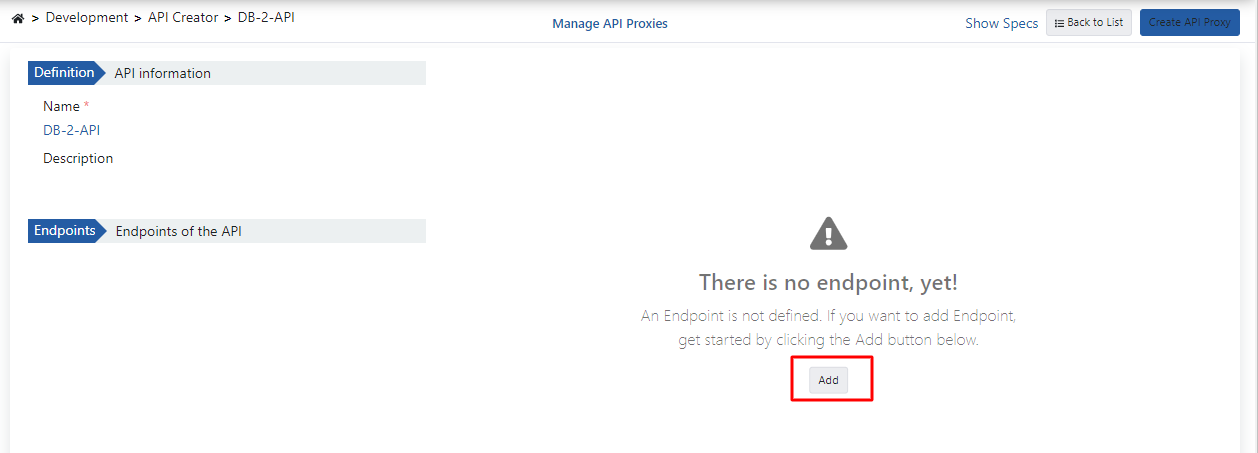
Click the **Add** button in the red rectangle to create the first endpoint.
On the page that appears after clicking the **Create** button:
* The **Name** field must give a name to the **DB-2-API**. This field cannot be left empty.
* A description can be added as desired.
After filling in the **Name** field, click the **Save and Next** button and proceed to the next step.
Now you can create DB-2-API on this page.
Click the **Add** button in the red rectangle to create the first endpoint.
 Fields on the endpoint creation screen:
* Select the methods **(GET,POST,DELETE,PUT, etc.)** of the endpoint to be created with the **HTTP Method** field.
* Enter the **name** of the endpoint in the **Name/URL** field.
* A **description** related to the endpoint can be added in the **Description** field.
* Select the database to be connected to with the **Connection Pool Definition** field.
* Specify how many seconds the created query will **timeout** with the **Timeout** field.
* Select **what type** the **SQL query** to be written will be created with the **Type of SQL Statement** expression.
* Enter the **SQL query** to be written in the **Enter SQL Statement** field.
Fields on the endpoint creation screen:
* Select the methods **(GET,POST,DELETE,PUT, etc.)** of the endpoint to be created with the **HTTP Method** field.
* Enter the **name** of the endpoint in the **Name/URL** field.
* A **description** related to the endpoint can be added in the **Description** field.
* Select the database to be connected to with the **Connection Pool Definition** field.
* Specify how many seconds the created query will **timeout** with the **Timeout** field.
* Select **what type** the **SQL query** to be written will be created with the **Type of SQL Statement** expression.
* Enter the **SQL query** to be written in the **Enter SQL Statement** field.
 ### GET Endpoint: /getSalariesByEmpNo
First, an endpoint named /getSalariesByEmpNo will be created.
For this endpoint to be usable, a parameter of **Query** type must be sent.
The fields to be used in this endpoint have been entered in the sections explained one by one above.
### GET Endpoint: /getSalariesByEmpNo
First, an endpoint named /getSalariesByEmpNo will be created.
For this endpoint to be usable, a parameter of **Query** type must be sent.
The fields to be used in this endpoint have been entered in the sections explained one by one above.
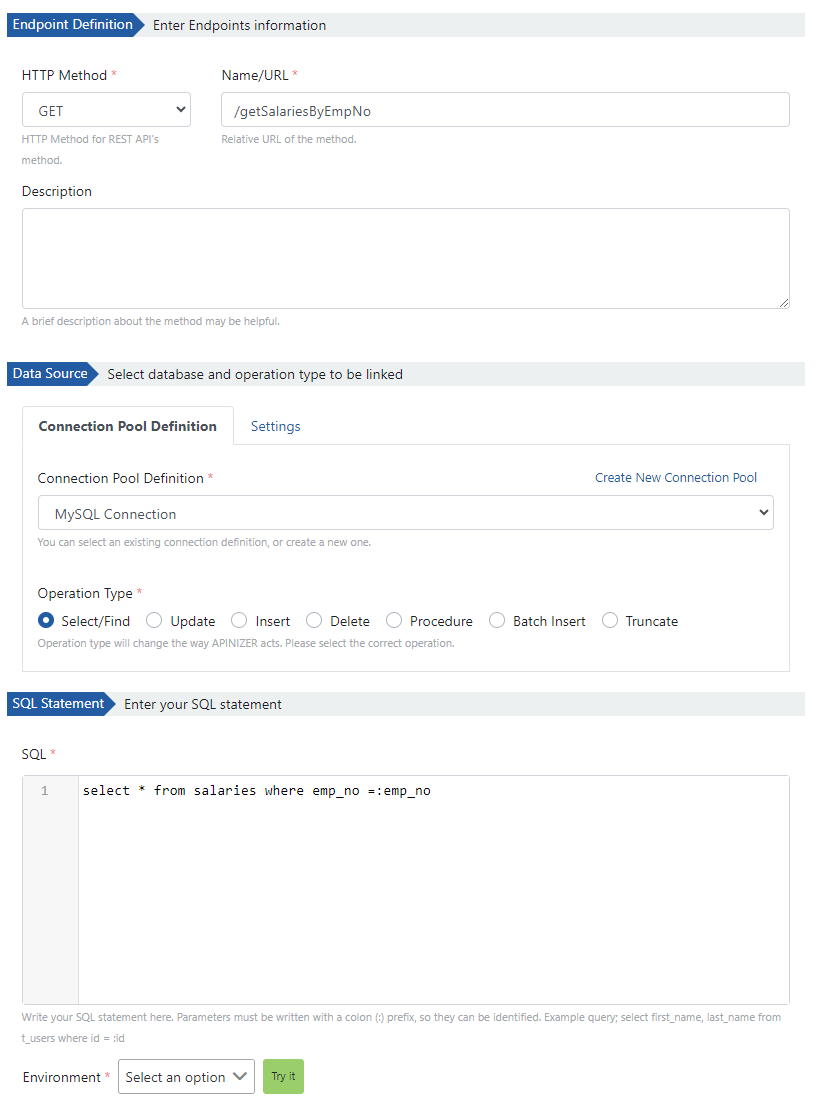 The image for the Query type parameter created is shown below.
 Parameter properties:
* **Data Type**: integer
* **Repetition Type**: Single (because it contains a single field)
* **Parameter Type**: Query
* **Test Value**: Write the value to be tested to get an example response
Click the **Save** button to save the endpoint.
### PUT Endpoint: /updateDepartmentByDeptNo
The second endpoint to be created is the endpoint named /updateDepartmentByDeptNo.
For this, it is necessary to click the **Add** button in the red rectangle as seen in the image below.
Parameter properties:
* **Data Type**: integer
* **Repetition Type**: Single (because it contains a single field)
* **Parameter Type**: Query
* **Test Value**: Write the value to be tested to get an example response
Click the **Save** button to save the endpoint.
### PUT Endpoint: /updateDepartmentByDeptNo
The second endpoint to be created is the endpoint named /updateDepartmentByDeptNo.
For this, it is necessary to click the **Add** button in the red rectangle as seen in the image below.
 After clicking, the field where the endpoint can be created appears on the side.
The endpoint to be created takes a parameter of **Body** type.
After clicking, the field where the endpoint can be created appears on the side.
The endpoint to be created takes a parameter of **Body** type.
 The fields to be used in this endpoint have been entered in the sections explained one by one above.
The image for the Body type parameter created is shown below.
The fields to be used in this endpoint have been entered in the sections explained one by one above.
The image for the Body type parameter created is shown below.
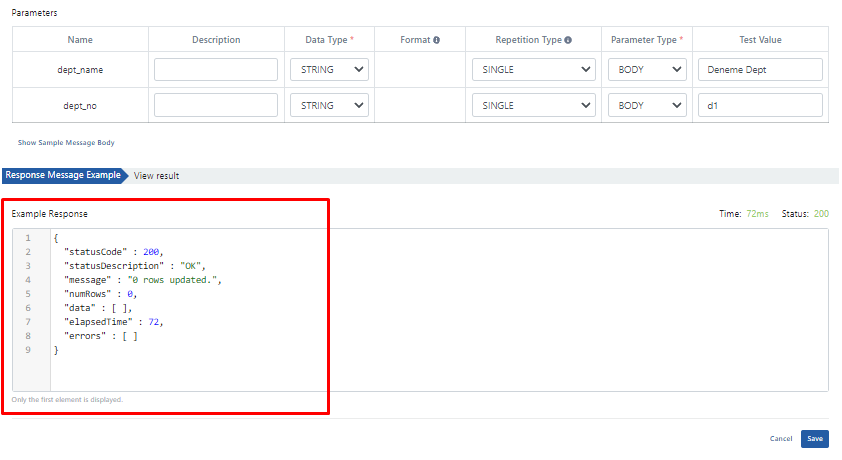 Since this endpoint receives two different parameter values, the parameters are defined separately.
Since the created endpoint performs an update operation, the Body expression is selected as Parameter Type.
When the written SQL query is tested, the response shown in the image above is obtained.
### DELETE Endpoint: /deleteSalariesByEmpNo
The last endpoint to be created is the endpoint named /deleteSalariesByEmpNo.
To add this endpoint, click the **Add** button in the red rectangle in the image below and create the endpoint from the screen that opens on the right.
Since this endpoint receives two different parameter values, the parameters are defined separately.
Since the created endpoint performs an update operation, the Body expression is selected as Parameter Type.
When the written SQL query is tested, the response shown in the image above is obtained.
### DELETE Endpoint: /deleteSalariesByEmpNo
The last endpoint to be created is the endpoint named /deleteSalariesByEmpNo.
To add this endpoint, click the **Add** button in the red rectangle in the image below and create the endpoint from the screen that opens on the right.
 After filling in the required fields, create the Query parameter that will be in the endpoint.
 Test the SQL query written with the created Query parameter and obtain the example response shown in the image below.
 This endpoint is saved and the final version of the DB-2-API to be created is shown in the image below.
The endpoints in the API are located in the rectangle on the left.
This endpoint is saved and the final version of the DB-2-API to be created is shown in the image below.
The endpoints in the API are located in the rectangle on the left.
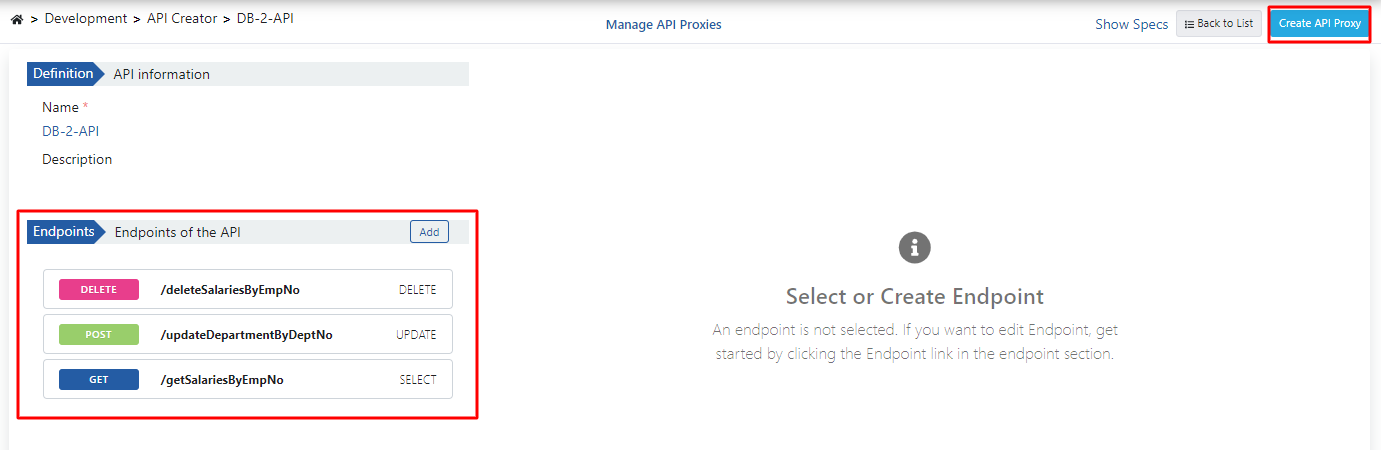 After all endpoints are created, click the **Create API Proxy** button in the top right corner.
## Creating API Proxy from DB-2-API
On this page:
* Give a name to the **API Proxy** to be created from DB-2-API in the **Name** field.
* Write the **/db2api** path expression in the **Relative Path** expression. This address will be the address where the API Proxy will be opened to the outside.
After all endpoints are created, click the **Create API Proxy** button in the top right corner.
## Creating API Proxy from DB-2-API
On this page:
* Give a name to the **API Proxy** to be created from DB-2-API in the **Name** field.
* Write the **/db2api** path expression in the **Relative Path** expression. This address will be the address where the API Proxy will be opened to the outside.
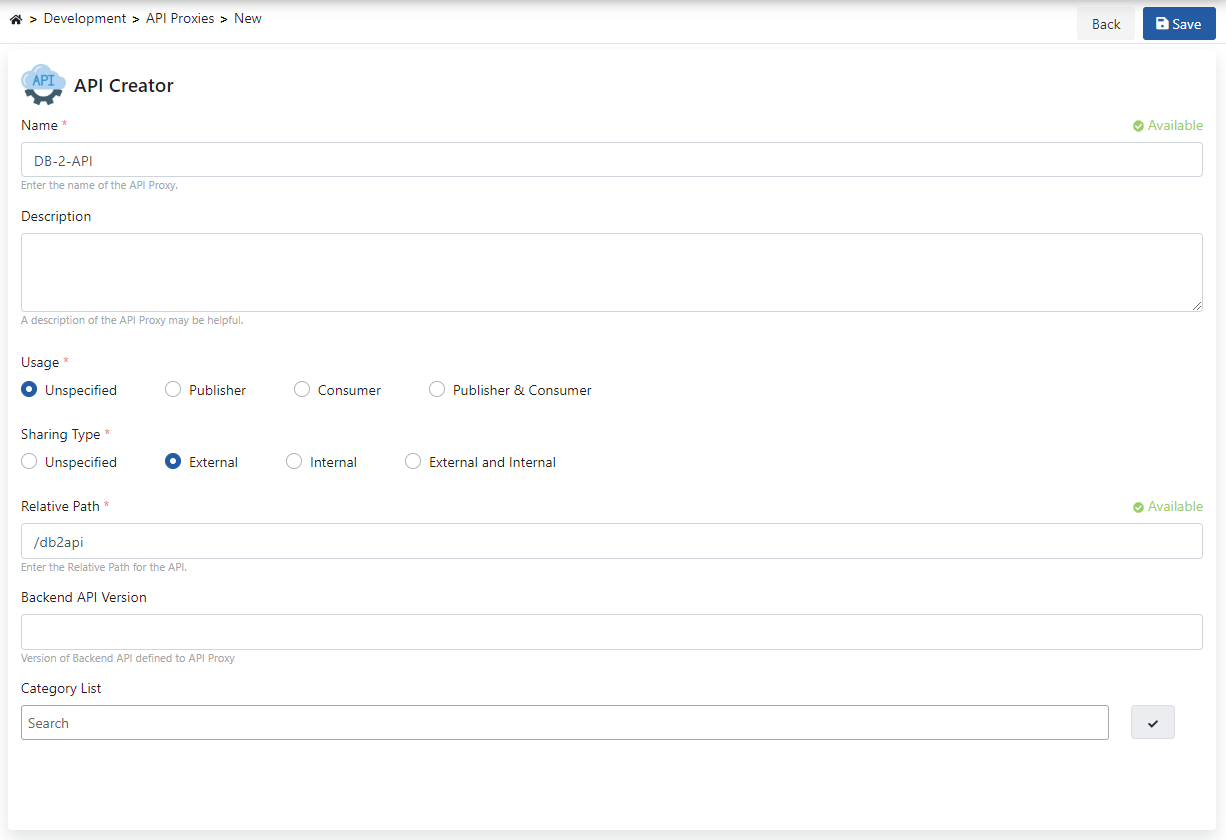 Click the **Save** button in the top right corner and save the proxy.
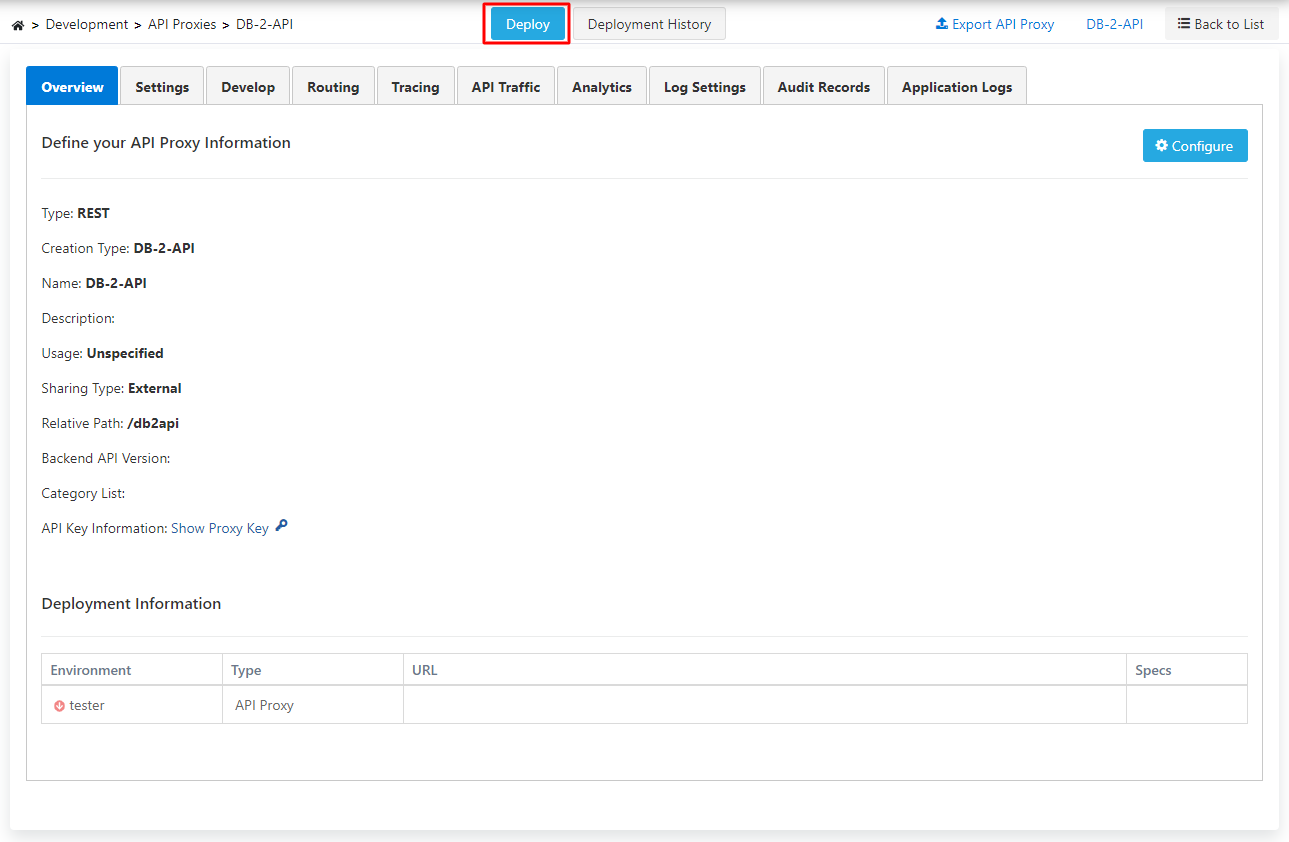
After the save operation is performed, you come to the page shown in the image below.
Click the **Save** button in the top right corner and save the proxy.
After the save operation is performed, you come to the page shown in the image below.
 ## Testing the API Proxy
Here, click the **Deploy** button in the red rectangle above and in the image to **deploy the API Proxy**.
## Testing the API Proxy
Here, click the **Deploy** button in the red rectangle above and in the image to **deploy the API Proxy**.
 After the proxy is deployed, the created endpoints are tested in order.
Select the **Develop** tab for test operations.
Select the endpoint named **/getSalariesByEmpNo** and click the **Test Endpoint** button.
After the proxy is deployed, the created endpoints are tested in order.
Select the **Develop** tab for test operations.
Select the endpoint named **/getSalariesByEmpNo** and click the **Test Endpoint** button.
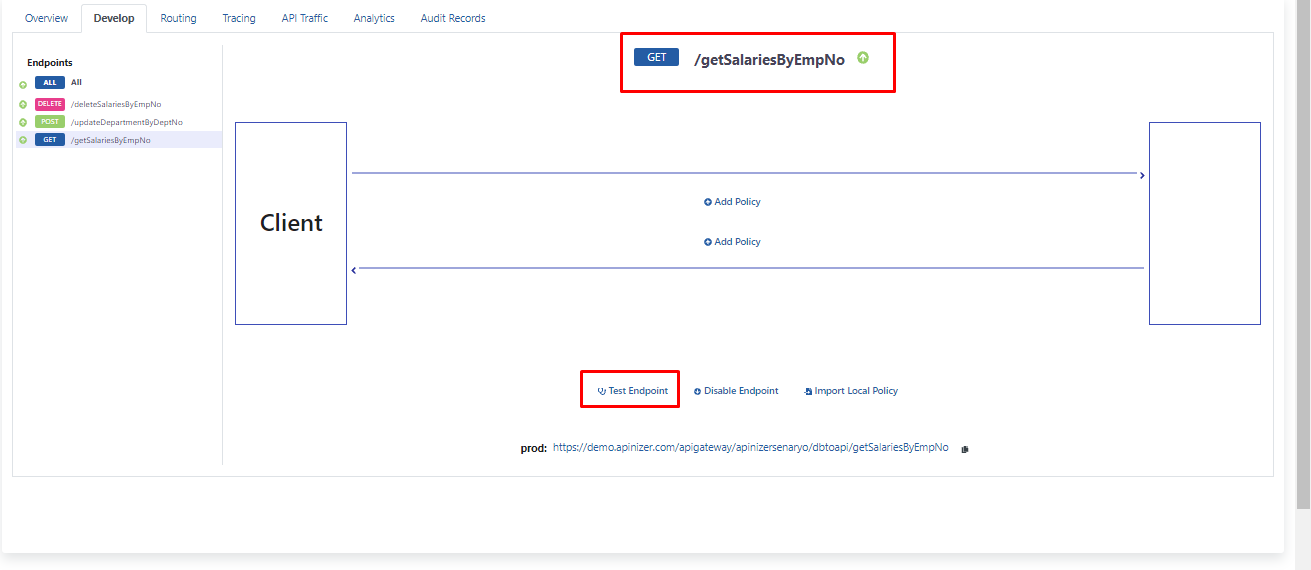 Enter the value **"10005"** as the **Query** parameter and obtain the response in the red rectangle.
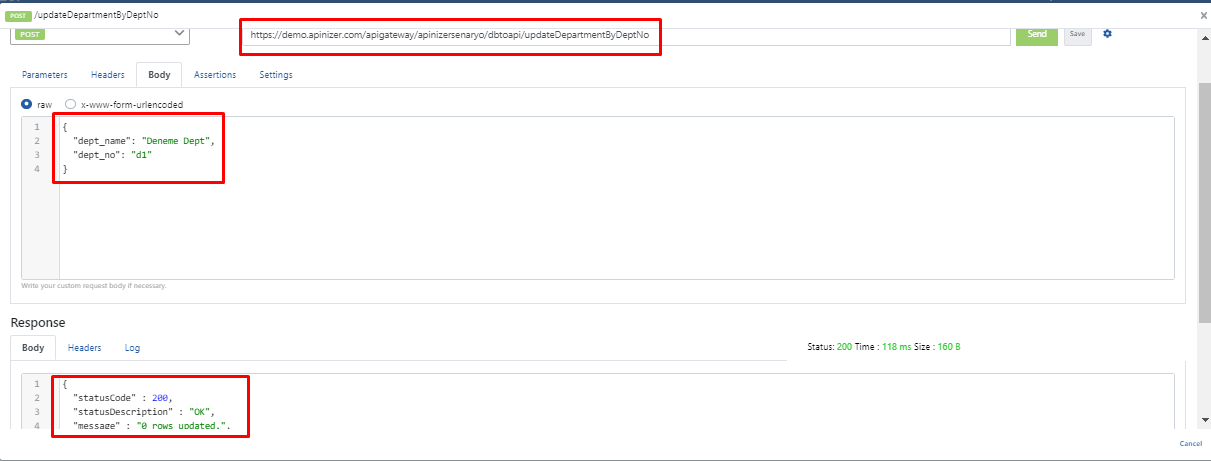
 After testing this endpoint, select the second endpoint named **/updateDepartmentByDeptNo** for testing.
Click the **Test Endpoint** button.
After testing this endpoint, select the second endpoint named **/updateDepartmentByDeptNo** for testing.
Click the **Test Endpoint** button.
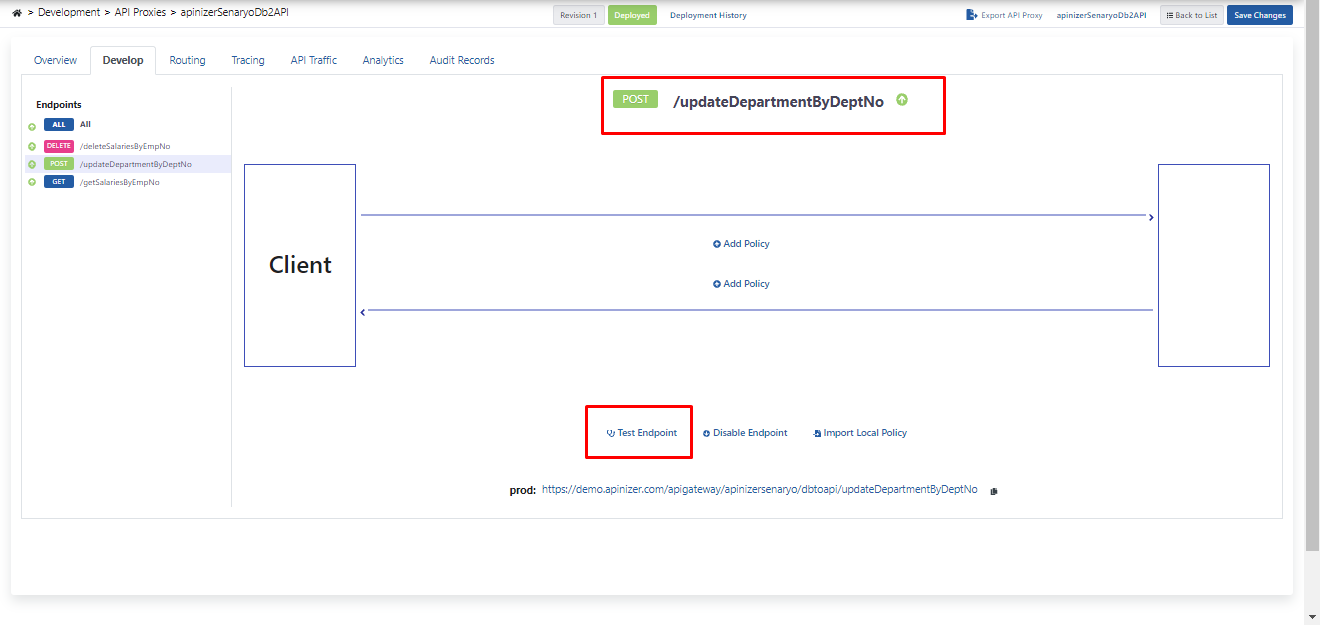 Since this endpoint requests two pieces of data in the **Body**, they are given in **key/value** format.
When the **Send** button is clicked, the response in the red rectangle is obtained as a response.
Since this endpoint requests two pieces of data in the **Body**, they are given in **key/value** format.
When the **Send** button is clicked, the response in the red rectangle is obtained as a response.
 Finally, select the endpoint named **/deleteSalariesByEmpNo** for testing.
Click the **Test Endpoint** button.
Finally, select the endpoint named **/deleteSalariesByEmpNo** for testing.
Click the **Test Endpoint** button.
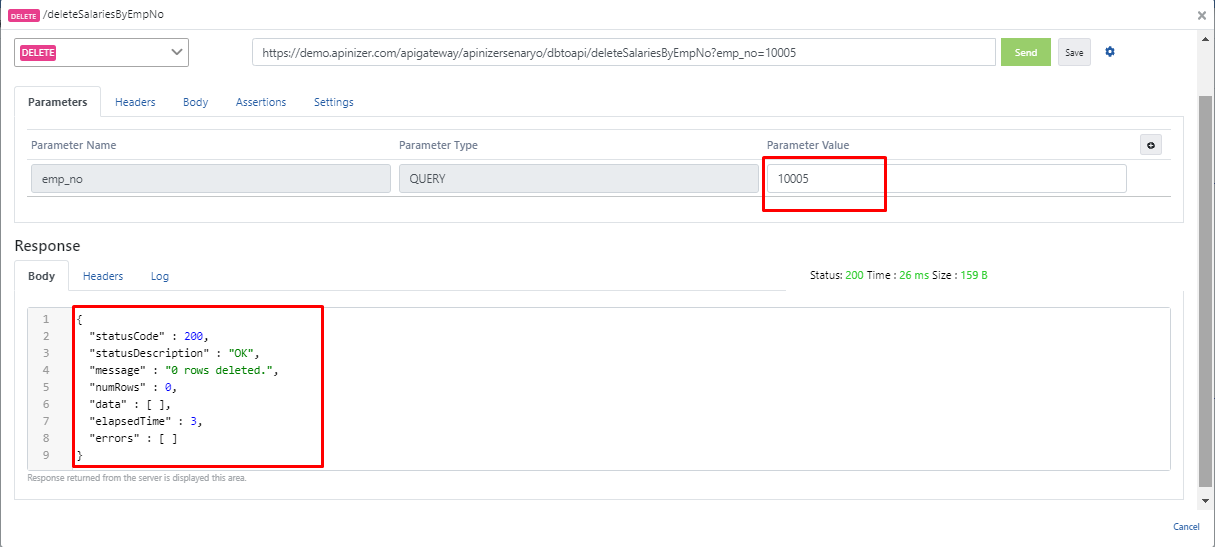
 This endpoint takes a parameter of **Query** type. Enter the value **"10005"** and when you click the **Send** button, the response obtained is in the red rectangle.