> ## Documentation Index
> Fetch the complete documentation index at: https://docs.apinizer.com/llms.txt
> Use this file to discover all available pages before exploring further.
# Application of Plain-Text Authentication Policy to SOAP Web Service via Security Manager Provider
> Explains how to apply Plain-Text Authentication policy to Calculator SOAP web service via Security Manager provider. Includes all steps from API Proxy creation to credential definition, adding policy to testing.
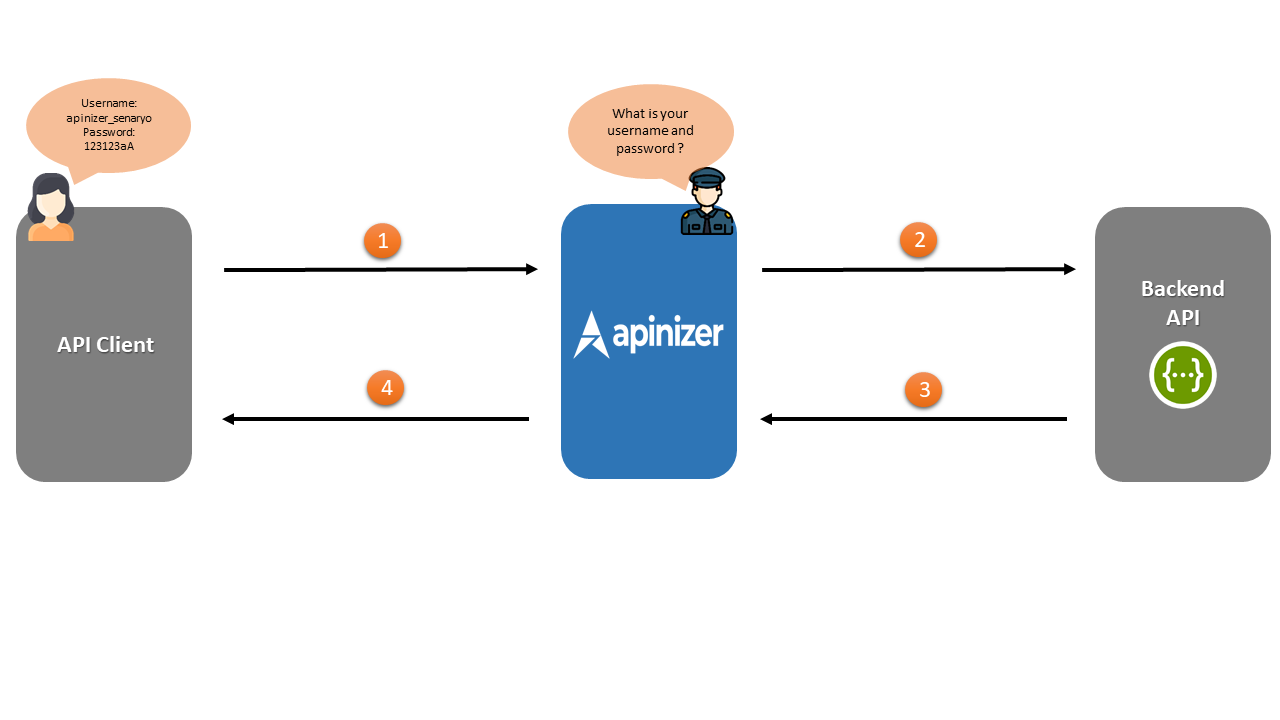
The numbering in the diagram below corresponds to the **order of operations**.
* **Security Manager** in **Apinizer** requests **Plain-Text type authentication** information from **API Client**. If this **authentication** information is correct, proceed to field number two.
* **Apinizer** makes a request to **Backend API**.
* **Backend API** responds to **Apinizer**.
* **Apinizer** responds to **API Client**.
 ## Creating API Proxy
 Access to the web service named Calculator can be provided from [http://www.dneonline.com/calculator.asmx?WSDL](http://www.dneonline.com/calculator.asmx?WSDL).
First, this address must be defined as an **API Proxy**.
For this, click the **API Proxies** option under the **Development** menu.
Since no **proxy** definition has been made before on the opened page, the text **No records found!** appears.
Here, click the **Create** button in the top right corner and start creating a new **proxy**.
Access to the web service named Calculator can be provided from [http://www.dneonline.com/calculator.asmx?WSDL](http://www.dneonline.com/calculator.asmx?WSDL).
First, this address must be defined as an **API Proxy**.
For this, click the **API Proxies** option under the **Development** menu.
Since no **proxy** definition has been made before on the opened page, the text **No records found!** appears.
Here, click the **Create** button in the top right corner and start creating a new **proxy**.
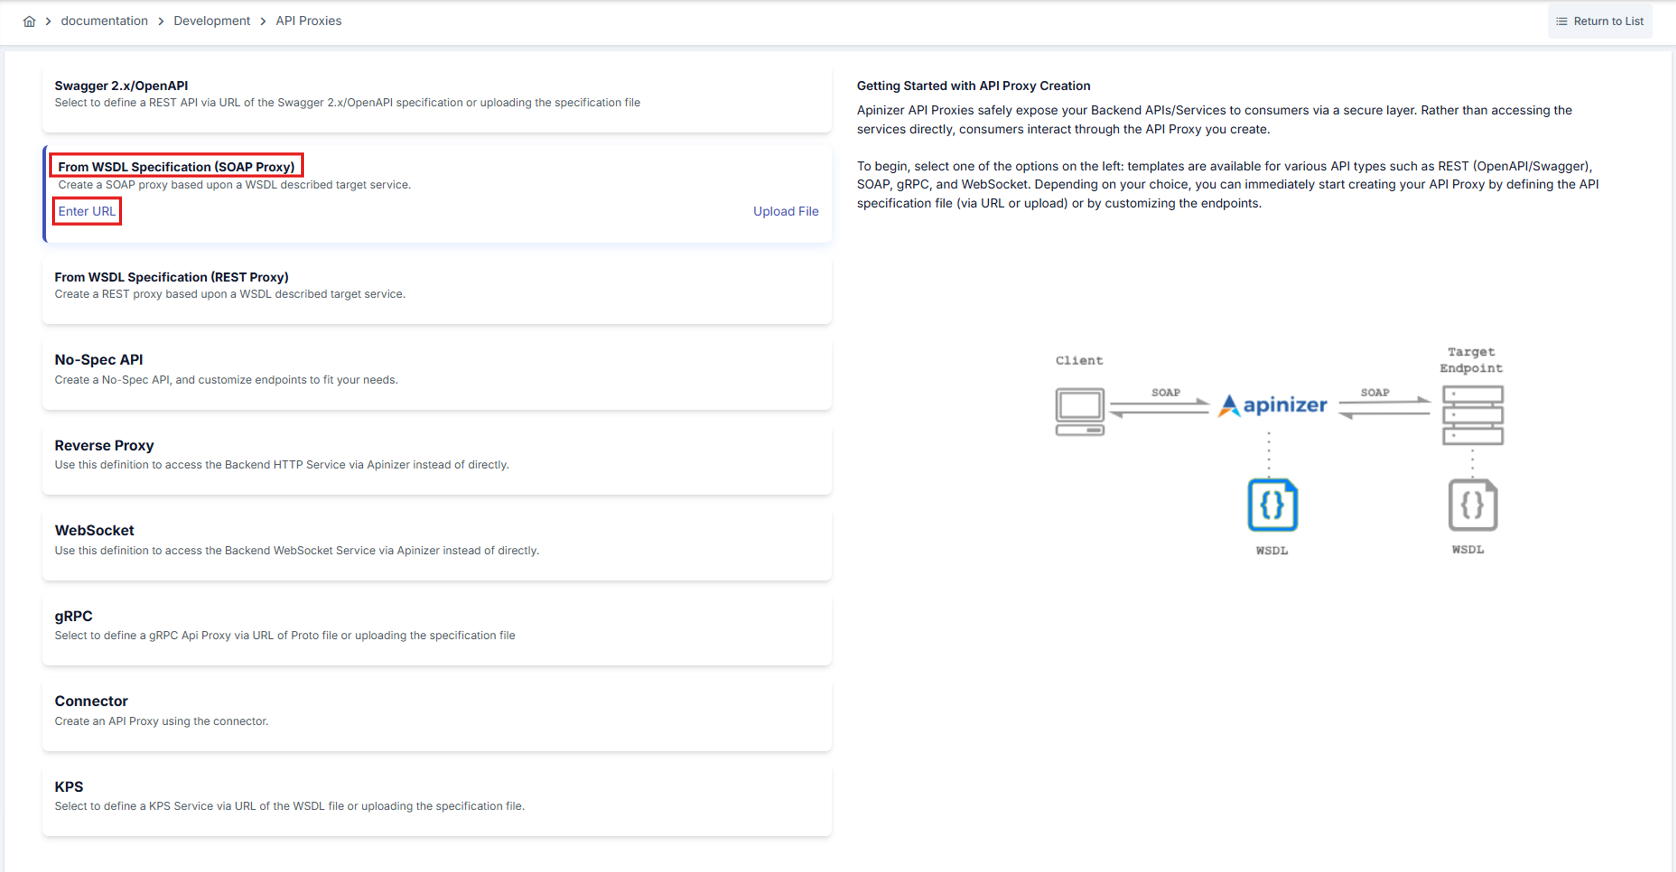
 Since the API proxy to be added is a SOAP web service, click on the **Enter URL** expression from the **WSDL menu** to switch to the screen where the address of the web service to be used will be entered.
 As seen in the image below, enter the **address to be accessed** in the URL section and click the **Parse** button.
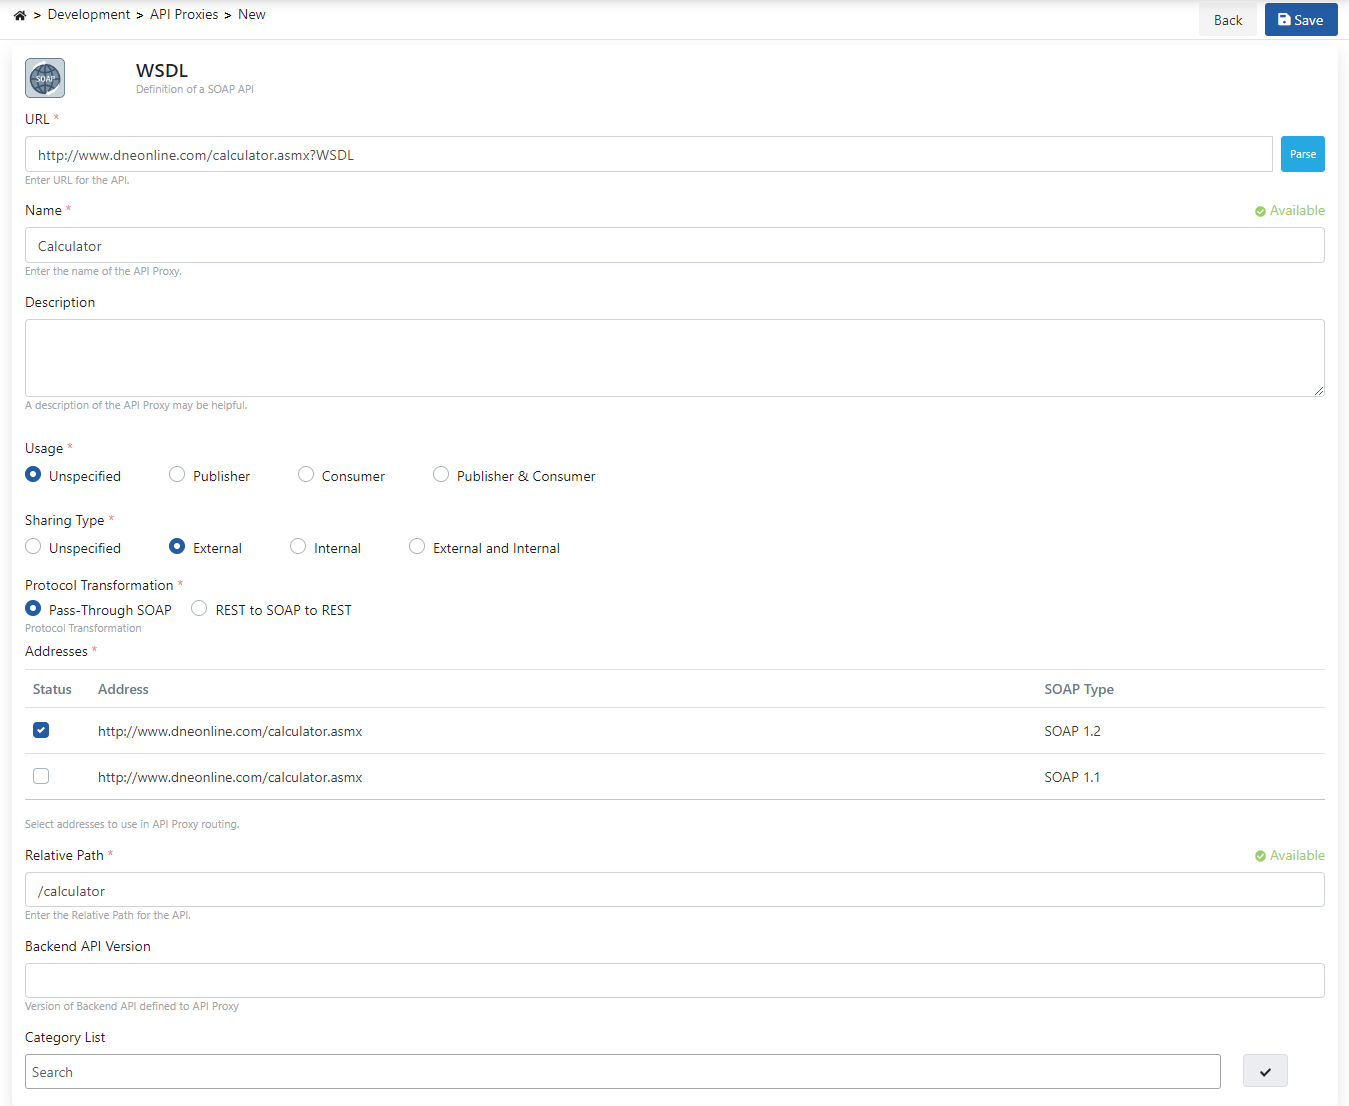
 After performing the parsing, the screen shown in the image below appears. Settings for the API Proxy can be made from this screen.
* The **Usage** field specifies who will use the created API Proxy. Options such as **publisher, consumer, publisher and consumer** are available here.
* There are two different options under the **Protocol Transformation** tab;
* **Pass-Through SOAP** allows the SOAP web service to be used as is without performing any transformation operations on the web service.
* **REST to SOAP to REST** allows this SOAP web service to be used in a structure that will include REST architecture.
* One or both of the two API addresses under the **Addresses** tab can be selected. If both addresses are selected, Apinizer will perform the **Load Balance** operation itself.
* **Relative Path** is the address where the created API Proxy will be opened for access.
* The **Category List** field also allows categorization of the created API Proxy.
After performing the parsing, the screen shown in the image below appears. Settings for the API Proxy can be made from this screen.
* The **Usage** field specifies who will use the created API Proxy. Options such as **publisher, consumer, publisher and consumer** are available here.
* There are two different options under the **Protocol Transformation** tab;
* **Pass-Through SOAP** allows the SOAP web service to be used as is without performing any transformation operations on the web service.
* **REST to SOAP to REST** allows this SOAP web service to be used in a structure that will include REST architecture.
* One or both of the two API addresses under the **Addresses** tab can be selected. If both addresses are selected, Apinizer will perform the **Load Balance** operation itself.
* **Relative Path** is the address where the created API Proxy will be opened for access.
* The **Category List** field also allows categorization of the created API Proxy.
 After these settings are made, the API Proxy is saved.
After the save operation, click the **Develop** tab on the opened page.
After these settings are made, the API Proxy is saved.
After the save operation, click the **Develop** tab on the opened page.
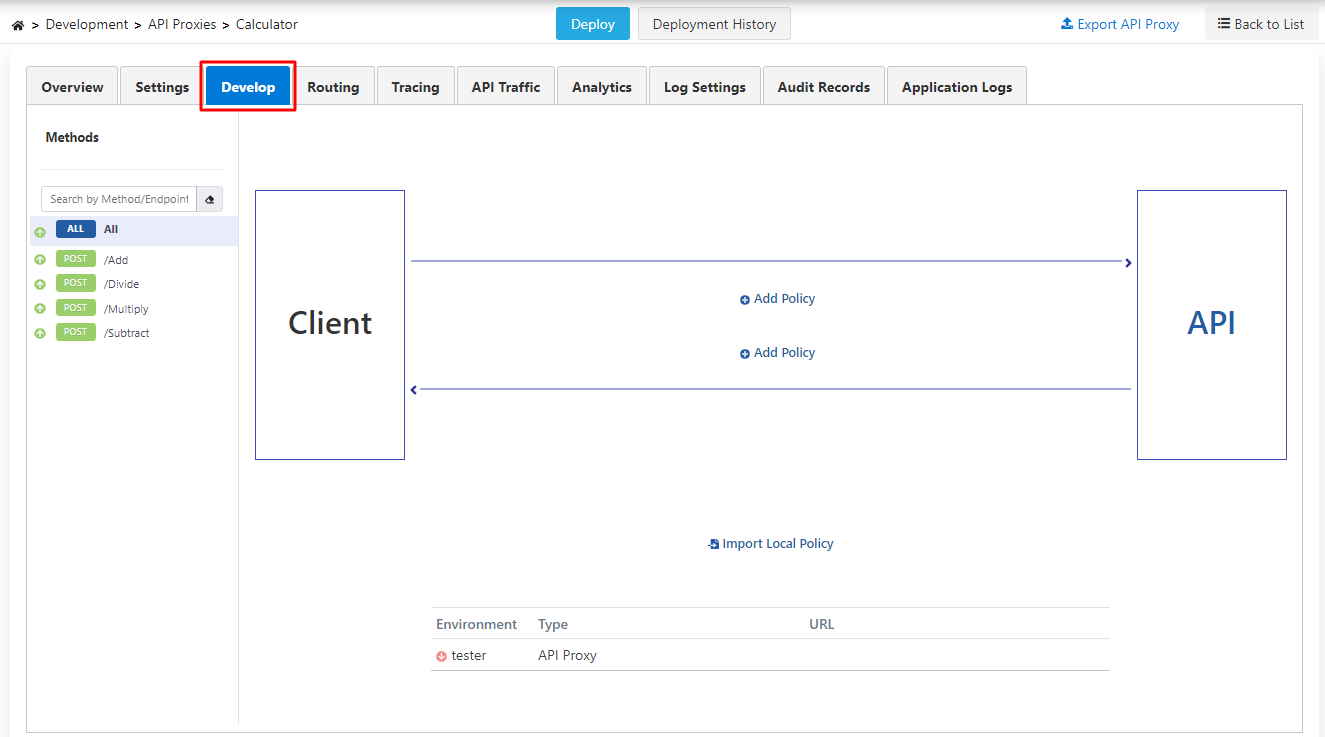 Here, the **methods** belonging to the web service are seen.
* Policies to be added with the **All** expression above these methods can be applied to **all methods**.
* The created API Proxy is deployed. For this, click the **Deploy** button in the middle section above.
Here, the **methods** belonging to the web service are seen.
* Policies to be added with the **All** expression above these methods can be applied to **all methods**.
* The created API Proxy is deployed. For this, click the **Deploy** button in the middle section above.
 ## Creating Credentials
The information for the **Credential** to be added will be **username = apinizer**, **password = 123123aA**.
For this, go to the **Identity Management** menu.
Here, click the **Credentials** menu under the **Credential Management** menu.
## Creating Credentials
The information for the **Credential** to be added will be **username = apinizer**, **password = 123123aA**.
For this, go to the **Identity Management** menu.
Here, click the **Credentials** menu under the **Credential Management** menu.
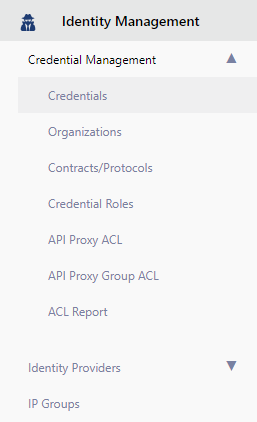 Click the **Create** button in the top right corner on the opened screen.
 Here, the required fields are filled with the previously specified information and the created **credential** is saved by clicking the **Save and Deploy** button.
 The proxy that this **credential element** will provide access to must be selected. Hover over the created **credential** and click the **Edit** option from the menu on the side.
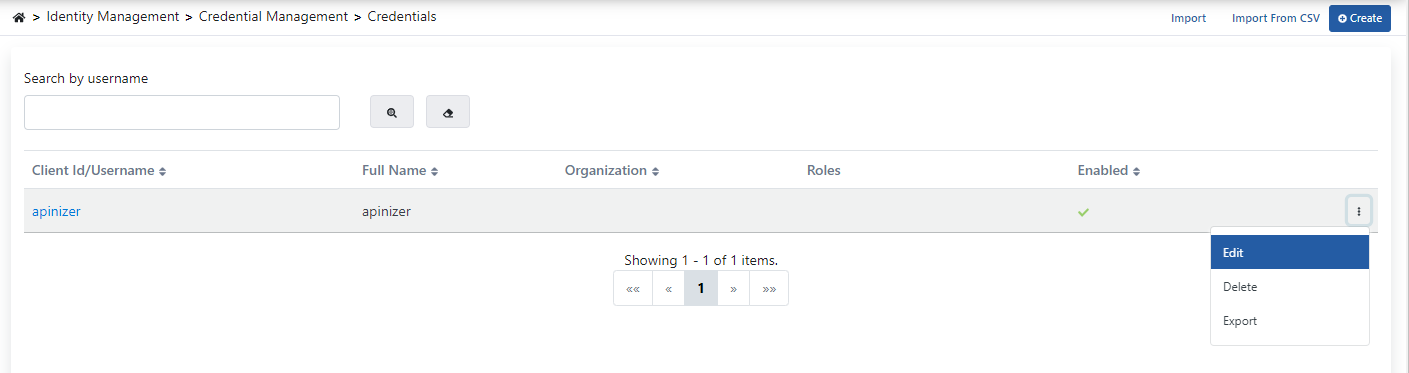 Click the **API Proxy ACL** tab from the opened screen, and click the button in this tab.
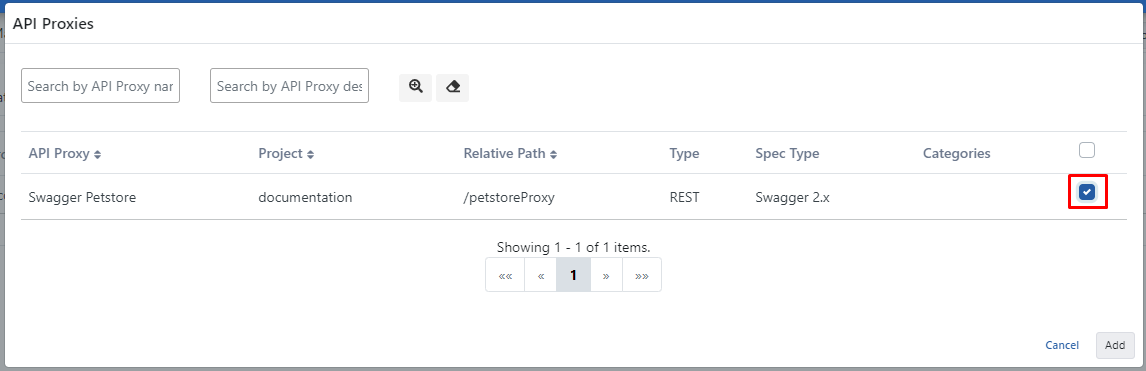
 On the opened page, **API Proxies** in the project currently being worked on are listed. The **proxy** named **Calculator** is selected.
Click the **Add** button to specify that the created **Credential** element will have access to this **proxy**.
On the opened page, **API Proxies** in the project currently being worked on are listed. The **proxy** named **Calculator** is selected.
Click the **Add** button to specify that the created **Credential** element will have access to this **proxy**.
 Click the **Save and Deploy** button in the top right corner and save the operation.
## Adding Authentication Policy
The **Plain-Text Authentication** policy can now be added.
Go to the page where API Proxies are listed and select the proxy named **Calculator** from here.
Then go to the **Develop** tab and click the **Add Policy** button.
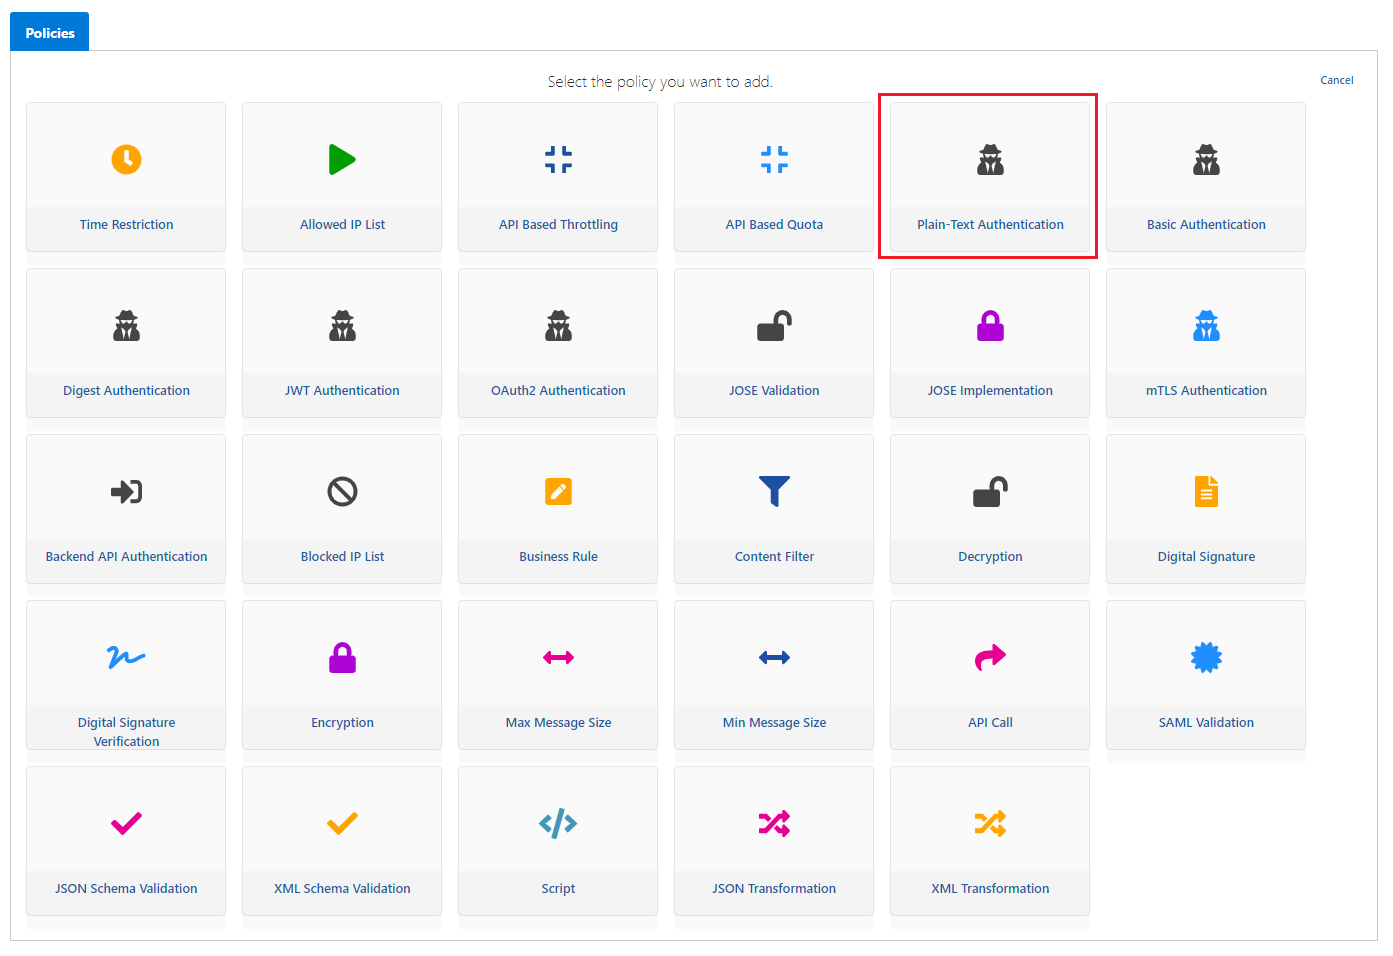
On the opened page, the **Plain-Text Authentication** policy is selected.
Click the **Save and Deploy** button in the top right corner and save the operation.
## Adding Authentication Policy
The **Plain-Text Authentication** policy can now be added.
Go to the page where API Proxies are listed and select the proxy named **Calculator** from here.
Then go to the **Develop** tab and click the **Add Policy** button.
On the opened page, the **Plain-Text Authentication** policy is selected.
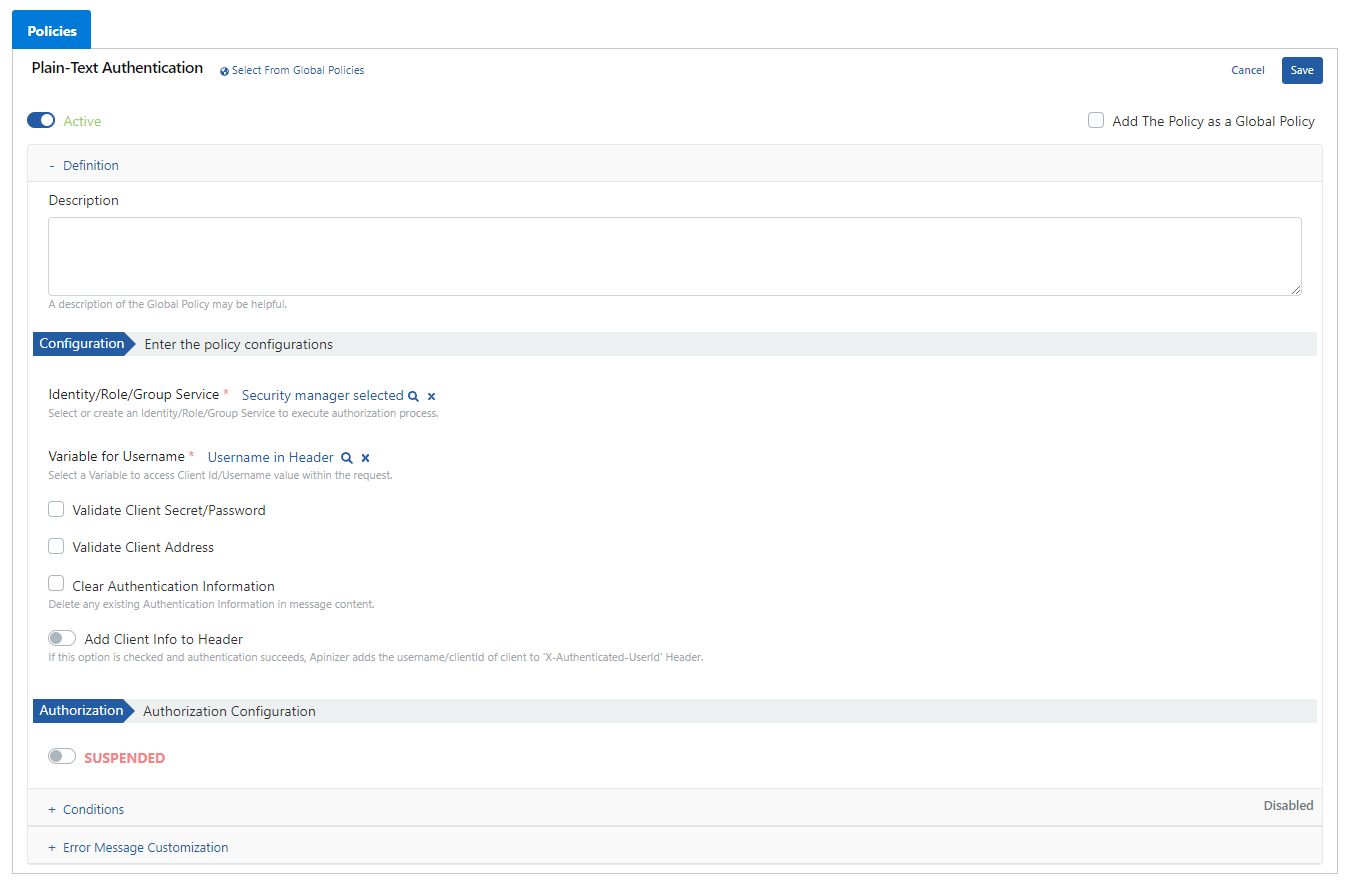
 The fields on this screen:
* The value to be selected in the **Identity/Role/Group Service** field is the **Security Manager** value. Because credentials control will be performed by **Security Manager**.
* The **Variable for username** and **variable for password** expressions also select which variable the username and password information will be retrieved with. In this scenario, these values will be retrieved from **header**.
* If the **Clear Authentication Information** option is selected, authentication information in the incoming message is deleted.
* The **Add Client Info To Header** option specifies whether client information will be present in the Header going to the backend API.
* If this option becomes active, another parameter named **Authenticated User Header Name** appears.
* The **X-Authenticated-UserId** expression here specifies the header name with which the client information going to the backend API will go.
The fields on this screen:
* The value to be selected in the **Identity/Role/Group Service** field is the **Security Manager** value. Because credentials control will be performed by **Security Manager**.
* The **Variable for username** and **variable for password** expressions also select which variable the username and password information will be retrieved with. In this scenario, these values will be retrieved from **header**.
* If the **Clear Authentication Information** option is selected, authentication information in the incoming message is deleted.
* The **Add Client Info To Header** option specifies whether client information will be present in the Header going to the backend API.
* If this option becomes active, another parameter named **Authenticated User Header Name** appears.
* The **X-Authenticated-UserId** expression here specifies the header name with which the client information going to the backend API will go.
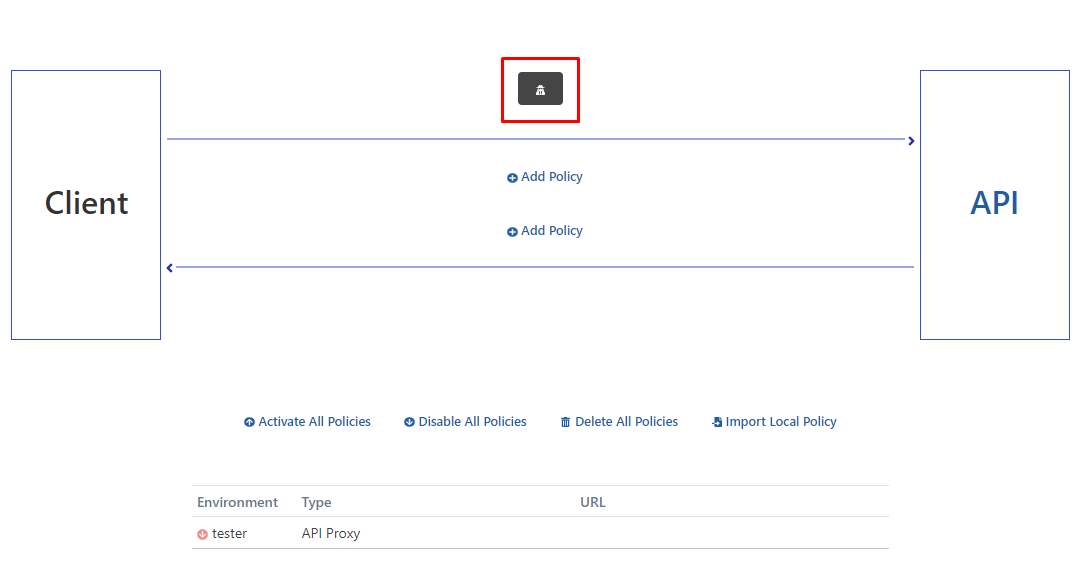
 For the operation to be valid, the proxy must be **Deployed**.
 ## Testing the API Proxy
After selecting the **Add** method, click the **Test Method** button.
## Testing the API Proxy
After selecting the **Add** method, click the **Test Method** button.
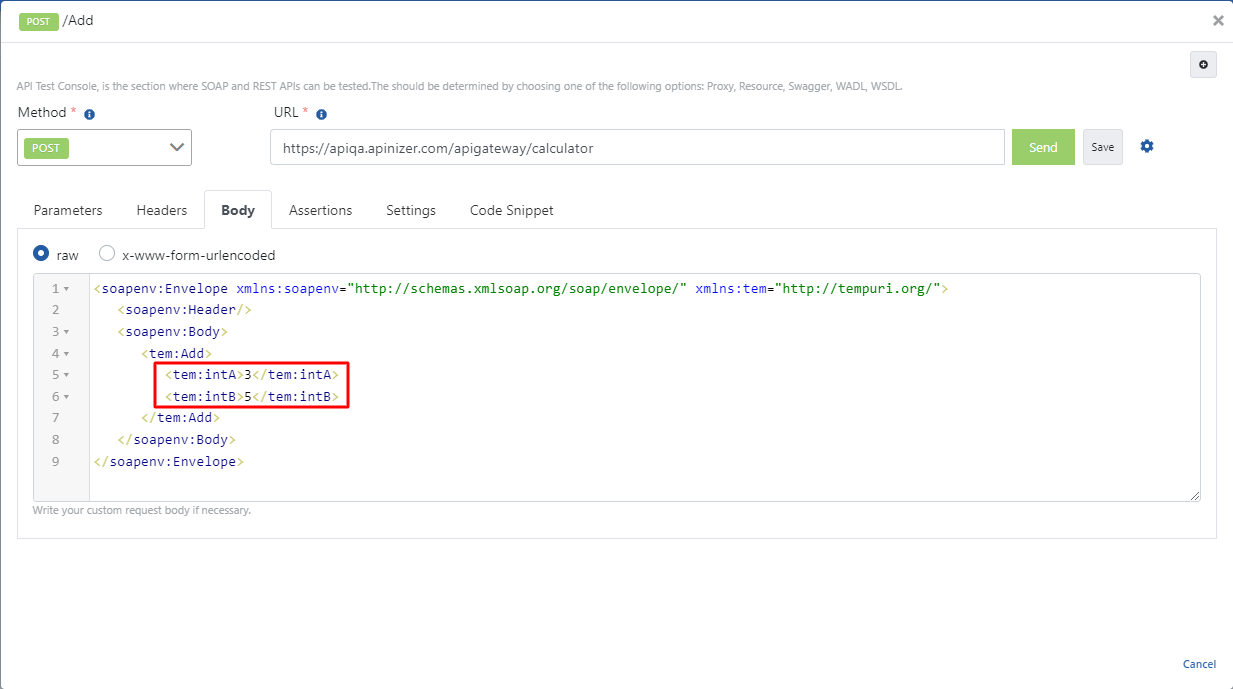
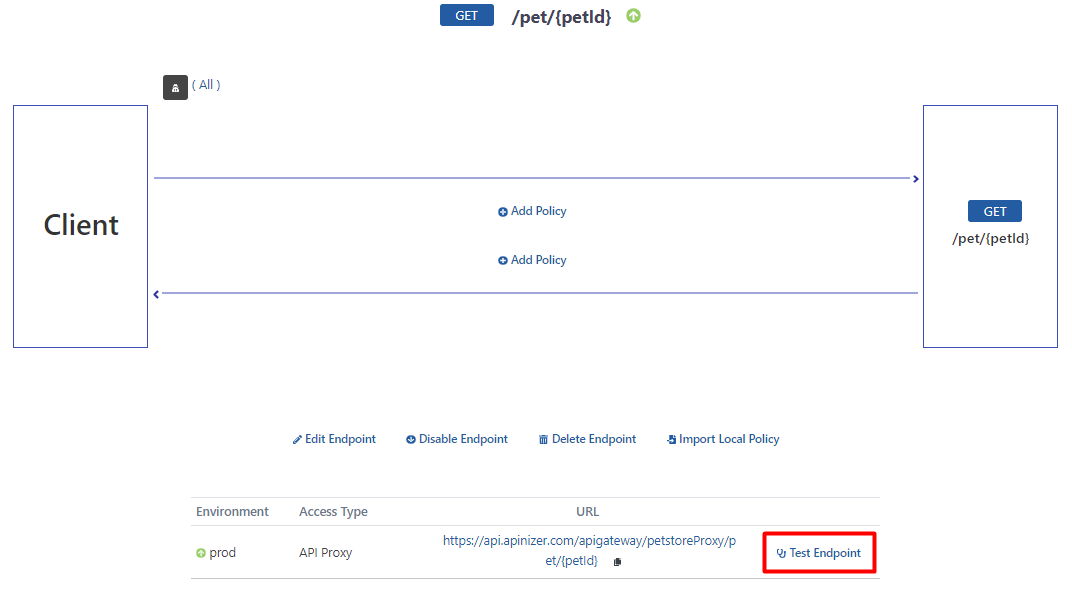 After writing the desired values in the Body, click the **Send** button and make a request to the **backend API**.
 As seen in the image below, since no **authentication** information is sent to the **backend API**, the error message in the rectangle is received as a response.
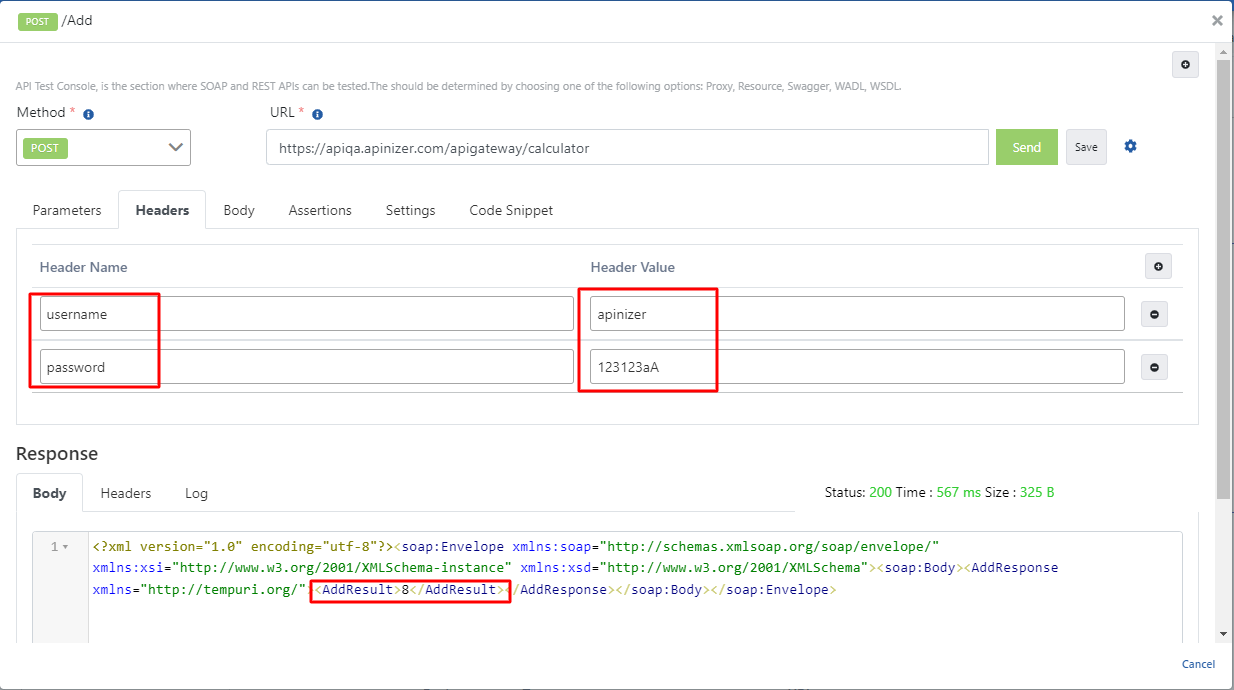
 This time, enter **username** and **password** expressions in the header and repeat the test.
Enter the values **username = apinizer**, **password = 123123aA** in the **headers** to be sent to the **Backend API**.
When the **Send** button is clicked, a successful response is received.
This time, enter **username** and **password** expressions in the header and repeat the test.
Enter the values **username = apinizer**, **password = 123123aA** in the **headers** to be sent to the **Backend API**.
When the **Send** button is clicked, a successful response is received.