

License Check
The Elasticsearch license must be Elastic Basic License. Apinizer uses the simple authentication method supported by the X-Pack security plugin included in this license. To check the Elasticsearch license information, make the following request:Enabling Security
By default, Elasticsearch security settings are not enabled. To enable the security option, add the following property to the config/elasticsearch.yml file.After this operation, the Elasticsearch application must be restarted.
Encrypting Communication Between Nodes in the Cluster (TLS Settings)
If you encounter the following error after Elasticsearch restarts, or if there are multiple nodes, the settings in this section should be configured. When security is enabled and running in a production environment, communication between Elasticsearch nodes must be encrypted. This communication occurs at the transport layer.If there are multiple nodes, this setting must be configured on all of them.
Certificate Creation
1
Creating CA certificate
Use the following command to create a certificate:
2
Creating certificate
Create a certificate using the CA certificate:
3
Moving certificates
Create the config/certs directory and move the certificates there:
Before proceeding, ensure that these certificate files have the same privileges as the Elasticsearch files.
After this operation, the Elasticsearch application must be restarted.
Creating Built-in User Passwords
Elasticsearch’s default built-in username is elastic. However, there is no password created for this username.This step is necessary to create a new user after enabling Elasticsearch security. These credentials can also be defined in Apinizer API Manager.
Adding Users
To add or update a new user, make the following request. In the request, a new user with username apinizer_es_cluster, password apinizer, and role superuser has been added.If user information is updated, it will return as “created” : false.
Password Reset
To change the password:-
When sending requests through API testing tools like Postman, Authorization: Basic <base64 encoded username:password> information must be added to the request’s header field.
-
To manage users through Kibana, go to Stack Management > Security > User from the menu. The following fields must be added to the Kibana configuration file /config/kibana.yml.
Apinizer Configuration
The username and password of the defined user are configured from the Elasticsearch Clusters page in Apinizer Manager Console.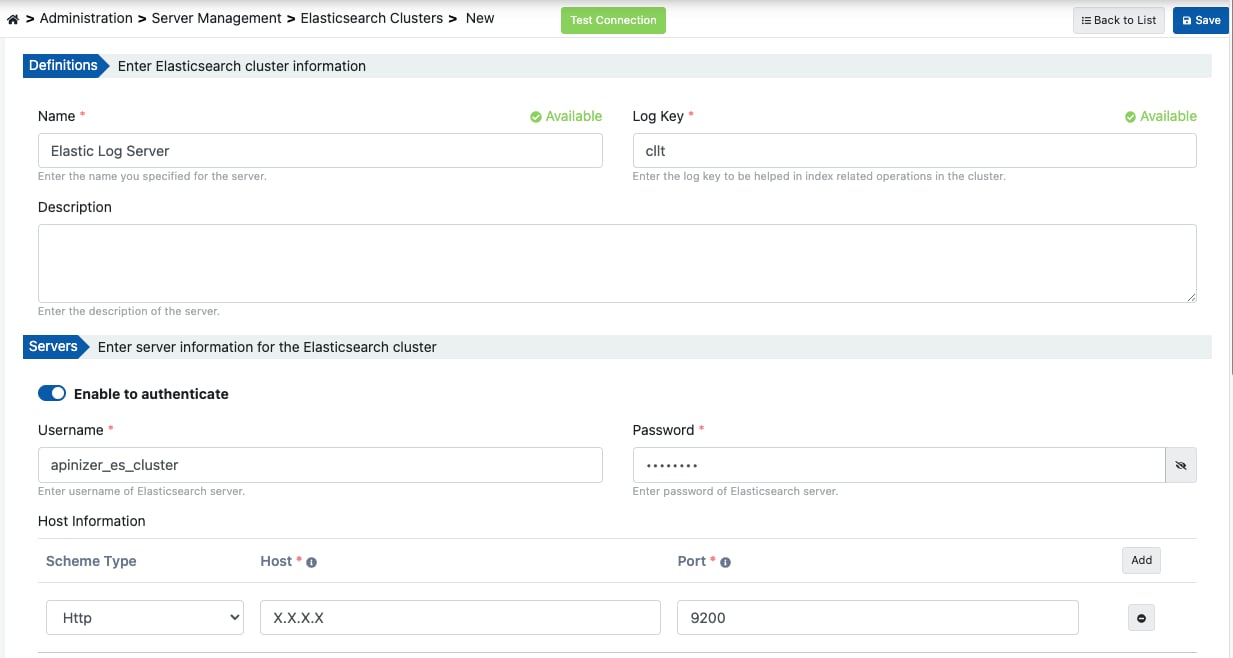
Apinizer - Elasticsearch Clusters page - Authentication configuration
1
Enabling authentication
Enable the authentication switch button.
2
Entering credentials
Enter the username and password information.