

For detailed information about the Environment Variables concept, you can refer to the Environment Variable core concepts page.
Working Logic
1. Definition Stage
Environment variables are defined at the project level and can be of two types:- Global (All Environments): Uses the same value in all environments
- Environment-Specific: Different values can be defined for each environment
2. Usage Stage
Environment variables are used in configuration fields in the${variableName} format:
- Example 1:
${BACKEND_URL}for backend address - Example 2:
jdbc:mysql://${DB_HOST}:${DB_PORT}/${DB_NAME}for database connection string - Example 3:
${API_KEY}for API key
3. Runtime Resolution
When the API Proxy is running (runtime):- Expressions in
${variableName}format in the configuration are detected - The variable value of the relevant environment (Environment) is retrieved
- Secret values are automatically decrypted
- Variable name is replaced with the actual value
- Operation continues with the actual value
- Development Environment:
BACKEND_URL = dev-api.example.com - Production Environment:
BACKEND_URL = api.example.com - In Configuration:
${BACKEND_URL} - At Runtime in Development:
dev-api.example.com - At Runtime in Production:
api.example.com
Creating Environment Variable (Create)
The visual containing the steps for creating an environment variable is shown below: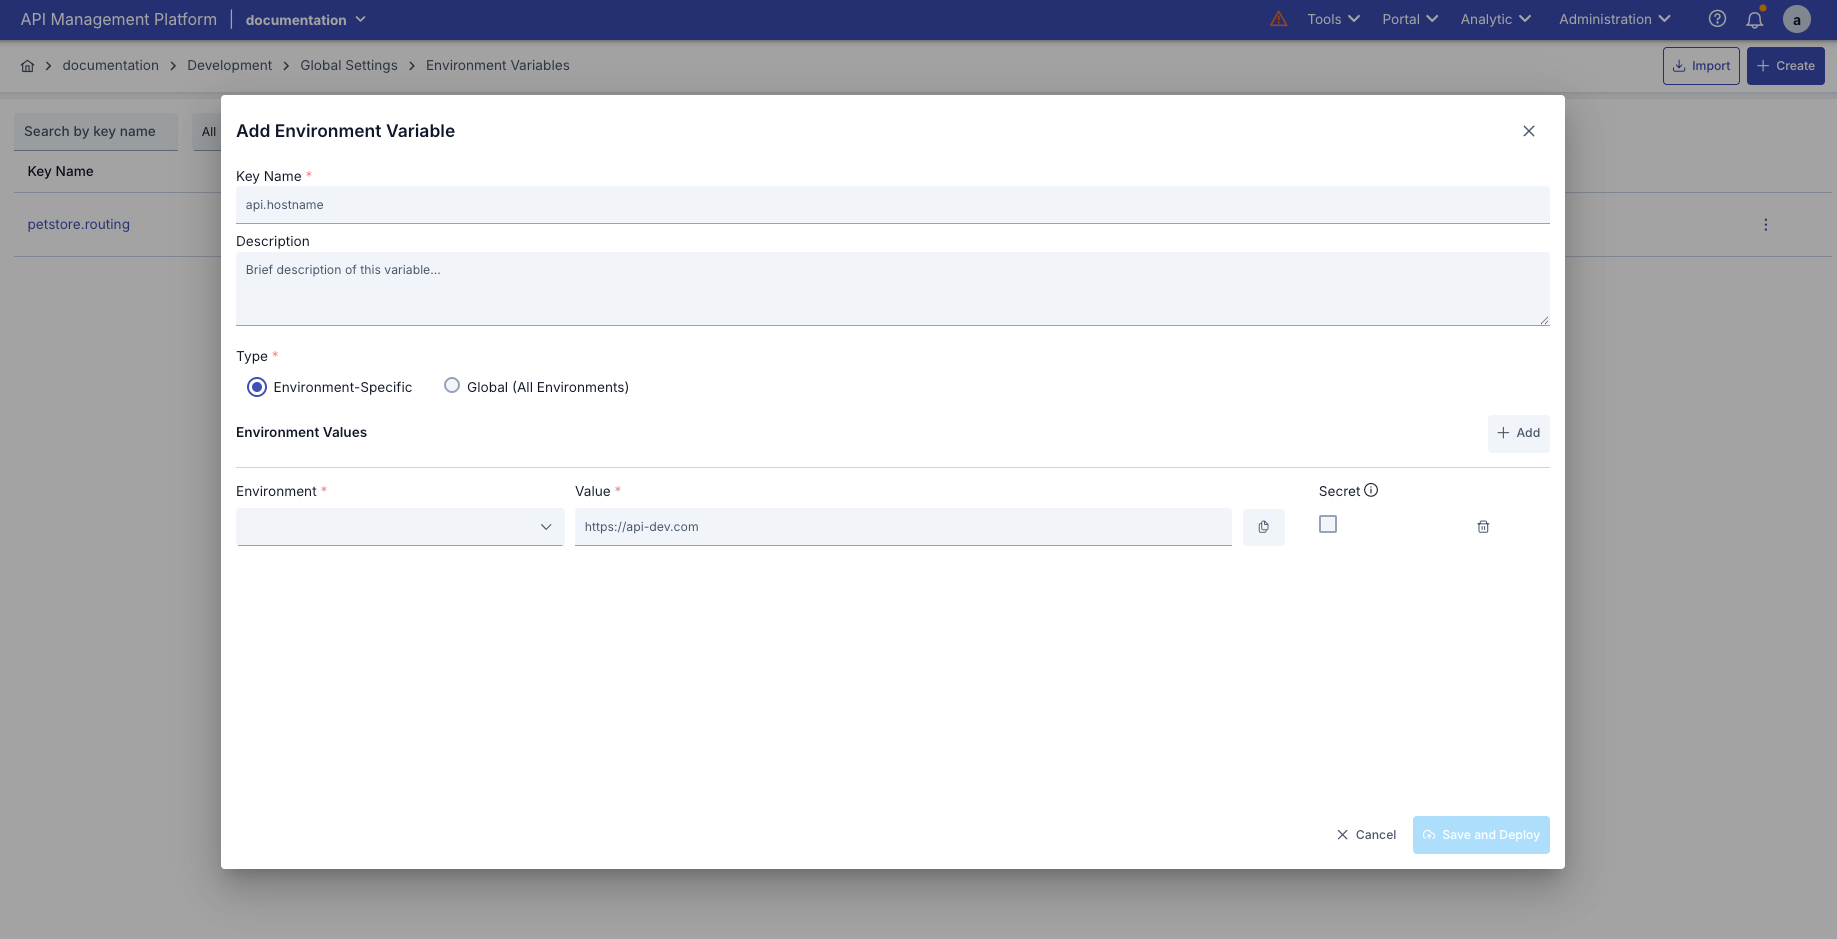
1
Adding New Environment Variable
- Go to Environment Variables page
- Click the “Create” button in the upper right corner
- Environment Variable editing window opens
2
Entering Basic Information
Key Name (Variable Name):
- Required field
- Must be unique within the project
- Name check is performed automatically
- Valid name: Green checkmark
- Existing name: Red warning sign
- Optional field
- Describes what the variable is used for
3
Type Selection
Environment-Specific:
- Different values can be defined for each environment
- Selected when creating a new record
- Cannot be changed after the record is created
- Same value is used in all environments
- Selected when creating a new record
- Cannot be changed after the record is created
Type selection can only be made when creating a new record. The type of existing records cannot be changed.
4
Value Definition
For Environment-Specific Variables:
- Adding Environment: Click “Add Environment” button to add a new environment
- Environment Selection: Select an environment for each value
- Existing environments are selected from the list
- Custom environment name can be entered with “Custom…” option
- Entering Value: Enter value for each environment
- Setting Secret: Check “Secret” checkbox for sensitive information
- Secret values are masked after saving (************)
- Secret values are stored encrypted
- If value is not changed during update, existing value is preserved
For Global Variables:
- Global Value: Enter a single value (valid for all environments)
- Setting Secret: Check “Secret” checkbox for sensitive information
5
Saving and Deployment
- Form Control: All required fields must be filled and name must be valid
- Click “Save and Deploy” button
- Confirmation Dialog:
- You are asked to enter the variable name again (for security)
- Affected components are listed:
- API Proxy Routing settings
- Policy Configuration settings
- Connector settings
- Other configuration settings
- Deployment Result:
- Automatically deployed to all running environments (Environments)
- Deployment results are displayed
Values marked as Secret cannot be viewed again after saving.
Editing Environment Variable (Edit)
Opening the Edit Modal
The edit modal can be opened in the following ways:Differences in Edit Modal
Environment Variables Usage
Environment variables can be used in various configuration fields in the Apinizer API Manager platform. This section explains in detail how environment variables are used, in which configurations they can be used, and practical examples.Usage Format
Environment variables are referenced in configuration fields using a special format. Format Structure
Format Rules
Usage Locations
Environment variables can be used in various configuration fields in the Apinizer platform. However, the Environment Variable Selection Dialog is only available in certain fields. 1. API Proxy - Routing Usage Area: Upstream Routing addresses
Usage Scenario: To use different backend addresses in different environments
2. Database Connection
Usage Area: Database connection configuration
Usage Scenario: To use different database connection information in different environments
3. LDAP Connection
Usage Area: LDAP connection configuration
Usage Scenarios and Examples
- Backend API Address Management
- Database Connection Management
- API Key Management
Problem: Different backend API addresses are used in different environments.Solution:
- Creating Environment Variable:
- Usage in Routing:
- Result:
- In Development environment, requests go to
https://dev-api.example.com - In Test environment, requests go to
https://test-api.example.com - In Production environment, requests go to
https://api.example.com
Related Pages
Environment Variable
Learn about the Environment Variables concept
Variable
Learn about the Variable concept