

General Settings
The portal’s basic configuration settings are made in this section.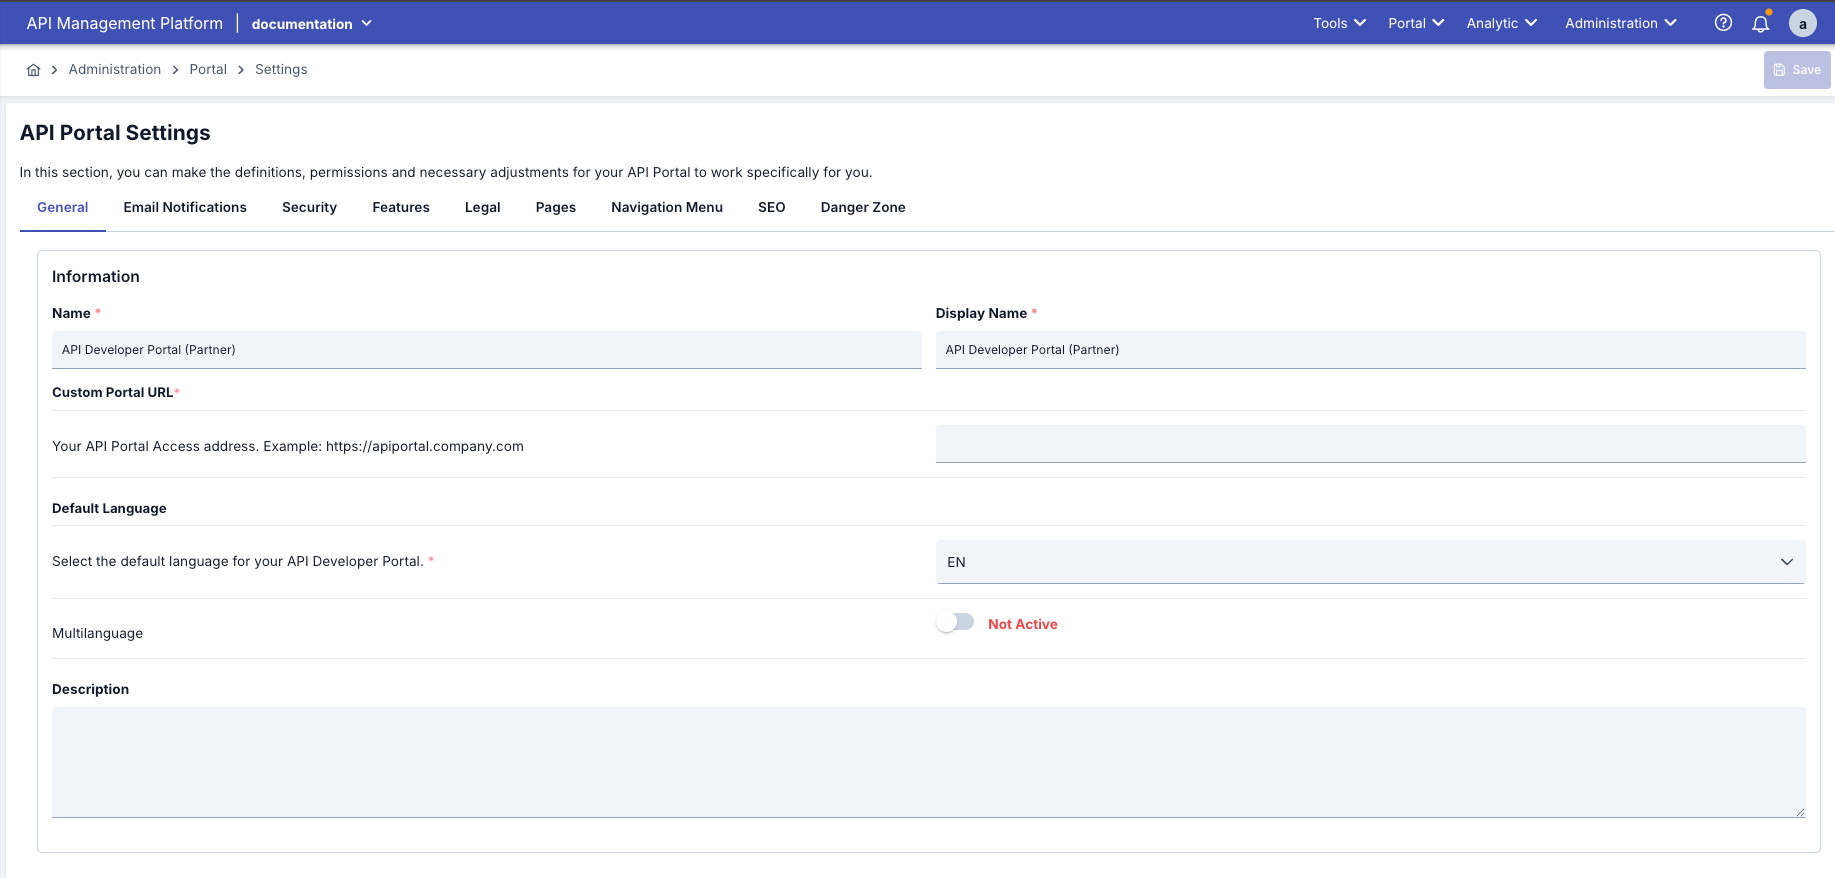
Portal Settings General
Email Notifications
Automatic emails sent to users from the portal are configured in this tab. Automatic emails are sent for operations such as user registration, approval, rejection, API subscription.
Email Settings
Email Templates
There are 8 different email types sent automatically from the portal. Each can be customized separately.Confirm Your Email Address
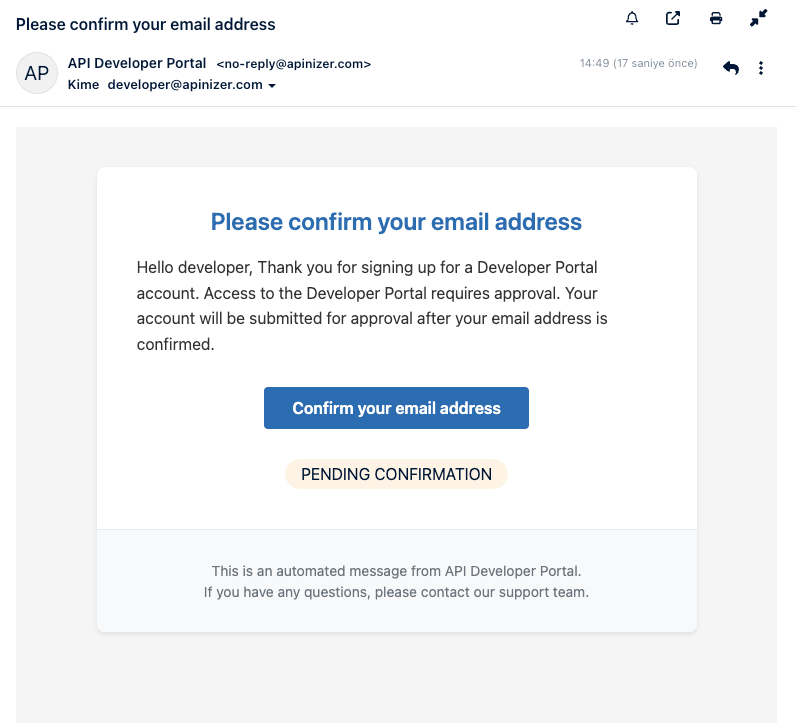
Confirm Your Email Address
- When a new user registers on the portal
- When the user needs to verify their email address
User Registers
System Sends Email
User Receives Email
User Clicks Link
Next Step (Depending on Setting)
Welcome
Welcome
- When the user’s account is approved
- After manual approval by administrator or in automatic approval situation
User Has Confirmed Email
Account is Approved (Two Scenarios)
User Receives Email
User Can Access Portal

Password Reset
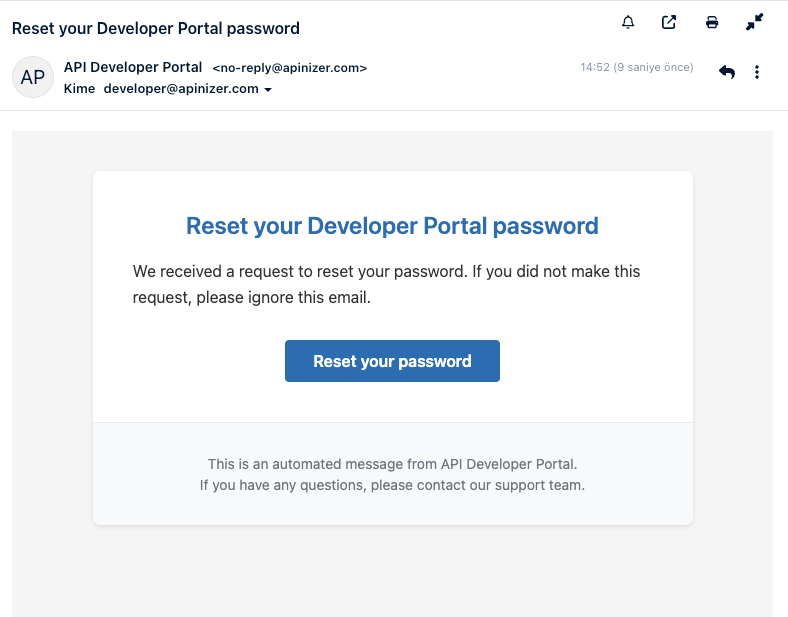
Password Reset
- When user clicks “Forgot Password” button
- When administrator initiates password reset process for user
User Forgets Password
System Sends Email
User Receives Email
User Clicks Link
Password is Updated
Account Access Rejected
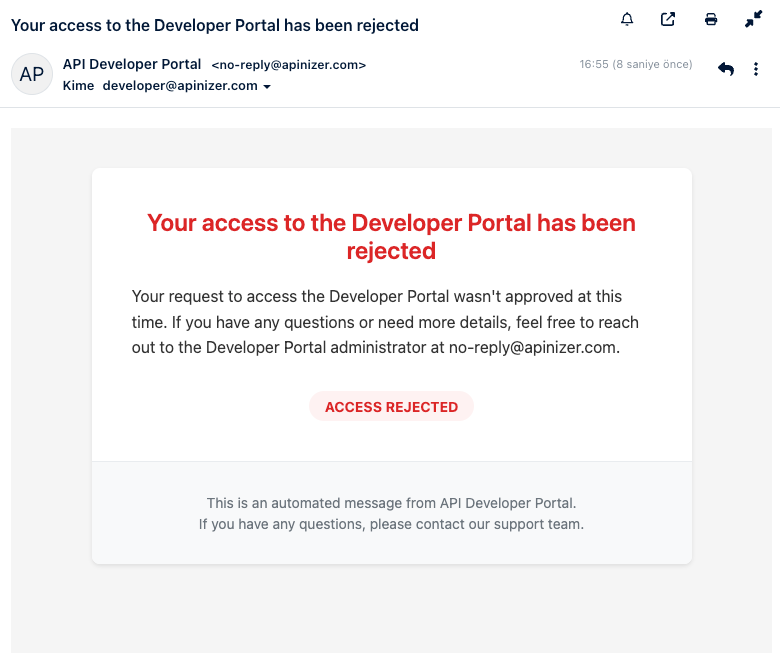
Account Access Rejected
- When administrator rejects user’s registration request
- When user is not deemed suitable in manual approval process
User Has Registered and Confirmed Email
Administrator Reviews Request
Administrator Rejects Request
System Performs Operation
User Receives Email
User Cannot Access Portal
Account Access Cancelled
Account Access Cancelled
- When access of a previously active user is cancelled
- When user is disabled by administrator
- In case of security or policy violation
User Has Active Account
Cancellation Reason Occurs
Administrator Cancels Access
System Performs Operation
User Receives Email
User Effects

App Registration Approved
App Registration Approved
- When user’s app registration request for an API is approved
- When administrator gives manual approval or in automatic approval situation
User Wants to Subscribe to API
Enters Application Information
System Processes Request (Two Scenarios)
User Receives Email
User Starts Using API

App Registration Rejected
App Registration Rejected
- When user’s app registration request for an API is rejected
- When administrator does not deem the request suitable
User Has Made Subscription Request for API
Administrator Reviews Request
Administrator Rejects Request
System Performs Operation
User Receives Email
User Options

App Registration Revoked
App Registration Revoked
- When a previously approved app registration is revoked
- In case of API usage policy violation
- When access is removed by administrator
User Has Active Subscription
Revocation Reason Occurs
Administrator Revokes Subscription
System Performs Operation
User Receives Email
User and API Effects
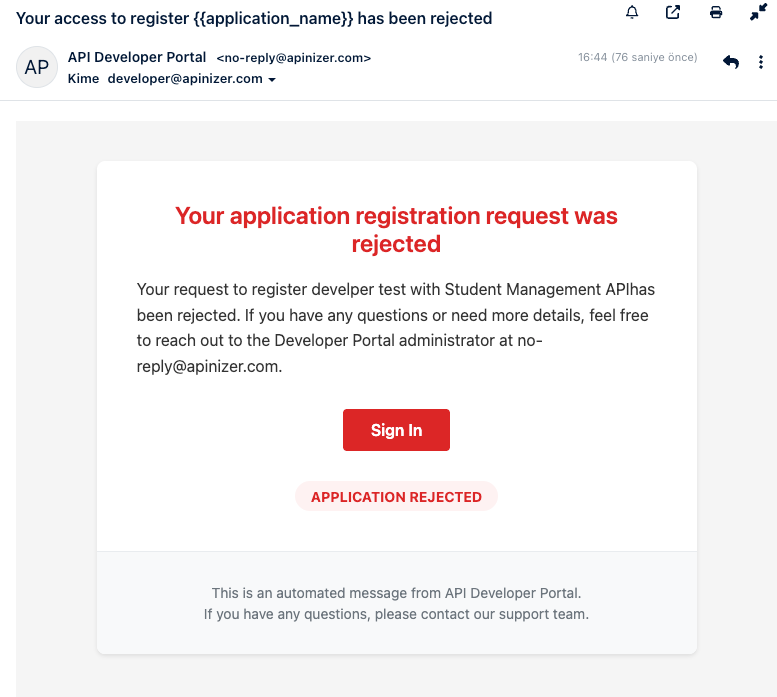
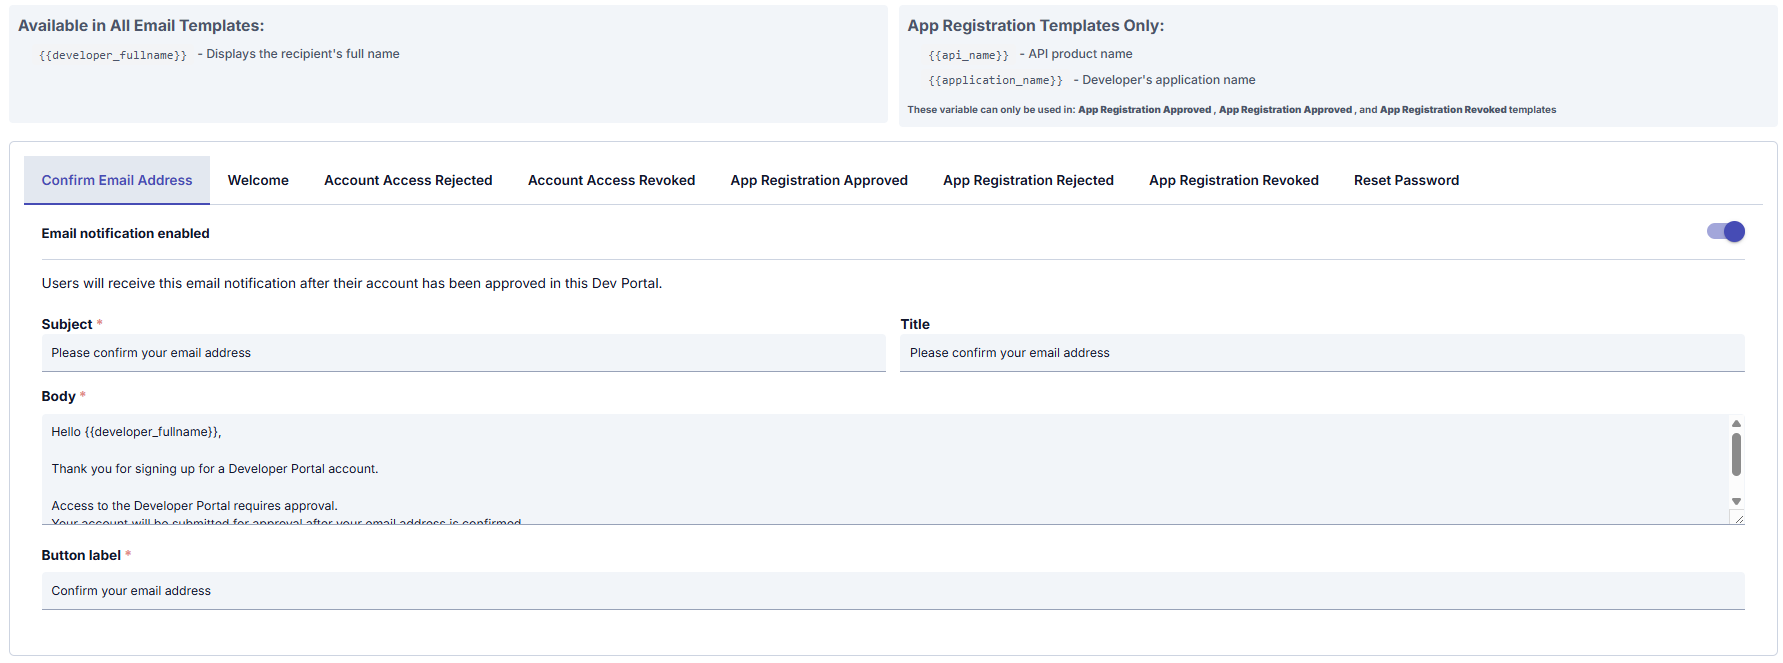
Email Template
{{developer_fullname}}
- If {{developer_fullname}} is used in the email template → The name of the user who will receive the notification is automatically written in that place. This way, personalized addressing is provided in sent emails
{{api_name}} - API product name
{{application_name}} - Developer’s application name
- If {{api_name}} is used in the email template → The name of the API product that the notification is related to is automatically written in that place.
- If {{application_name}} is used in the email template → The name of the application that the notification is related to is automatically written in that place.
Security
Privacy settings to be used on the API Developer Portal side are managed through this screen.
Security Settings
Features
Features to be used on the API Developer Portal side are managed through this screen.
Features Settings
Legal
Legal settings to be used on the API Developer Portal side are managed through this screen.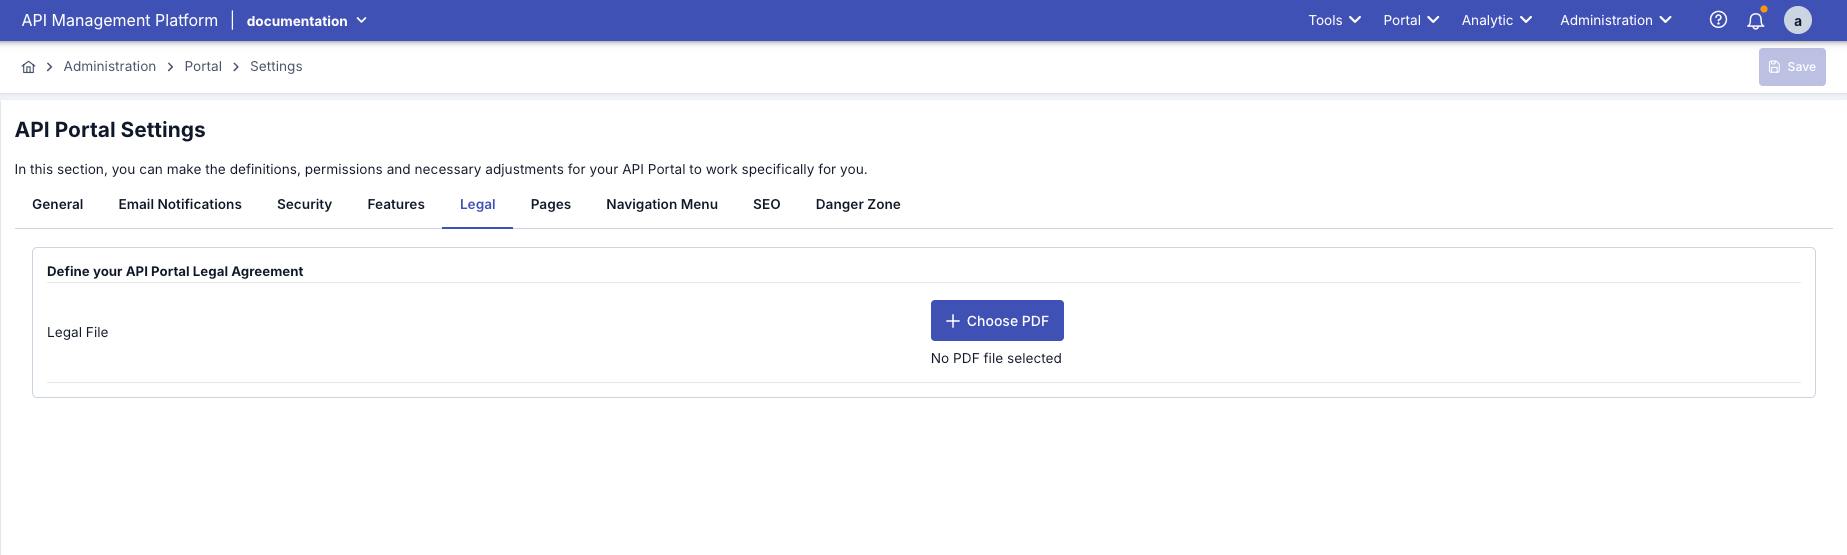
Legal Settings
SEO
SEO settings to be used on the API Developer Portal side are managed through this screen.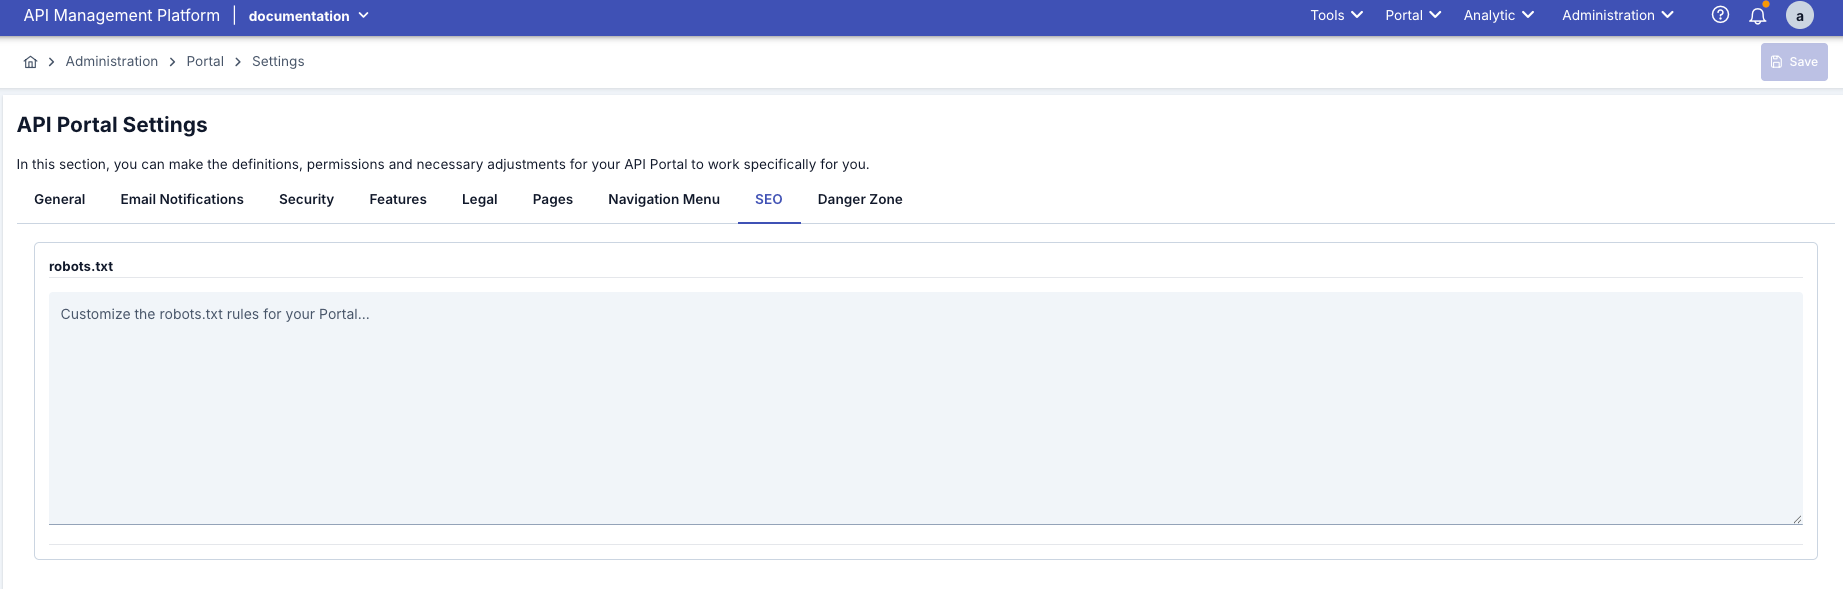
SEO Settings
Portal Content Management
In the API Portal Settings page, you can manage the portal’s content pages. In this section, you can configure settings for the home page, footer, “How It Works” page, pending page, and navigation menu.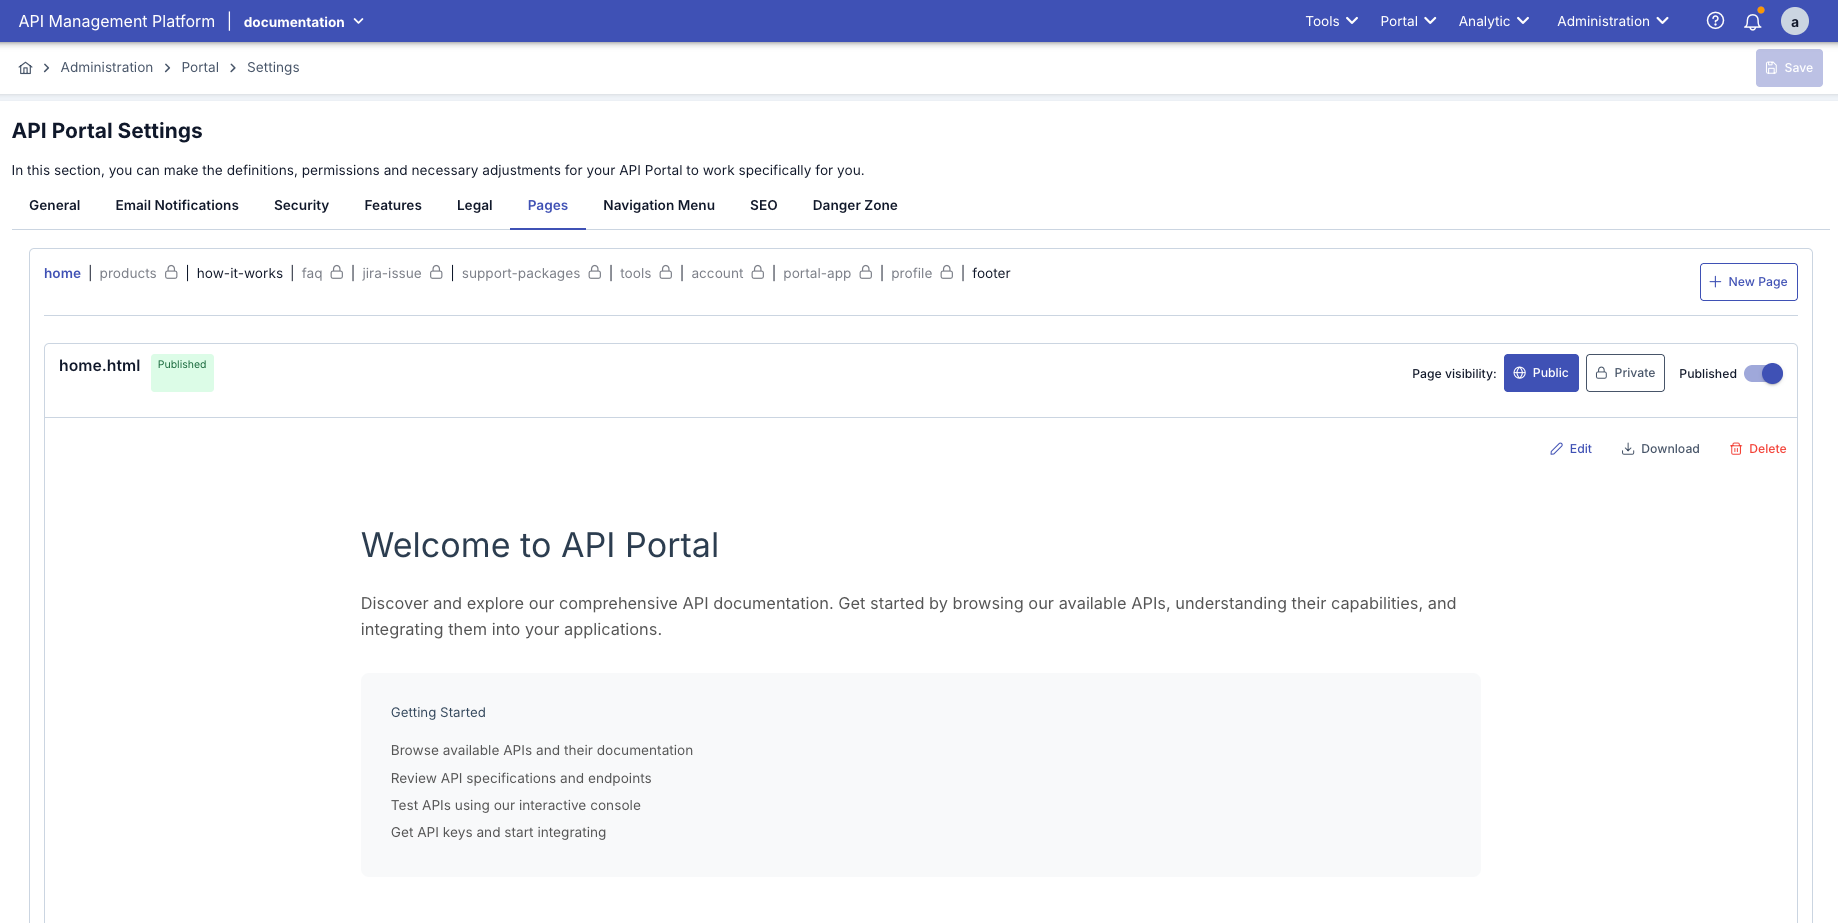
Portal Content Pages Management
Overview of Portal Pages
When each portal is created, the system automatically creates a set of default pages. These pages provide the portal’s basic functionality and can be viewed by users. Default Portal Pages:Page Access Statuses
Portal pages are categorized according to their access status:Public Pages
Public Pages
- Portal Home: Home page is open to everyone
- Footer: Visible on all pages
- How It Works: Open to everyone if feature is active
- Login Page: Login page is open to everyone
- Register Page: Open to everyone if registration permission exists
- API Catalog: Published APIs are visible to everyone (login may be required for details)
Private Pages
Private Pages
- My Apps: Only logged in users can see their own applications
- Analytics: Only logged in users can see their own statistics
- API Details: Some API details are only open to subscribed users
- Pending Page: Only users in waiting status can see it
Conditional Pages
Conditional Pages
- How It Works: Visible if “How It Works” is active in Portal Settings → Features
- Test Tools: Visible if “Test Tools” is active in Portal Settings → Features
- Analytics: Visible if “Analytics” is active in Portal Settings → Features and user is logged in
- Jira Integration: Visible if “Jira Integration” is active in Portal Settings → Features
Portal Pages Working Logic
1. Page Creation and Management: Pages for each portal are created in two ways:- Automatically Created by System
- Managed by Administrator
- Created automatically by the system when portal is created
- Come with default content
- Cannot be deleted or disabled
- Only their content can be edited
- Login Page
- Register Page
- API Catalog
- My Apps
- Default Language: Determined from Portal Settings → General Settings (can be selected from all languages defined in the system)
- Language Options: Any number of languages can be activated from all languages defined in the system (Turkish, English, German, French, Spanish, Italian, etc.)
- Content Management: Separate content can be prepared for each language
- Automatic Redirect: System shows appropriate content based on user’s language preference
- Portal Settings: Pages can be activated/deactivated from feature settings
- User Status: Based on logged in/not logged in user status
- User Roles: Based on user role (Admin, Developer, Guest)
- API Subscription Status: Some pages are only open to subscribed users
Page Management Operations
You can perform the following operations to manage portal pages:Content Editing
Multi-Language Management
Preview
Visibility Control
Portal Home Page
The portal home page is the page that users see when they first enter the portal. This page contains portal introduction texts, guiding descriptions, links, or visual content. Portal Home Page Features:Portal Home Page Settings
- Welcome Title: “Welcome to [Portal Name]”
- Short Description: General information about the portal
- Action Cards:
- “How It Works?” - Redirects to How It Works page
- “Discover Our APIs” - Redirects to API catalog
- “Register” - Redirects to registration page
- “Contact Us” - Redirects to contact page
Go to Portal Home Page Tab
- Click on “Portal Home” or “Home Page” tab in API Portal Settings page
- Home page content editing screen opens
Content Editing
- Write HTML code
- Use Markdown format
- Add headings, paragraphs, lists, links
- Add images and tables
Multi-Language Support
- Portal Home (TR): Turkish content area
- Portal Home (EN): English content area
- Portal Home (DE): German content area (if enabled)
- Portal Home (FR): French content area (if enabled)
- And other enabled languages…
Preview
- You can see in real-time how your HTML content will appear on the portal
- Preview automatically updates as you make changes
- You can check mobile and desktop views
Saving Content
- After preparing the content, click the “Save” button at the top of the page
- Changes are saved and immediately reflected on the portal home page
- Portal users will see the new content when they refresh the page
- Portal welcome message and title
- Short description about the portal
- Action cards like “How It Works?”, “Discover Our APIs”, “Register”, “Contact Us”
- Featured APIs or features
- Corporate information and links
- Images, banners, or video content
- Statistics or success stories
-
Users Not Logged In:
- Can view the home page
- Can get information about the portal
- Can register by clicking “Register” button
- Can see API catalog with “Discover Our APIs” (only published APIs)
-
Logged In Users:
- Can view the home page
- Can access “My Apps” menu
- Can subscribe to APIs
- Can access Analytics page (if feature is active)
-
Administrators:
- Can view the home page
- Can access all features
- Can perform portal management operations
Footer
Footer is the content area displayed at the bottom of the portal. It usually contains contact information, legal texts, copyright statements, or corporate links. Footer Features:- Home page
- API catalog
- API detail pages
- How It Works page
- Login and Register pages
- User panel pages (My Apps, Analytics)
Go to Footer Tab
- Click on “Footer” or “Footer” tab in API Portal Settings page
- Footer content editing screen opens
Editing Footer Content
- Contact information (address, phone, email)
- Social media links and icons
- Legal texts (Terms of Service, Privacy Policy)
- Copyright information
- Corporate links
- Logo or images
Multi-Language Support
- Footer (TR): Turkish footer content
- Footer (EN): English footer content
- Footer (DE): German footer content (if enabled)
- Footer (FR): French footer content (if enabled)
- And other enabled languages…
Preview and Save
- You can preview how the footer will appear on the portal on the right
- After making changes, click the “Save” button
- Footer content is immediately reflected at the bottom of the portal
- Company name and logo
- Contact information (address, phone, email)
- Social media icons (LinkedIn, Twitter, GitHub, etc.)
- Quick links (About Us, Support, Documentation)
- Legal links (Terms of Service, Privacy Policy)
- Copyright information (© 2024 Company Name)
How It Works
The “How It Works” page is an informative page that explains the system’s general operation, API access process, or registration/step-by-step usage guide to portal users. How It Works Features:- Title: “How It Works” or “Nasıl Çalışır”
- General Description: General information about portal usage
- Step-by-Step Guide: Basic usage steps
- API Access Process: How to access APIs
- Registration Process: How to register on the portal
-
If Feature is Active:
- Portal Settings → Features → “How It Works” is active
- “How It Works?” link appears in portal top menu
- Everyone (logged in/not logged in) can access the page
-
If Feature is Passive:
- Link does not appear in portal top menu
- Users cannot access even if page content is prepared
- Direct URL access may not be possible
Go to How It Works Tab
- Click on “How It Works” or “How It Works” tab in API Portal Settings page
- How It Works content editing screen opens
Preparing Content
- Step-by-step usage guide
- API access process description
- Registration and account creation steps
- API usage examples
- Frequently asked questions
- Icons, numbered lists, and images
Multi-Language Support
- How It Works (TR): Turkish content
- How It Works (EN): English content
- How It Works (DE): German content (if enabled)
- How It Works (FR): French content (if enabled)
- And other enabled languages…
Appearance in Portal Menu
- The How It Works page appears as “How It Works?” or “Nasıl Çalışır?” link in portal top menu
- When this link is clicked, the content you prepared is shown
- For it to appear in the menu, the “How It Works” feature must be active in Portal Settings → Features section
Saving
- After preparing the content, click the “Save” button
- Changes are saved and the page becomes accessible from the portal menu
- Steps to register on the portal
- Process of discovering and reviewing APIs
- Application registration and API subscription process
- Getting and using API keys
- Steps to make API calls
- Troubleshooting and support information
Pending Page
The Pending Page is a waiting page that users view while waiting for account approval or until a certain operation is completed. This page informs users about their status and explains what they need to do. Pending Page Features:- Title: “Your Account is Pending Approval” or “Hesabınız Onay Bekliyor”
- Description: Information about account approval process
- Waiting Message: “Your account is being reviewed. You will be notified once it’s approved.”
- Contact Information: Instructions to contact support team
Waiting for Account Approval
Waiting for Account Approval
- Portal Settings → Security → “Auto Approve Account” = PASSIVE
- User has confirmed email address
- Administrator has not yet approved the account
- When user tries to log in, Pending Page is displayed
- “Your account is pending approval” message is shown
- User cannot access portal content
Waiting for API Subscription Approval
Waiting for API Subscription Approval
- Portal Settings → Security → “Auto Approve API Subscribe” = PASSIVE
- User has subscribed to API
- Administrator has not yet approved the subscription
- When user goes to API detail page, Pending Page may be displayed
- “Your subscription is pending approval” message is shown
- User cannot use the API
Account Suspension
Account Suspension
- Administrator has suspended user account
- Account is not completely deleted, only temporarily disabled
- When user tries to log in, Pending Page is displayed
- “Your account is temporarily suspended” message is shown
- Contact information is provided
Go to Pending Page Tab
- Click on “Pending Page” or “Pending Page” tab in API Portal Settings page
- Pending Page content editing screen opens
Preparing Waiting Page Content
- Message informing user about status
- Instructions explaining what they need to do
- Information about waiting period
- Contact information (for questions)
- Visual elements (icons, animations)
Multi-Language Support
- Pending Page (TR): Turkish content
- Pending Page (EN): English content
- Pending Page (DE): German content (if enabled)
- Pending Page (FR): French content (if enabled)
- And other enabled languages…
When It Is Displayed
- User has registered and confirmed email, but account has not yet been approved (Auto Approve Account = PASSIVE)
- User has subscribed to API, but subscription has not yet been approved (Auto Approve API Subscribe = PASSIVE)
- User account has been suspended or temporarily disabled
Saving
- After preparing the content, click the “Save” button
- Changes are saved and users in waiting status will see this page
- “Your account is pending approval” message
- Information about approval process
- Estimated waiting time
- Contact information (support team for questions)
- Instructions for status check
- Reassuring messages
Navigation Menu
Navigation Menu allows you to manage the menu structure visible at the top of the portal. You can control which pages appear in this menu, their order, and visibility. Navigation Menu Features:- Always Visible
- Visible If Feature is Active
- For Logged In Users
- Home: Always visible (cannot be deleted)
- APIs: Always visible (cannot be deleted)
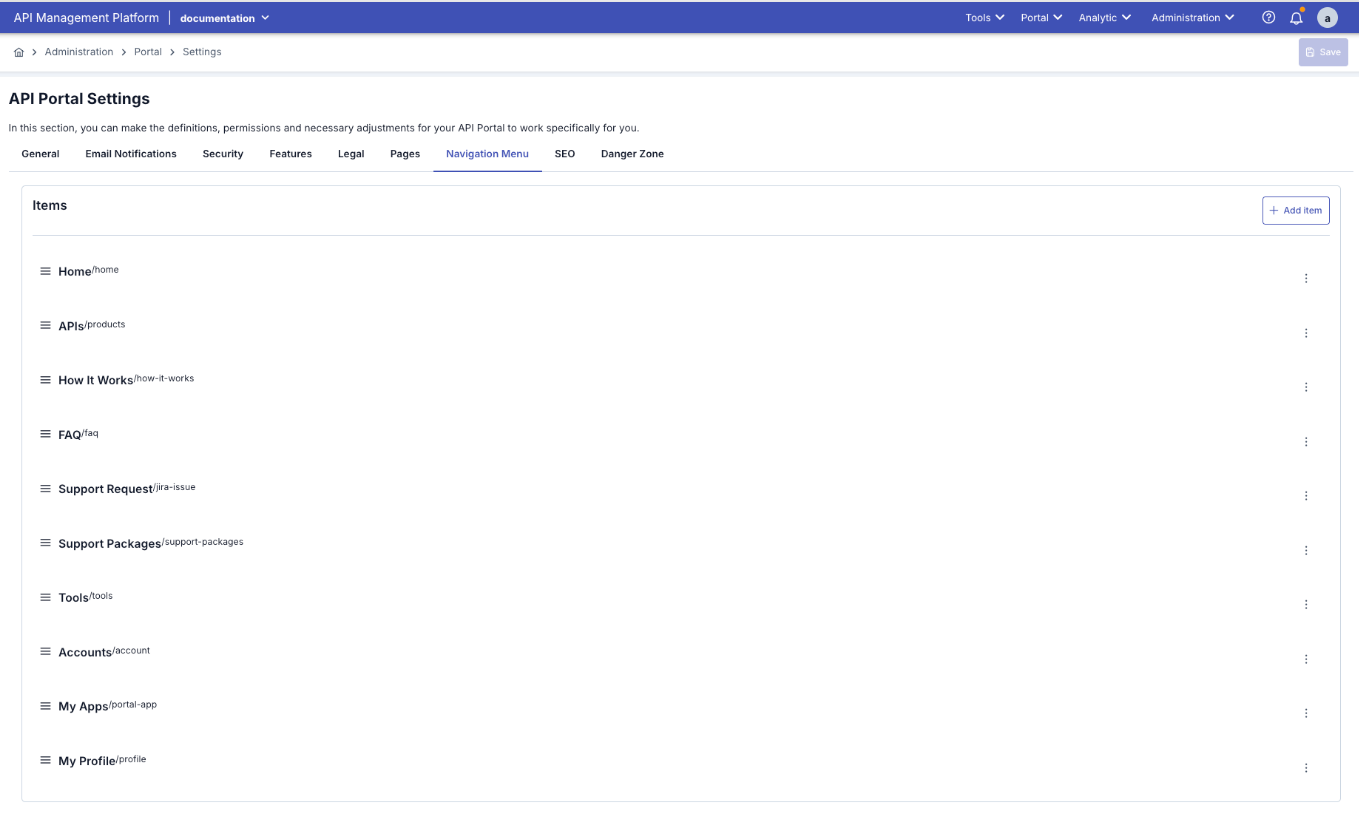
Navigation Menu Management
Go to Navigation Menu Tab
- Click on “Navigation Menu” or “Navigation Menu” tab in API Portal Settings page
- Navigation menu management screen opens
Managing Menu Items
- Home: Home page link
- APIs: API catalog page
- How It Works: How It Works page (visible if feature is active)
- Test Tools: Test tools page (visible if feature is active)
- My Apps: User’s applications page (for logged in users)
- Analytics: Analytics page (if feature is active and user is logged in)
- Visibility: Determine whether menu item will be visible
- Sorting: Change order of menu items (drag & drop or sequence number)
- Label: Change the display name of menu item
- Link: Determine which page the menu item will redirect to
Adding Menu Item
- Click ”+ Add Menu Item” or ”+ Add Menu Item” button
- Menu item form opens
- Label: Enter the name that will appear in the menu
- Link: Enter the URL to redirect to (internal or external link)
- Order: Determine its position in the menu
- Visibility: Select which users it will be visible to (All, Only Logged In, Only Guests)
- Click “Save” button
Editing Menu Item
- Click “Edit” or edit icon next to the menu item
- Menu item form opens
- Make changes
- Click “Save” button
Deleting Menu Item
- Click “Delete” or delete icon next to the menu item
- Say “Yes” in the confirmation dialog
- Menu item is removed from the menu
Changing Menu Order
- Drag and drop menu item to desired position
- Or change order from sequence number field
- Changes are previewed immediately
Saving
- After making all changes, click the “Save” button at the top of the page
- Menu structure is saved and immediately appears in portal top menu
Portal Content Management Summary
Portal Pages Management Logic: Portal content management works according to the following principles: 1. Default Pages:- Automatically created by the system when each portal is created
- Come with default content
- Content can be customized
- Cannot be deleted or disabled
- Managed from Portal Settings → Portal Content Management section
- HTML format content can be added
- Multi-language support available
- Preview feature available
- Public Pages: Open to everyone (including users not logged in)
- Private Pages: Only logged in users
- Conditional Pages: Shown/hidden based on feature settings
- If multi-language is active in Portal Settings → General Settings
- Content can be prepared in all enabled languages for each page (Turkish, English, German, French, Spanish, etc.)
- System shows appropriate content based on user’s language preference
- Content changes are immediately reflected on the portal
- Page refresh is sufficient
- Browser cache may need to be cleared
Login Log
The Login Log tab appears in the API Portal Settings header between SEO and Danger Zone. Use this tab to control whether portal user login audit records are written to MongoDB and whether they are forwarded to configured connectors (Elasticsearch, Kafka, Webhook, etc.). These settings are scoped per portal.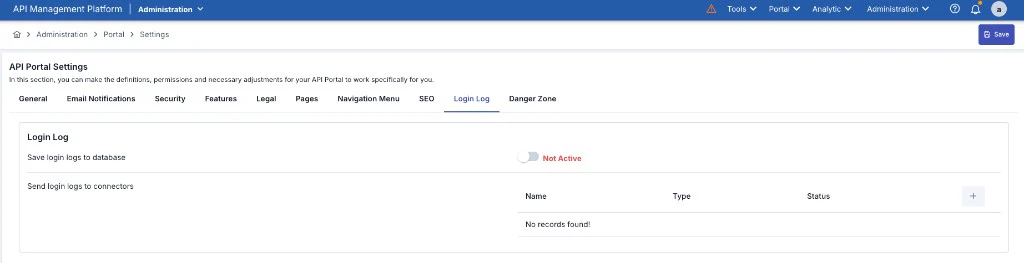
Danger Zone
Danger Zone is the section where critical and irreversible operations for the portal are performed. This section contains permanent operations such as portal deletion.
Danger Zone - Critical Operations
Portal Deletion
Portal deletion permanently deletes the portal and all its data. This operation cannot be undone.Go to Danger Zone Tab
- Click on “Danger Zone” or “Danger Zone” tab in API Portal Settings page
- Critical operations are listed
Click Portal Deletion Button
- Click “Delete Portal” or “Delete Portal” button
- Confirmation dialog opens
Confirm Portal Name
- You are asked to enter the portal name exactly in the confirmation dialog
- Make sure you enter the portal name correctly
- This step is to prevent accidental deletion
Confirm Deletion Operation
- After entering the portal name correctly, click “Yes, Delete” or “Yes, Delete” button
- Portal is permanently deleted
- All data (users, APIs, content, statistics) is deleted