

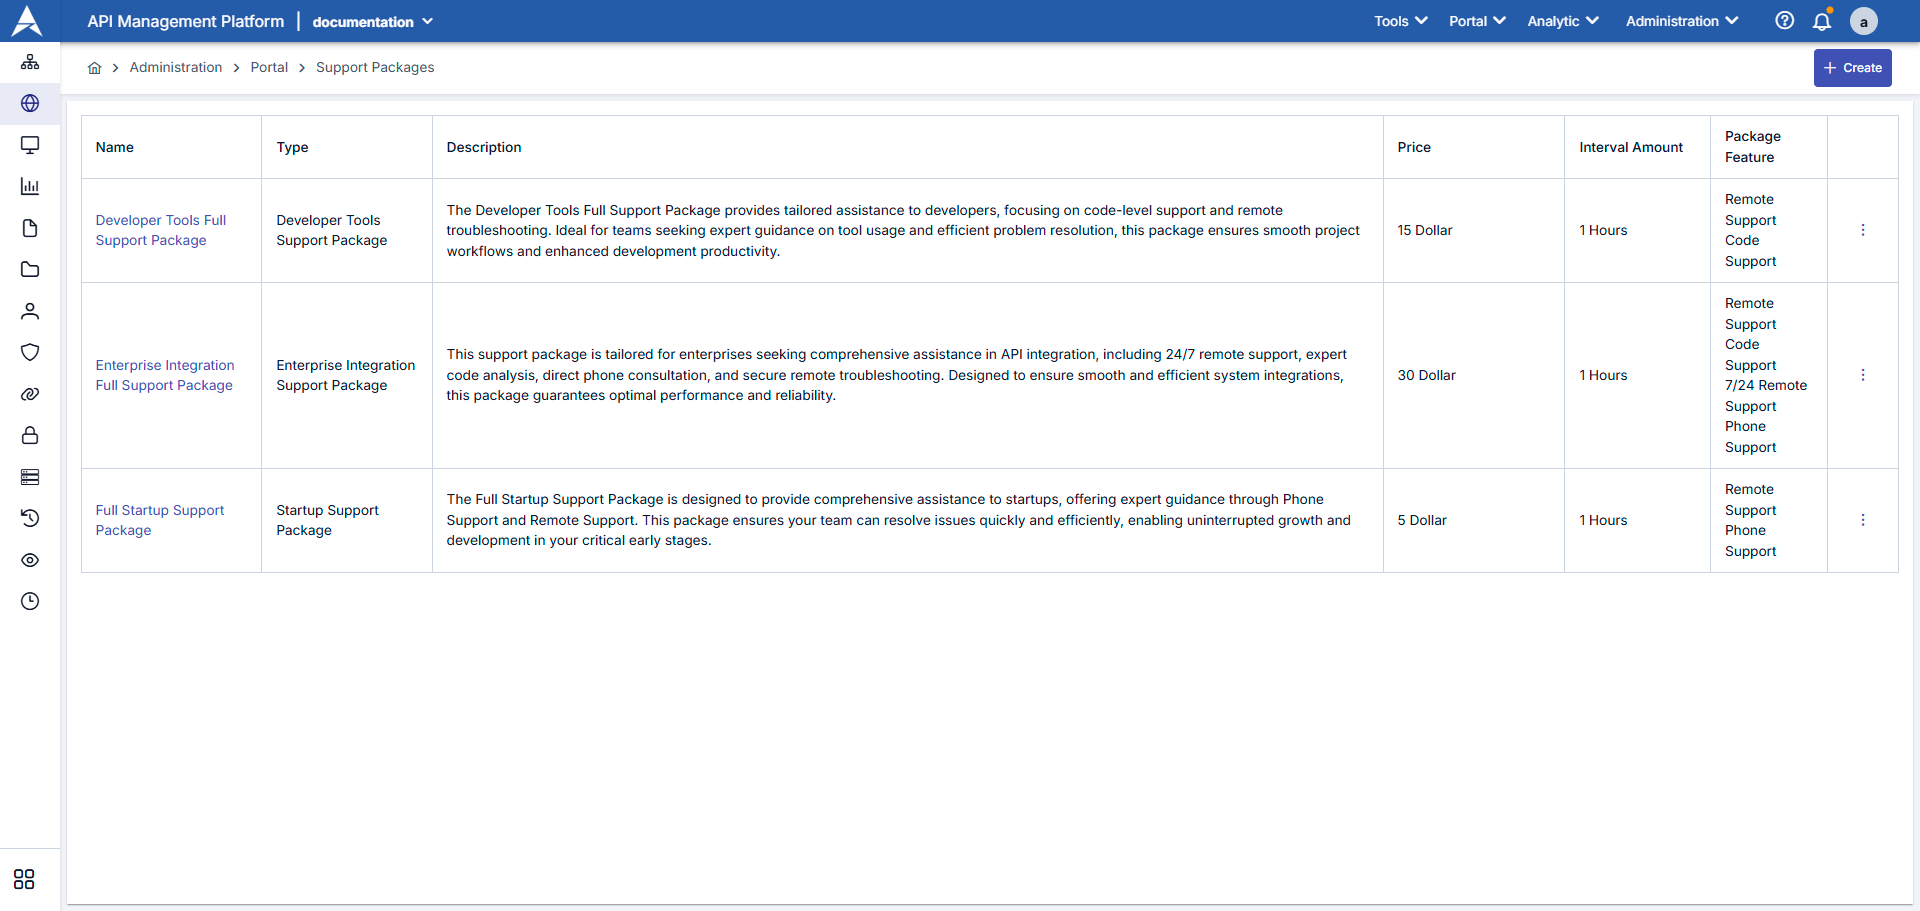
Support Packages List Screen
Creating a New Support Package
To create a new support package, click the ”+ New” button and fill in the following information: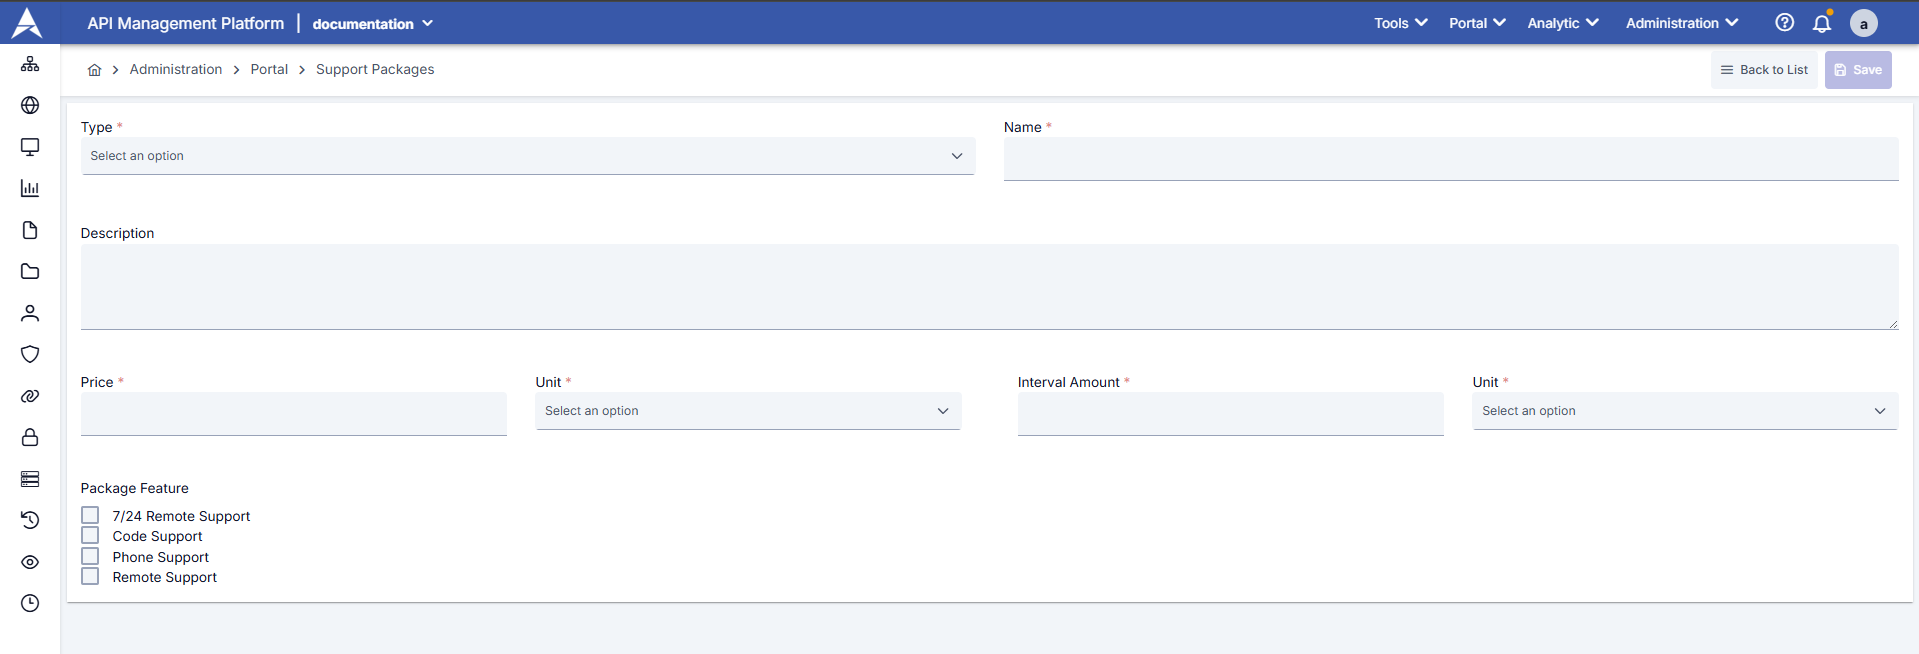
Support Package Creation Form
1
Enter List Screen
Open the Portal Management heading from the left menu.
Click on Support Packages option.
Verify that existing packages are listed.
2
Open Creation Form
Click the New Support Package button in the top right.
support-package-update form opens as modal/panel.
3
Enter Basic Information
Name: Write the name that will appear on the portal (e.g., “Premium Support”).
Description: Enter a short description that users can understand the package scope.
Support Package Type: Select one of the previously defined package types (e.g., Bronze, Silver, Gold).
SLA Level: Specify expected response time or SLA metric.
Available Channels: Select support channels such as phone, email, ticket.
4
Add Package Features
In the “Features” section, select features you defined on the
Support Package Feature screen (e.g., 24/7 support, dedicated customer representative).
Fill in the description of each feature that will appear on the portal.5
Pricing and online information
If the package is paid, enter the price field and currency.
If you want to use a badge or icon to be displayed on the portal, fill in the relevant fields.
6
Saving
Click the
Save button.Appearance and Data Flow on Portal
In the Portal application, users list support packages. Packages that areActive in Manager are listed on the portal; those that are Passive are not visible. When a user selects a package, the package’s features and the type it belongs to are shown on the detail page. When the user presses the Request Support Package or similar button, they fill out the request form; the request appears on the Support Package Request screen in Manager.
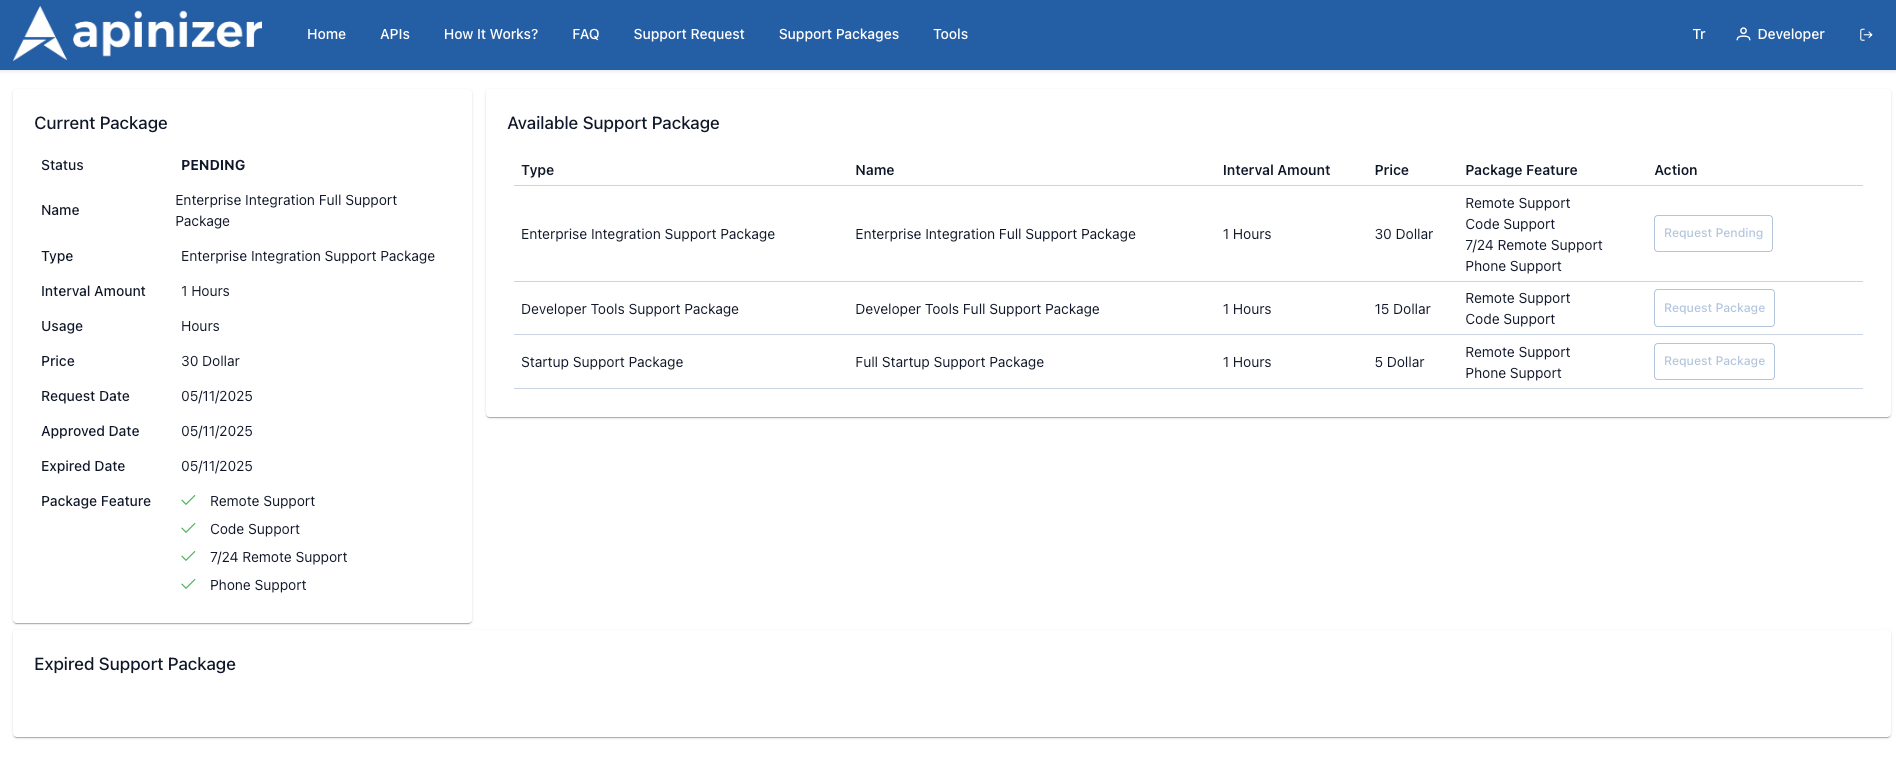
Support Packages View on Portal