

API Product Access Settings
Users do not directly access APIs; they first create an application and request access to the API product through this application. API products are configured as public by default. In this case, when a user requests access to an API through their application, the request is automatically approved and the user immediately gains access. However, the product owner can change the “Access requests from applications” setting found for each product on the Apinizer API Manager > Administration > Portal > API Products page with configure. This setting is shown in the image below:This setting is configured per product and each API product can be managed independently. A change in one product does not affect other products.
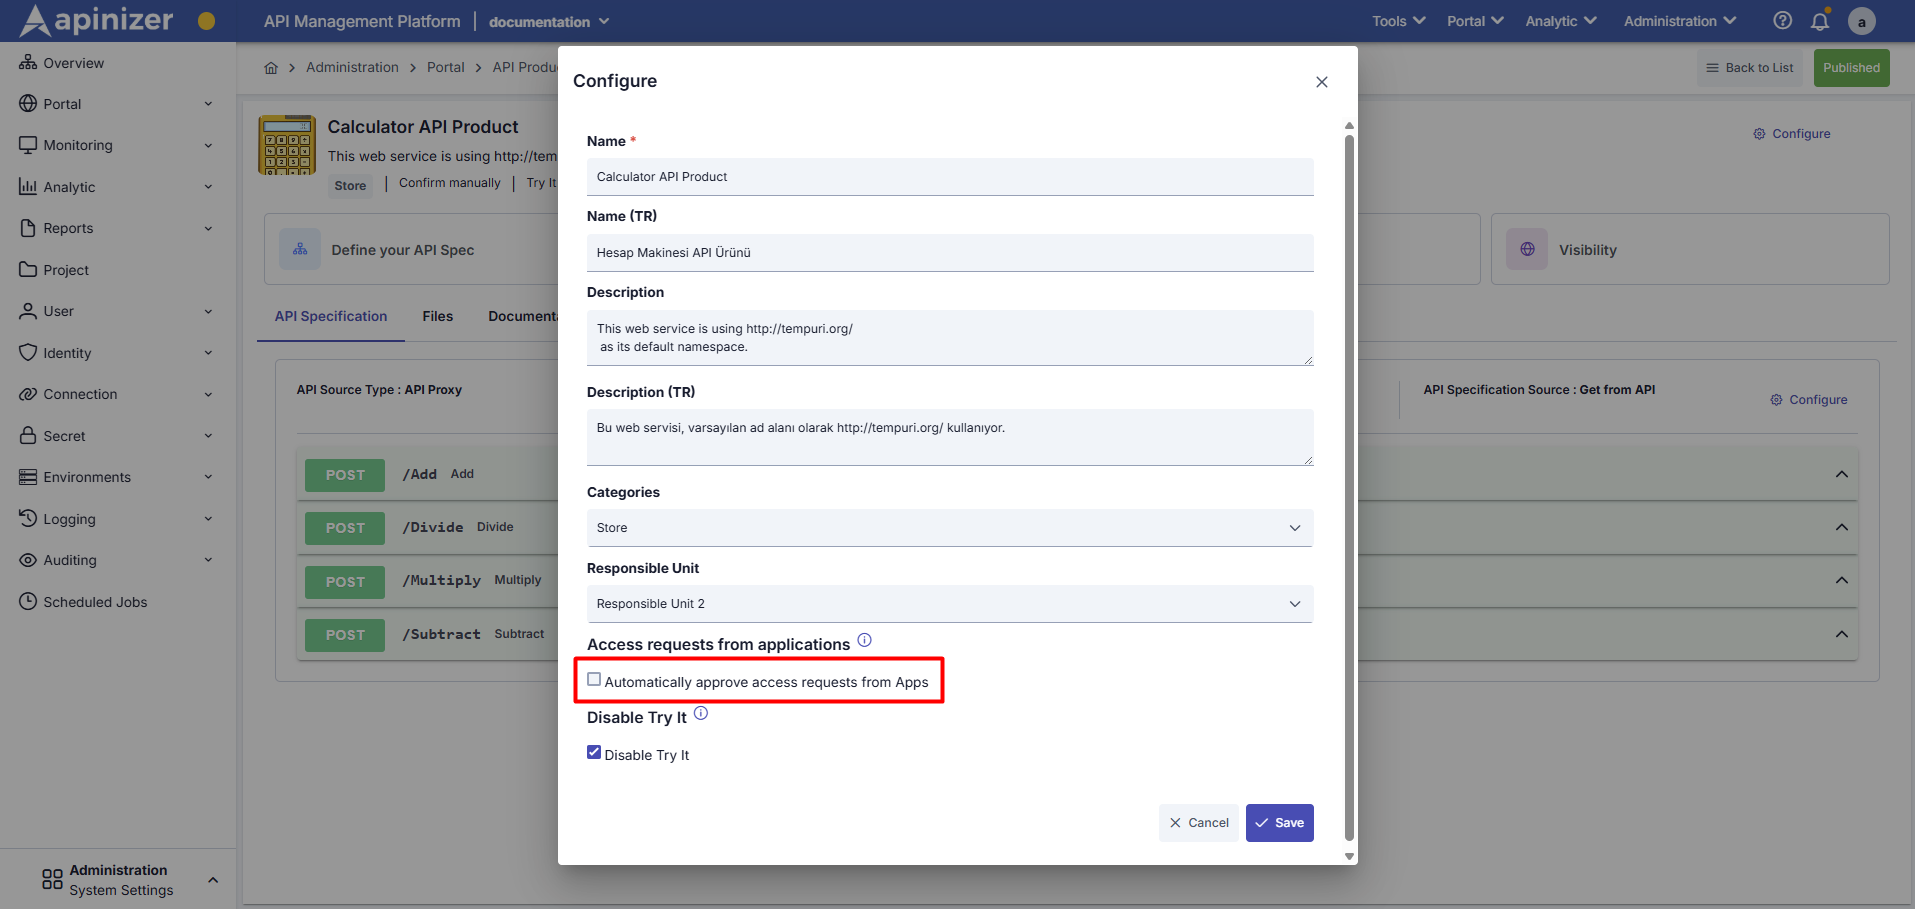
- When option is checked: Access requests from applications are automatically approved (default state).
- When option is unchecked: Users cannot automatically gain access. In this case, the user requests access through their application and must wait for the product owner’s manual approval.
Usage in Portal Interface
After automatic application approval is turned off and saved, it can be tested from Portal as follows. On the API Portal Screen, APIs are selected and the relevant product is opened, and the following operations are applied.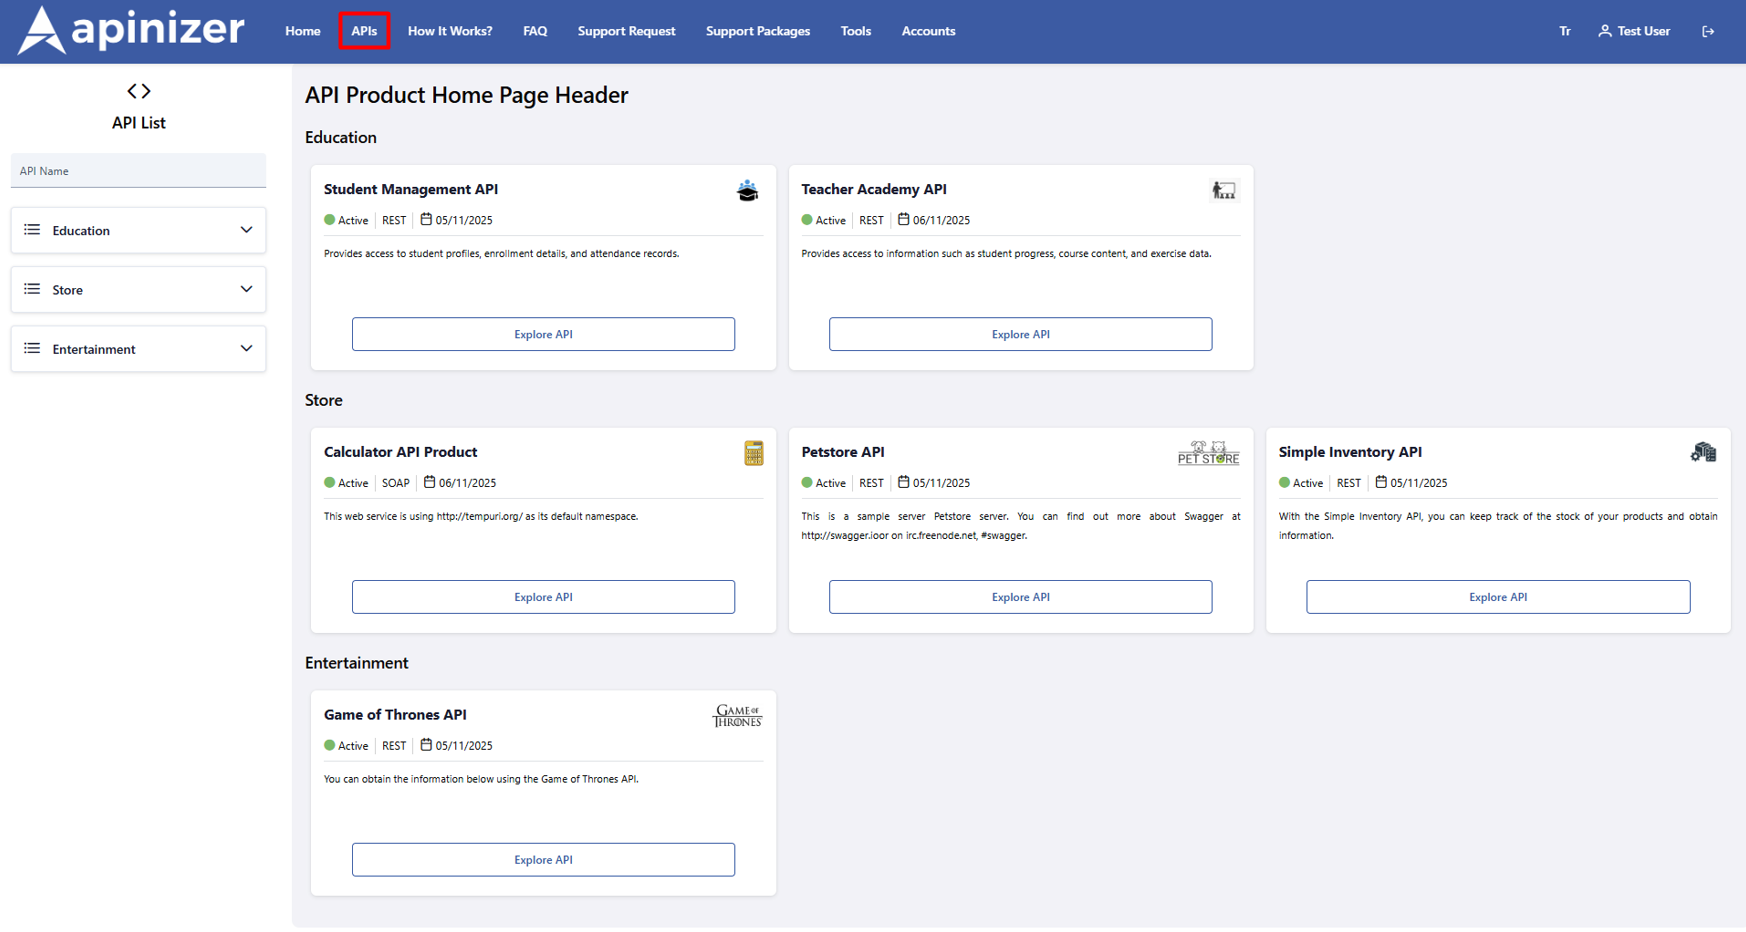
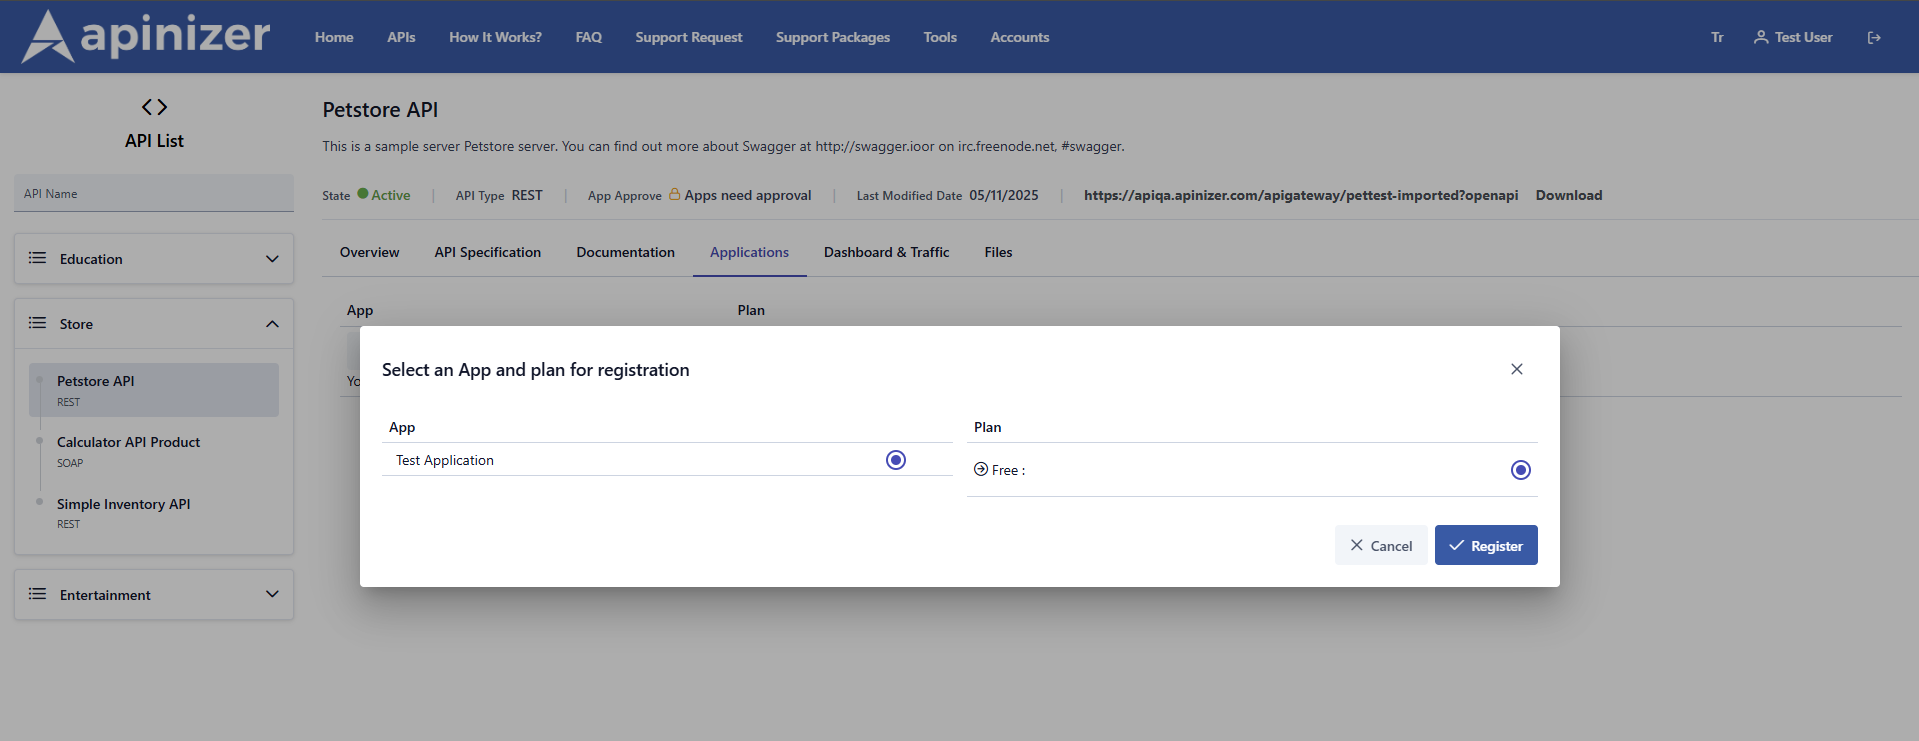
You can review the APIs Visibility by Organization page on the API product page to set plan options.
1
Access API Portal Page and Product Selection
The user who wants to use the API enters the Portal > APIs page. On this page, API products grouped by categories (Education, Store, Entertainment, etc.) are listed. The user selects the API product they want to use and clicks the “Explore API” button.
2
API Product Detail Page and Application Creation
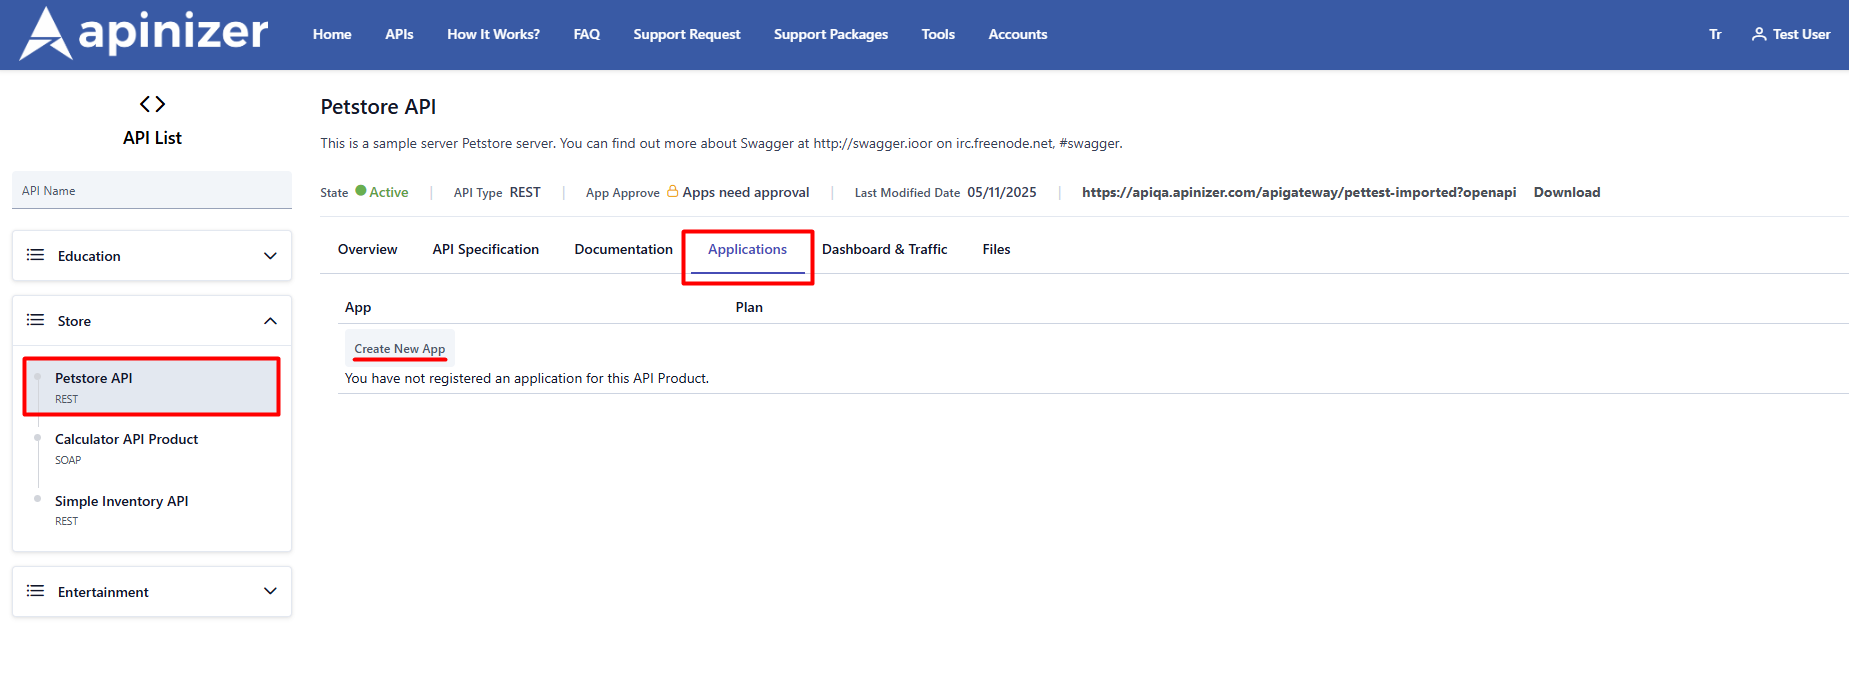
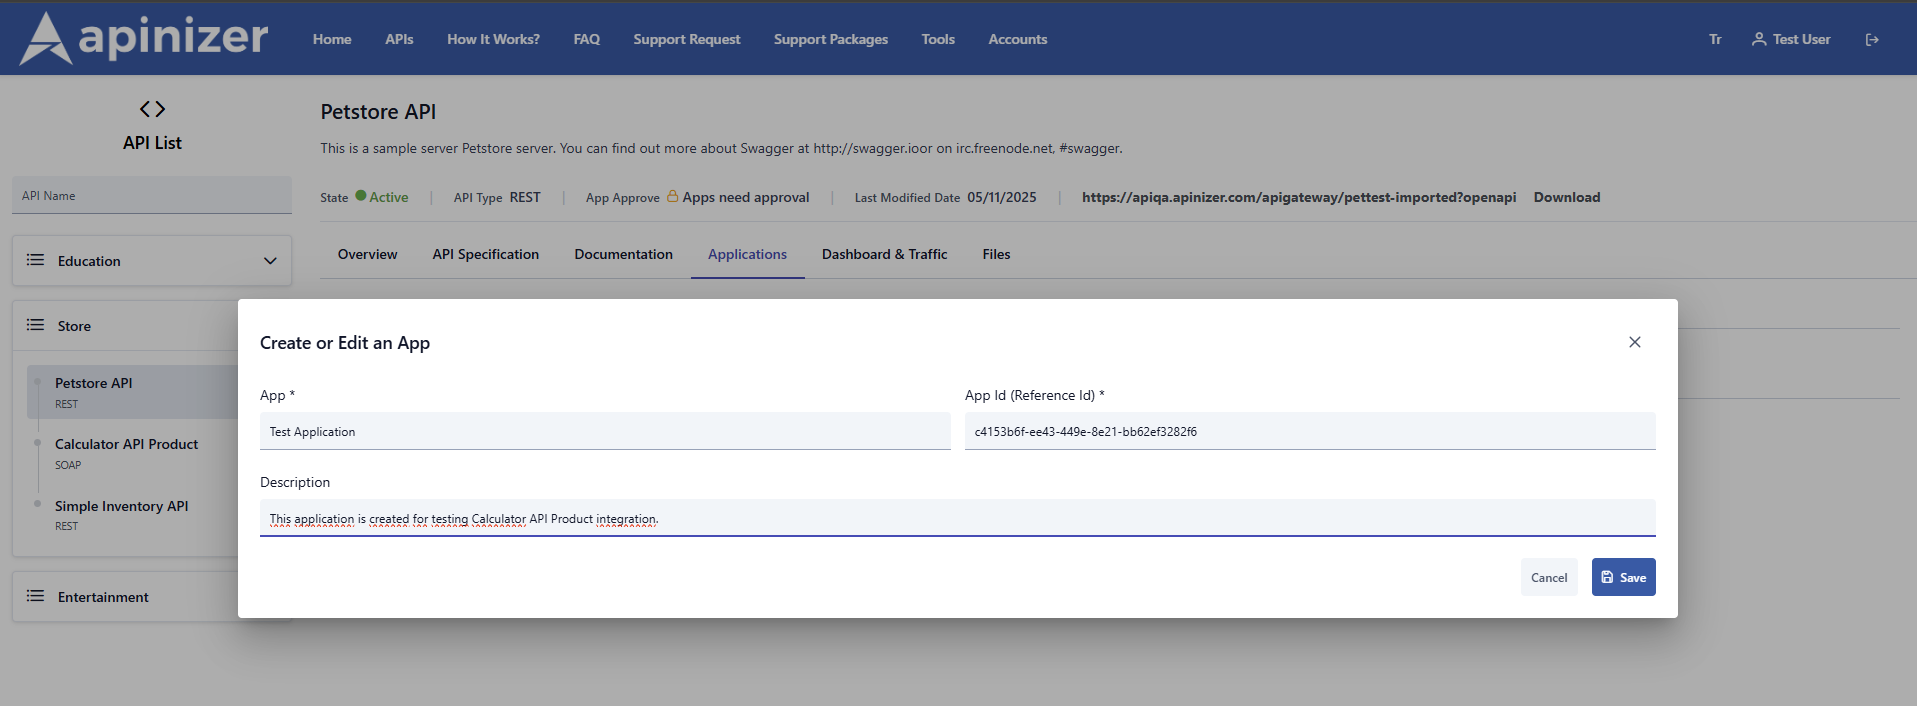
On the API product detail page, click on the “Applications” tab. If there is no registered application, the message “You have no registered application for this API product” appears.Click the “Create New App” button and in the opened pop-up:
- Enter application name and description
- Create the application by clicking the “Save” button
3
Registration
In the “Select an application and plan to register” popup:
- Select the application they created
- Select a plan (e.g., Plus)
- Click the “Register” button
4
Viewing Registration Status
Registration status is displayed in the “Applications” tab:
- Pending approval: Waiting for product owner’s approval
- Approved: API is ready to use
- Rejected: Access request was rejected
When an access request is created by a user, this request is forwarded to the Apinizer API Manager > Administration > Portal > Approval Requests page on the Apinizer interface. On this page, product owners can view, review, and perform approval or rejection operations on access requests sent to them if they deem appropriate. This page is explained in detail below.
Approval Requests API Product Application Registration
When automatic approval for API product access is turned off, users’ registration requests are listed on the Apinizer API Manager > Administration > Portal > Approval Requests Page.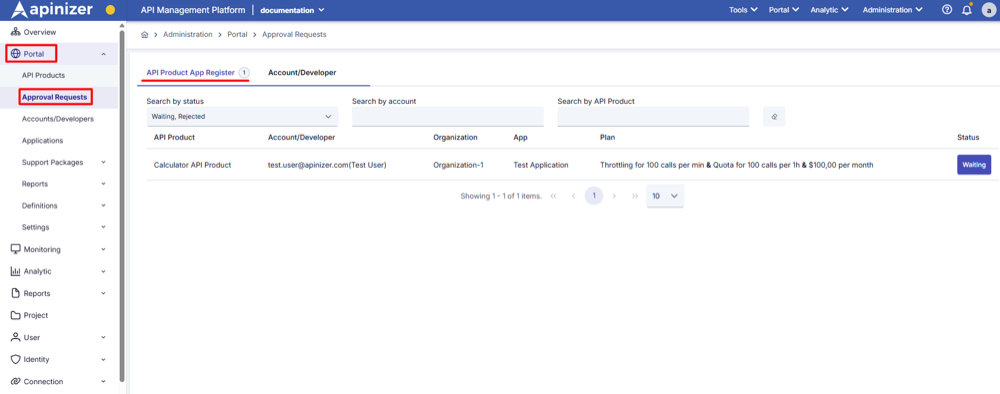
1
Selecting Pending Request
Click the “Waiting” (Bekliyor) button in the Status column
2
Viewing Request Details
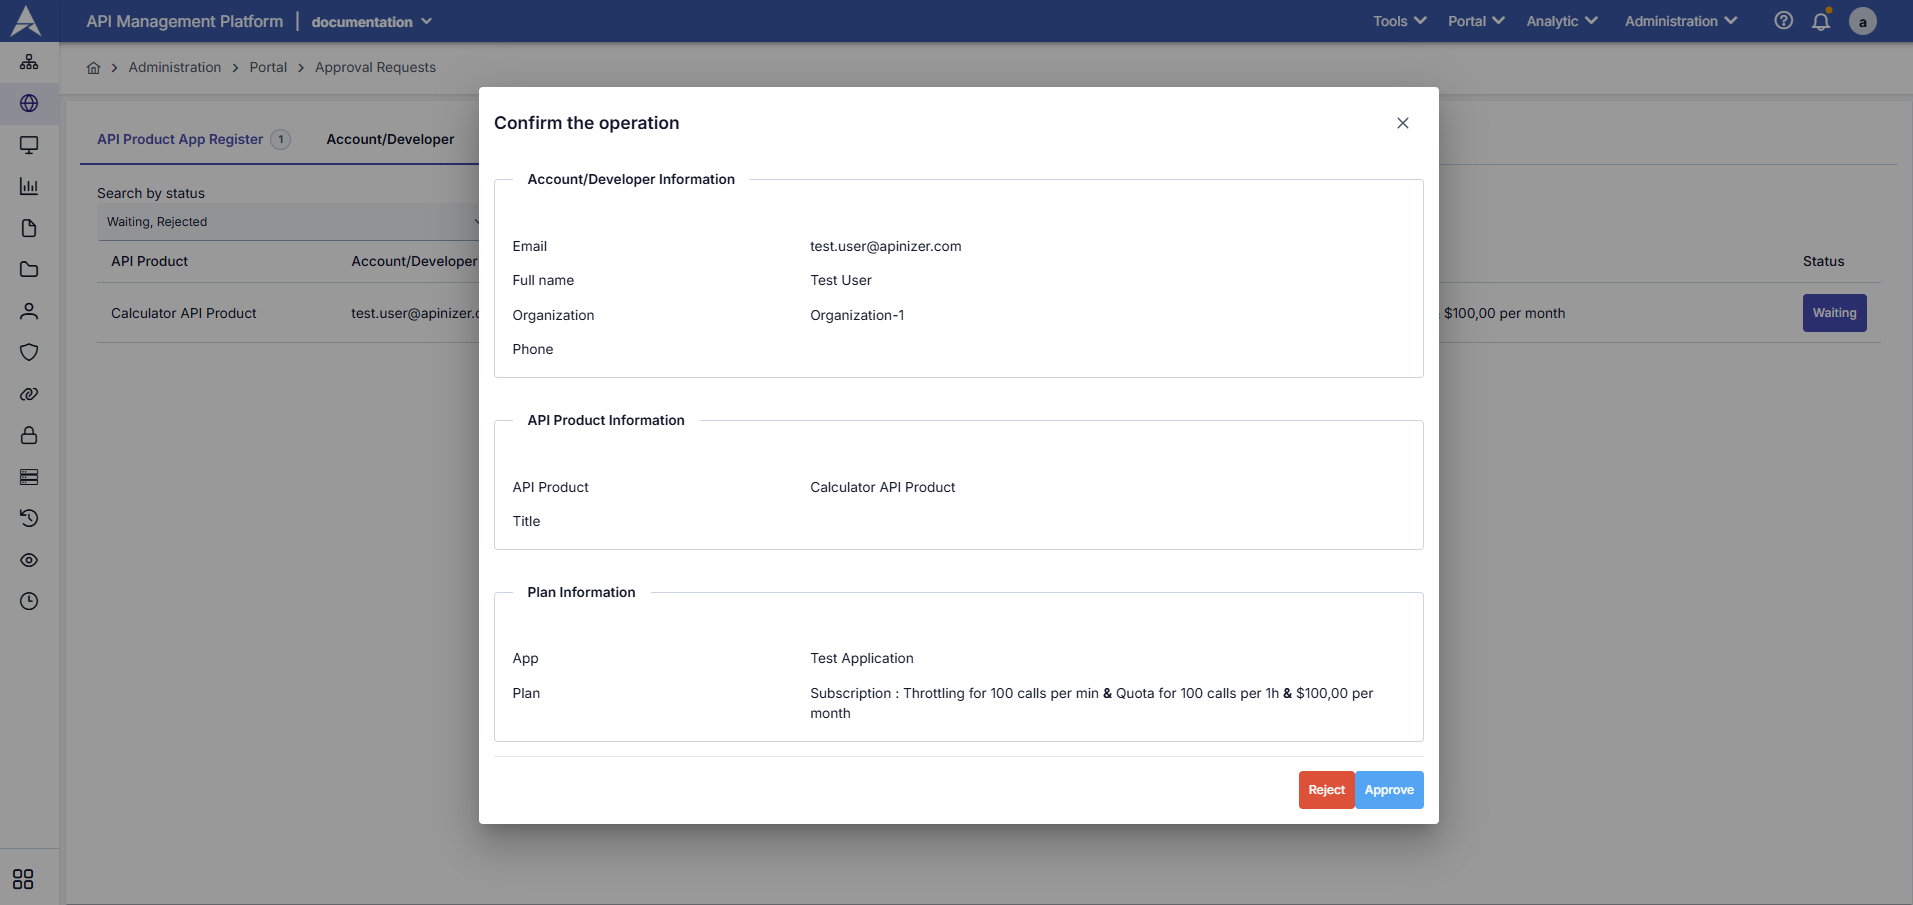
“Confirm the operation” popup opens and request details are displayed:
- Account/Developer Information: User information (email, name, organization, phone)
- API Product Information: API product name and title
- Plan Information: Application name and selected plan and details
3
Making Decision
Admin evaluates the request and makes a decision:
- Approve: Approves the request, user gains access to the API.
- Reject: Rejects the request, user cannot gain access.
In both cases, an automatic notification email is sent to the user.
Automatic Approval Setting
API Portal is configured as automatic approval by default. To manage this process, the following steps are applied. The approval process for users who want to become new members of the Portal is controlled by the “Auto Approve Account/Developers” setting in Apinizer API Manager > Administration > Portal > Settings > Portal > Security tab. If this setting is on, the account can be logged in directly with email verification without admin verification. If this setting is off, the email address is first verified, then the registration request comes to the Apinizer API Manager > Administration > Approval Requests > Account/Developer screen.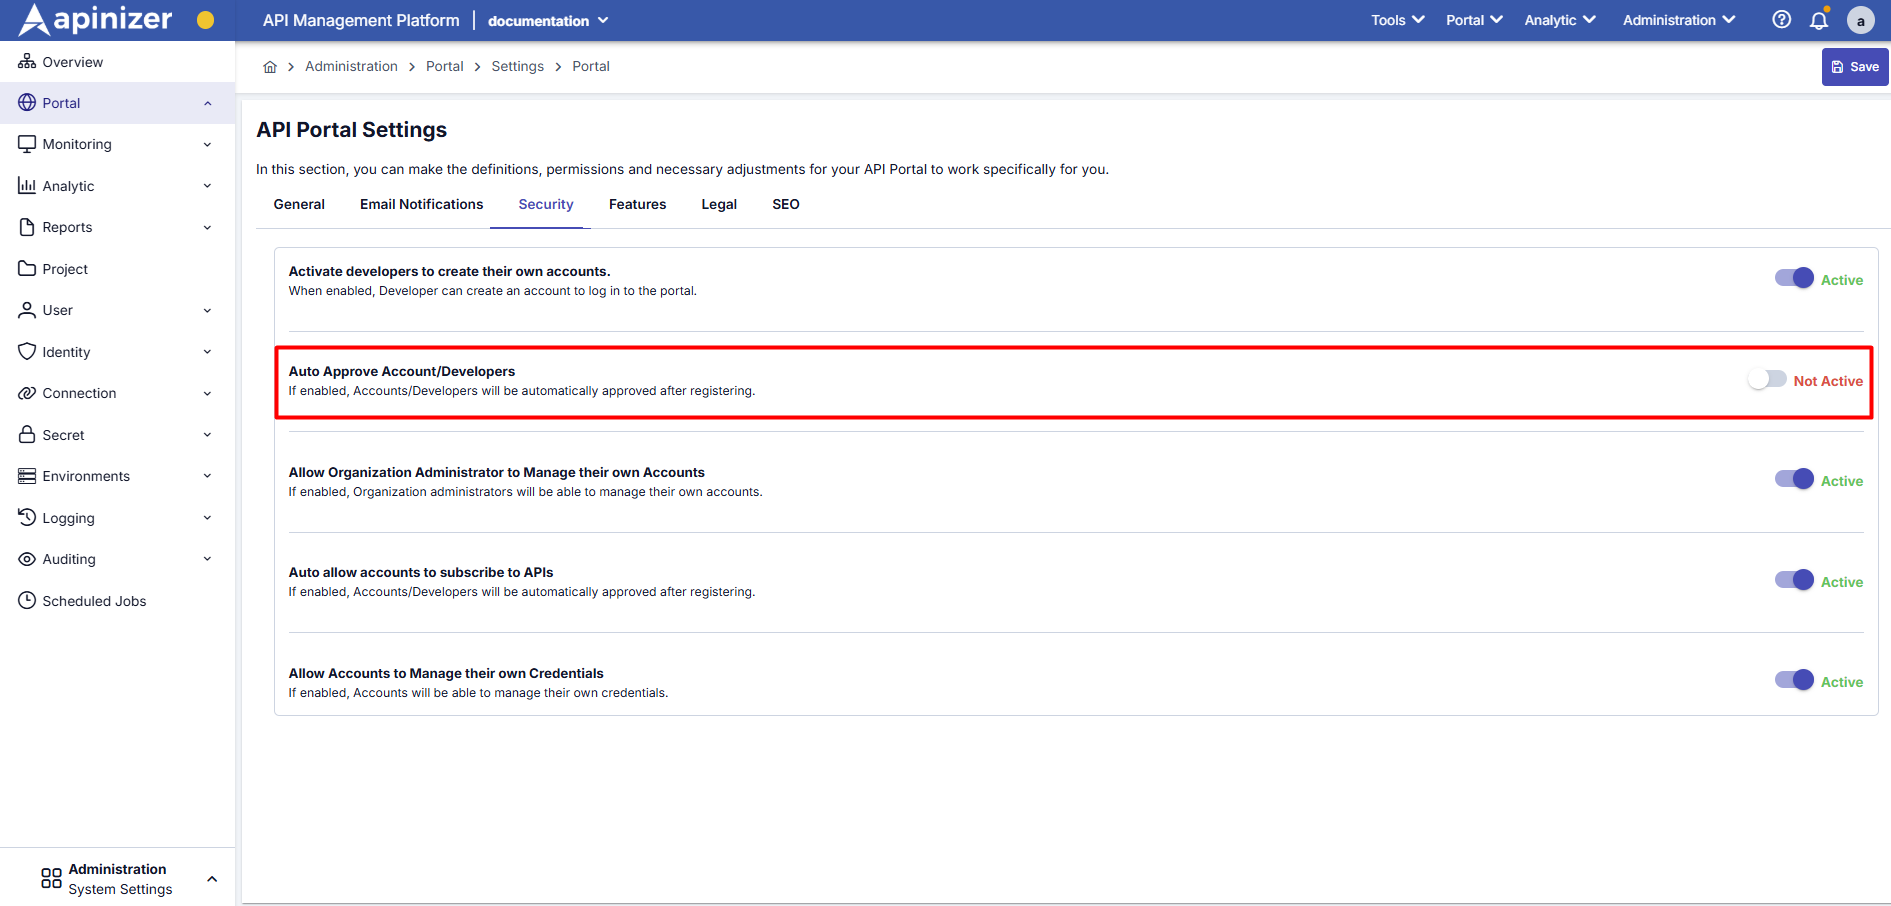
Approval Requests Account/Developer
When automatic approval is off, admin views pending registration requests in the Apinizer API Manager > Administration > Approval Requests > Account/Developer tab. The following information is listed for each request: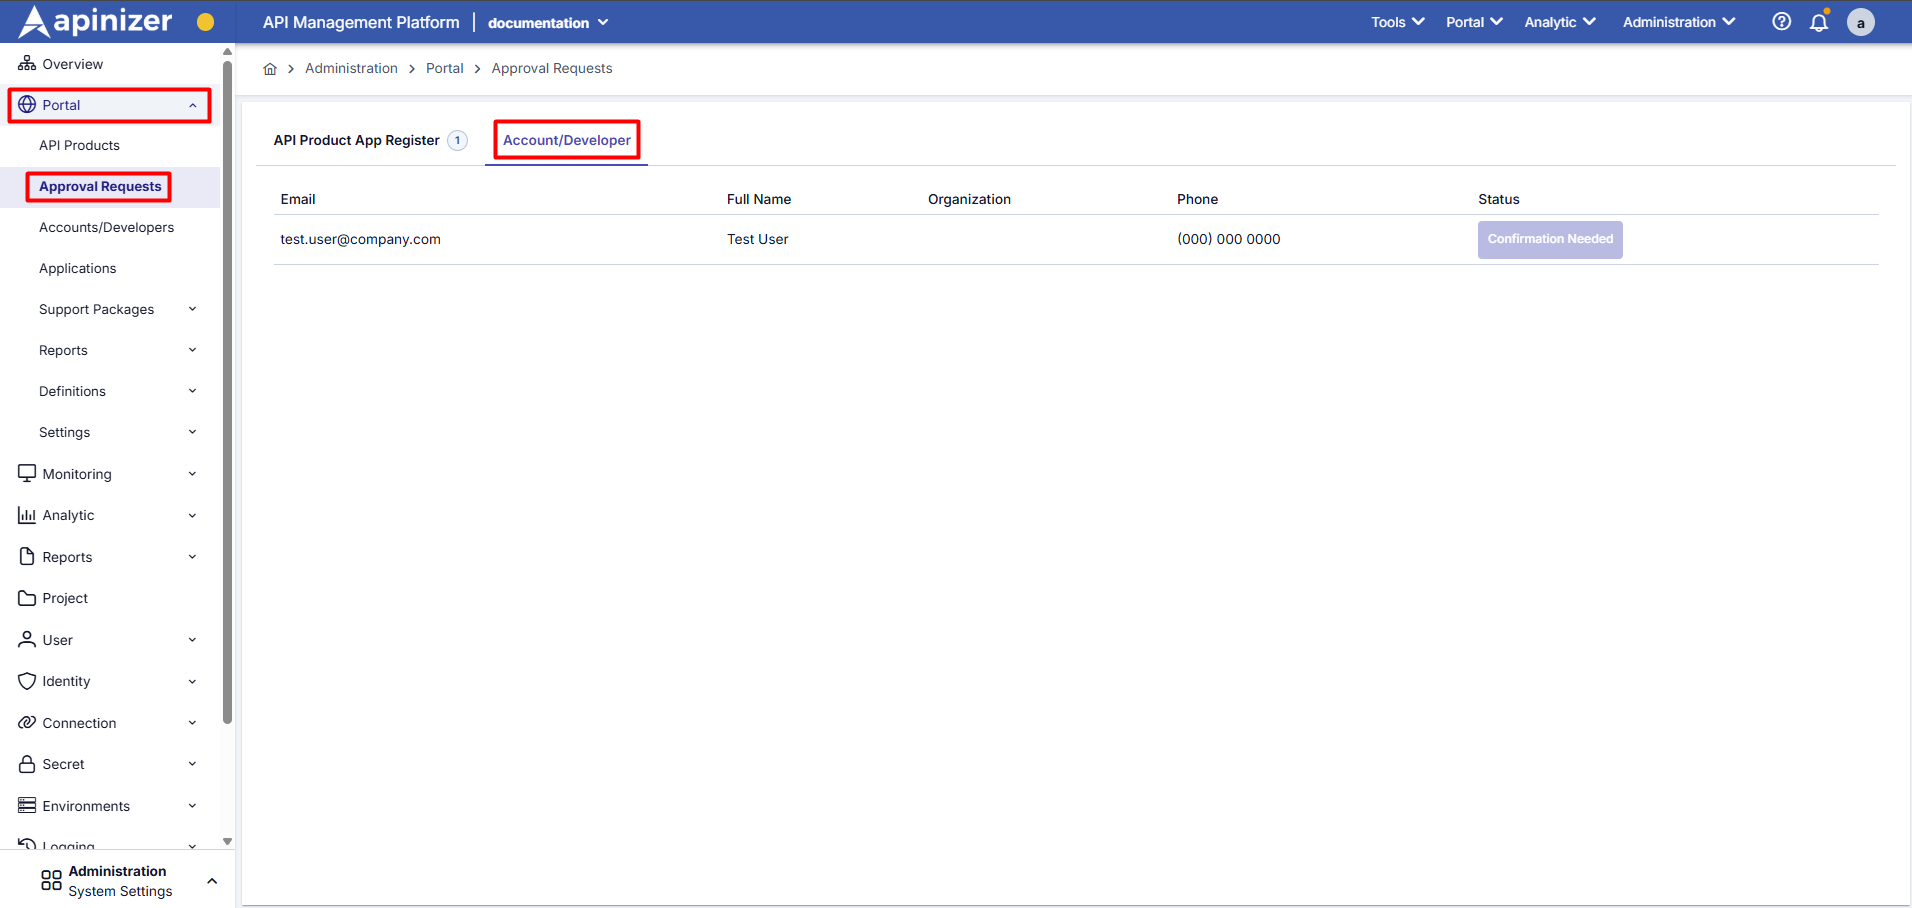
Admin clicks the Status button to approve or reject the user registration after the user verifies their email address.
In both cases, an automatic notification email is sent to the user.You can review the Email Templates link to customize automatic notification emails.