

- Providing secure access to APIs
- Tracking and reporting API usage on an application basis
- Managing API Keys
- Managing API Product subscriptions
Portal App Management in API Manager
In API Manager, administrators can view and manage all portal applications.Creating New Portal App
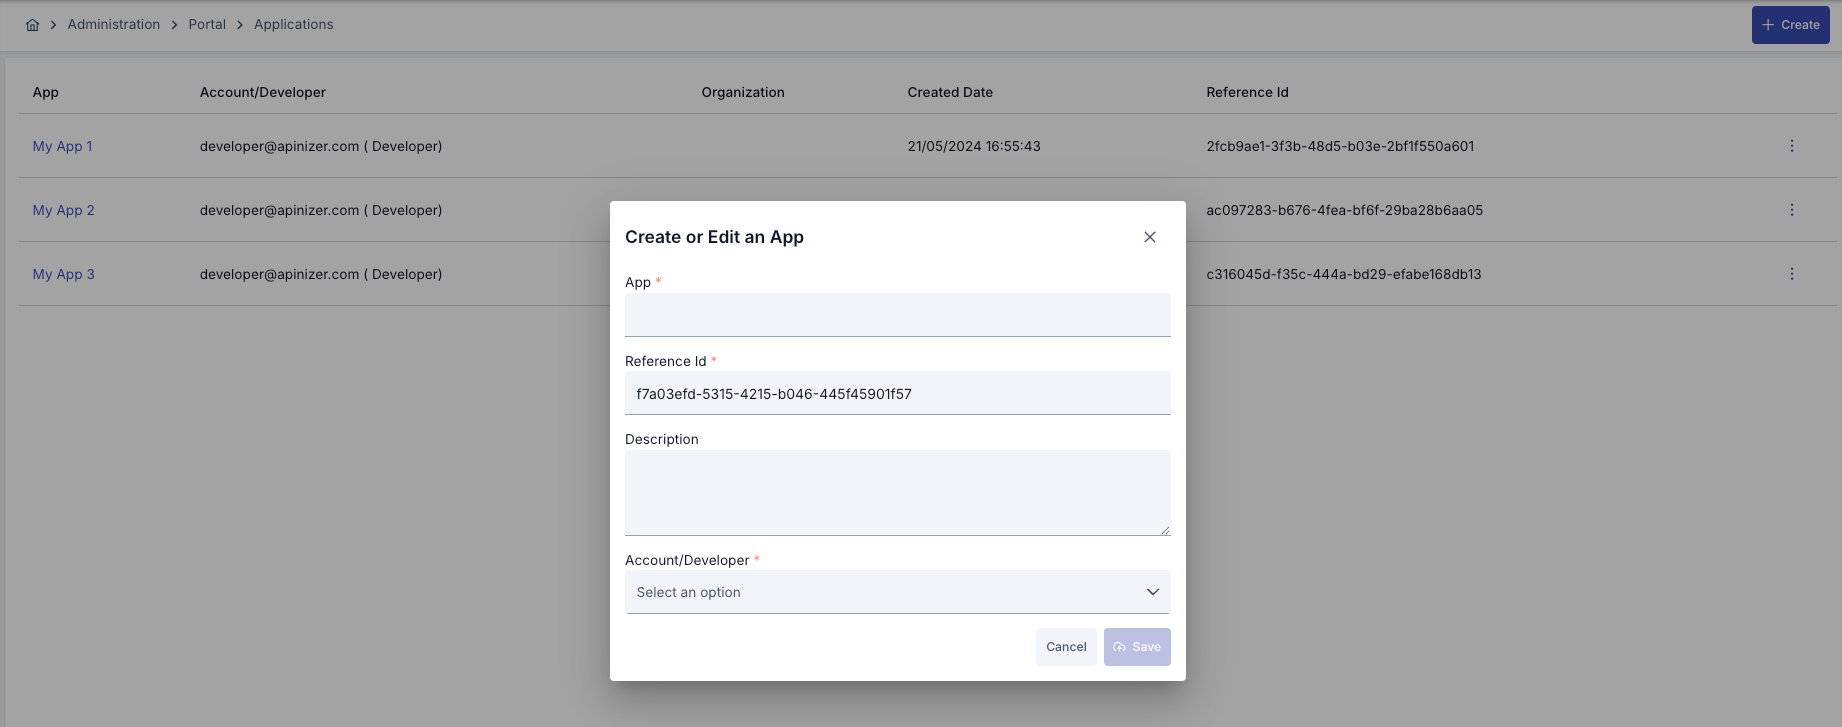
Step 1
Step 2
- Account: Select the portal account the application will be linked to from the dropdown list (Required)
- Name: Application name (Required, Max: 255 characters)
- Reference ID: Unique ID of the application (Required, UUID is automatically generated)
- Description: Application description (Optional)
Step 3
Step 4
Portal App Detail Page
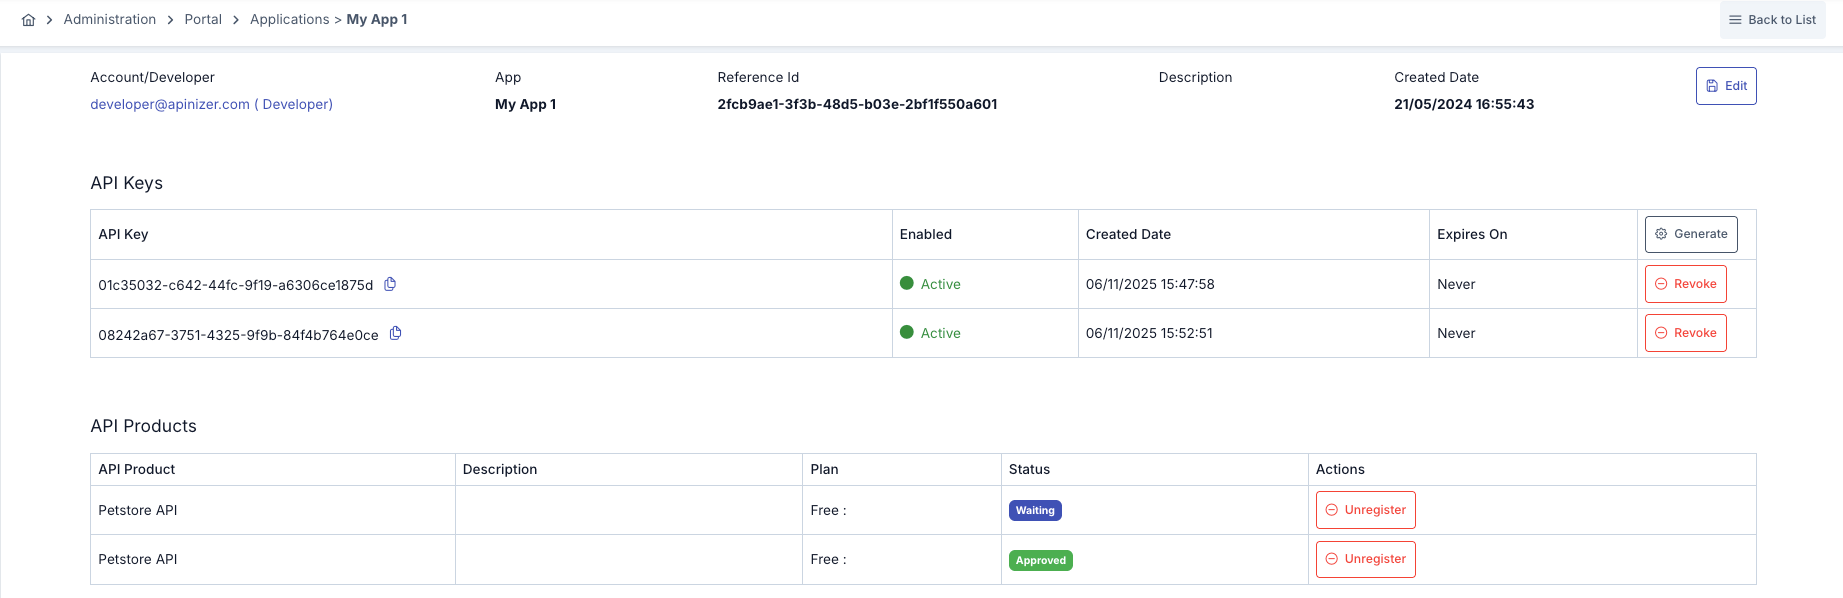
- Click the “Unregister” button on the row of the product you want to cancel
- Registration status is updated to UNSUBSCRIBED
- Application can no longer access this API Product
My Applications in API Portal Interface
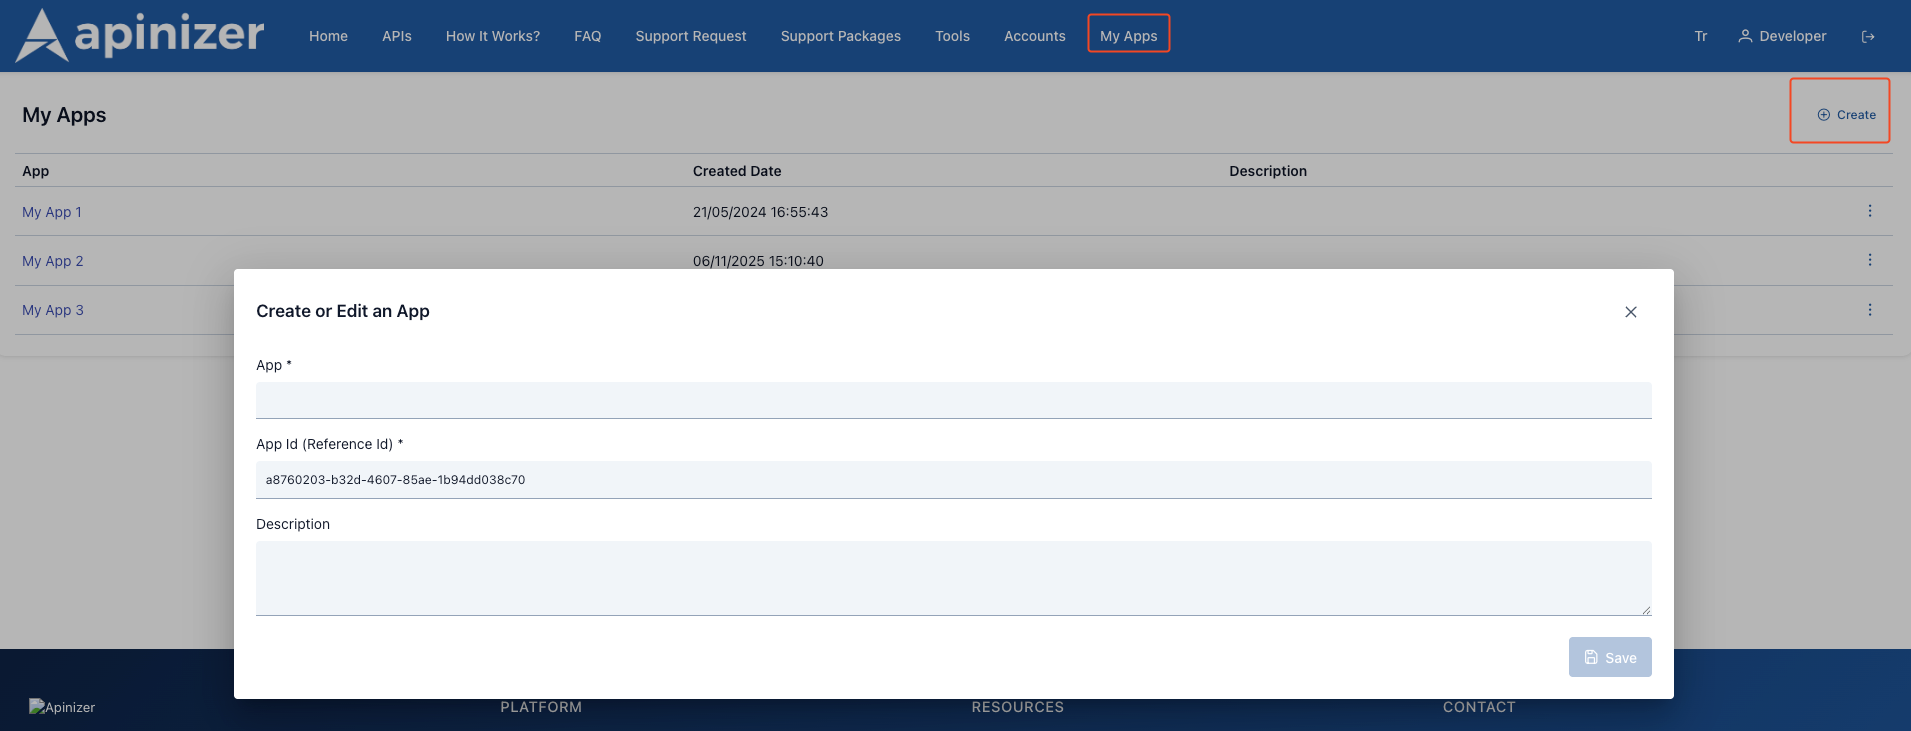
On API Portal, users can only see and manage their own applications.Creating Application from Portal
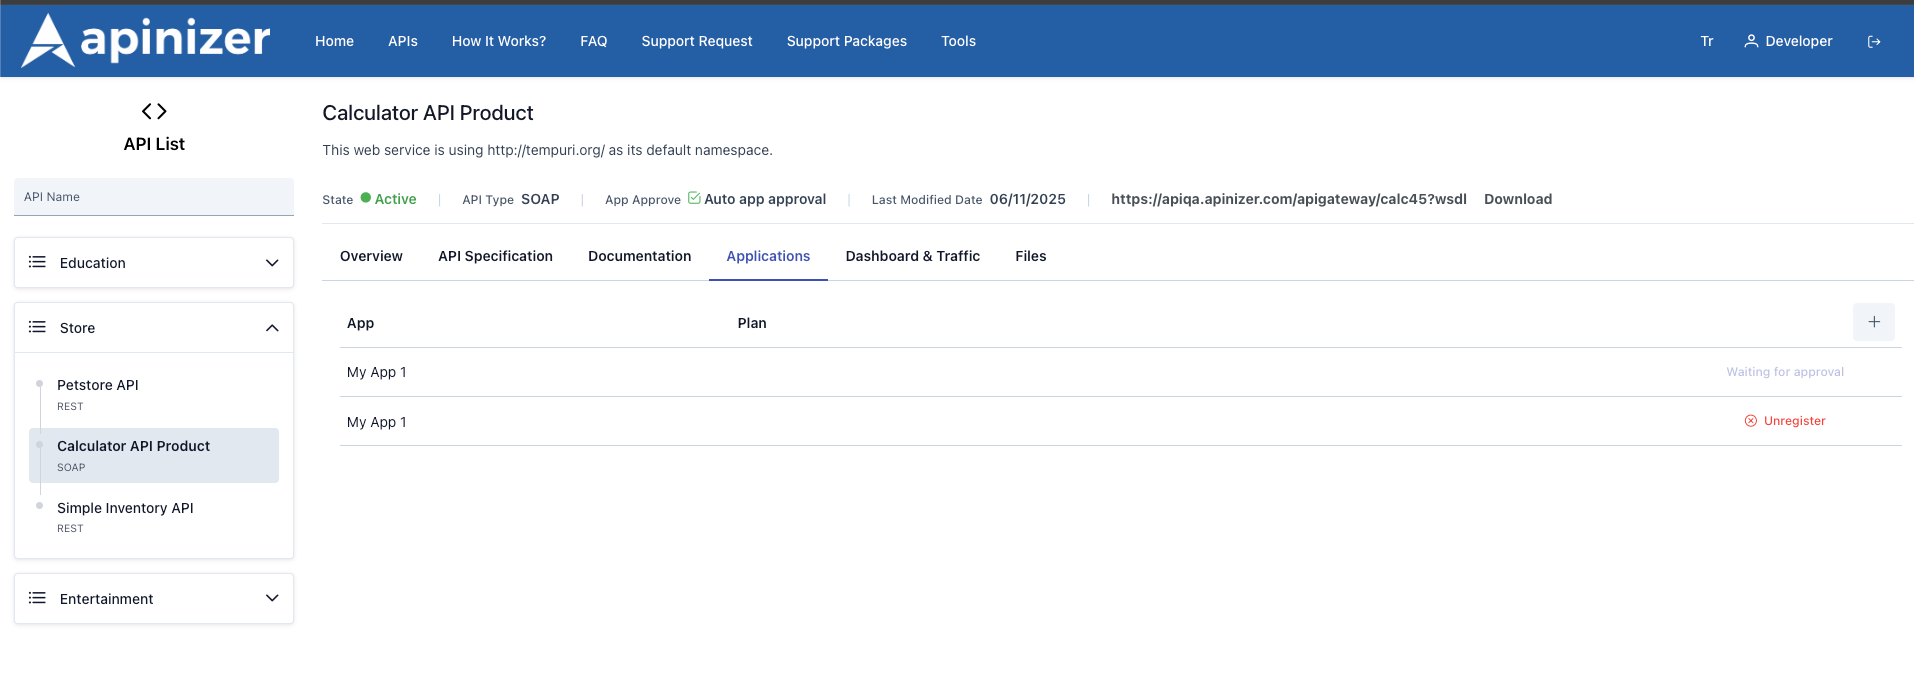
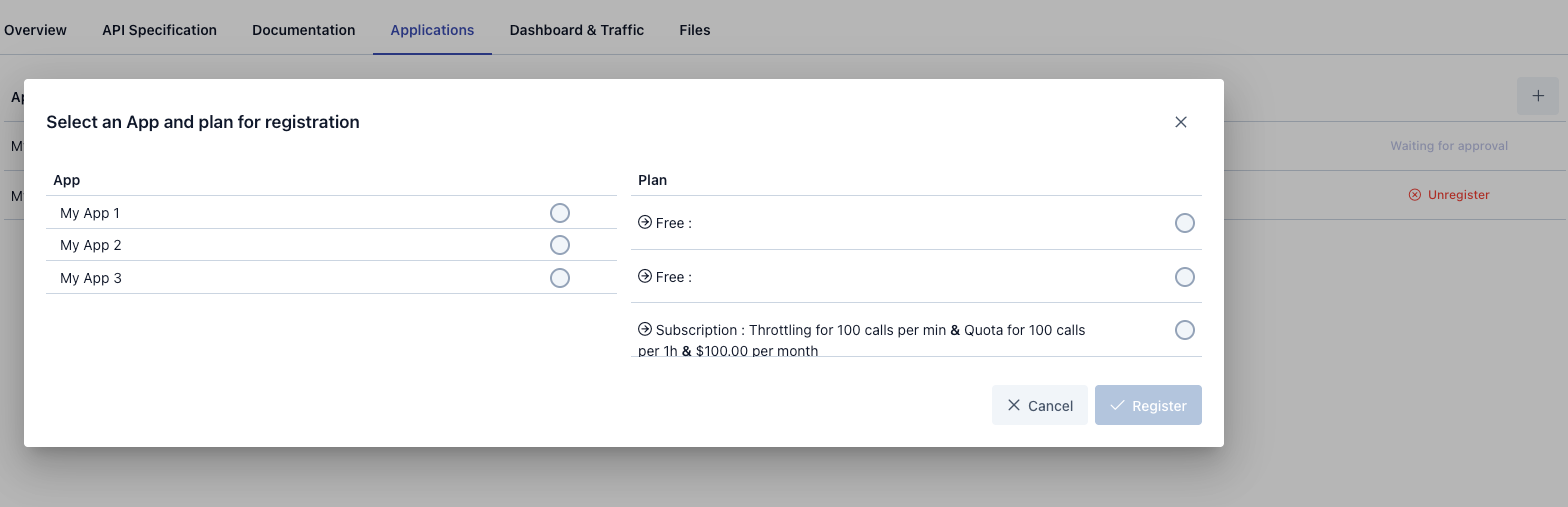
- Scenario A: User with No Applications
- Scenario B: User with Existing Applications
- Click the ”+ Create” button
- Fill in the information in the opened dialog
- Click the “Save” button
- When registration is completed, your first automatically created application is added to the list and your first API Key is prepared
API Key (Credential) Management in API Portal Interface
API Key Structure Each API Key has the following properties:API Key Creation and Revocation Flow
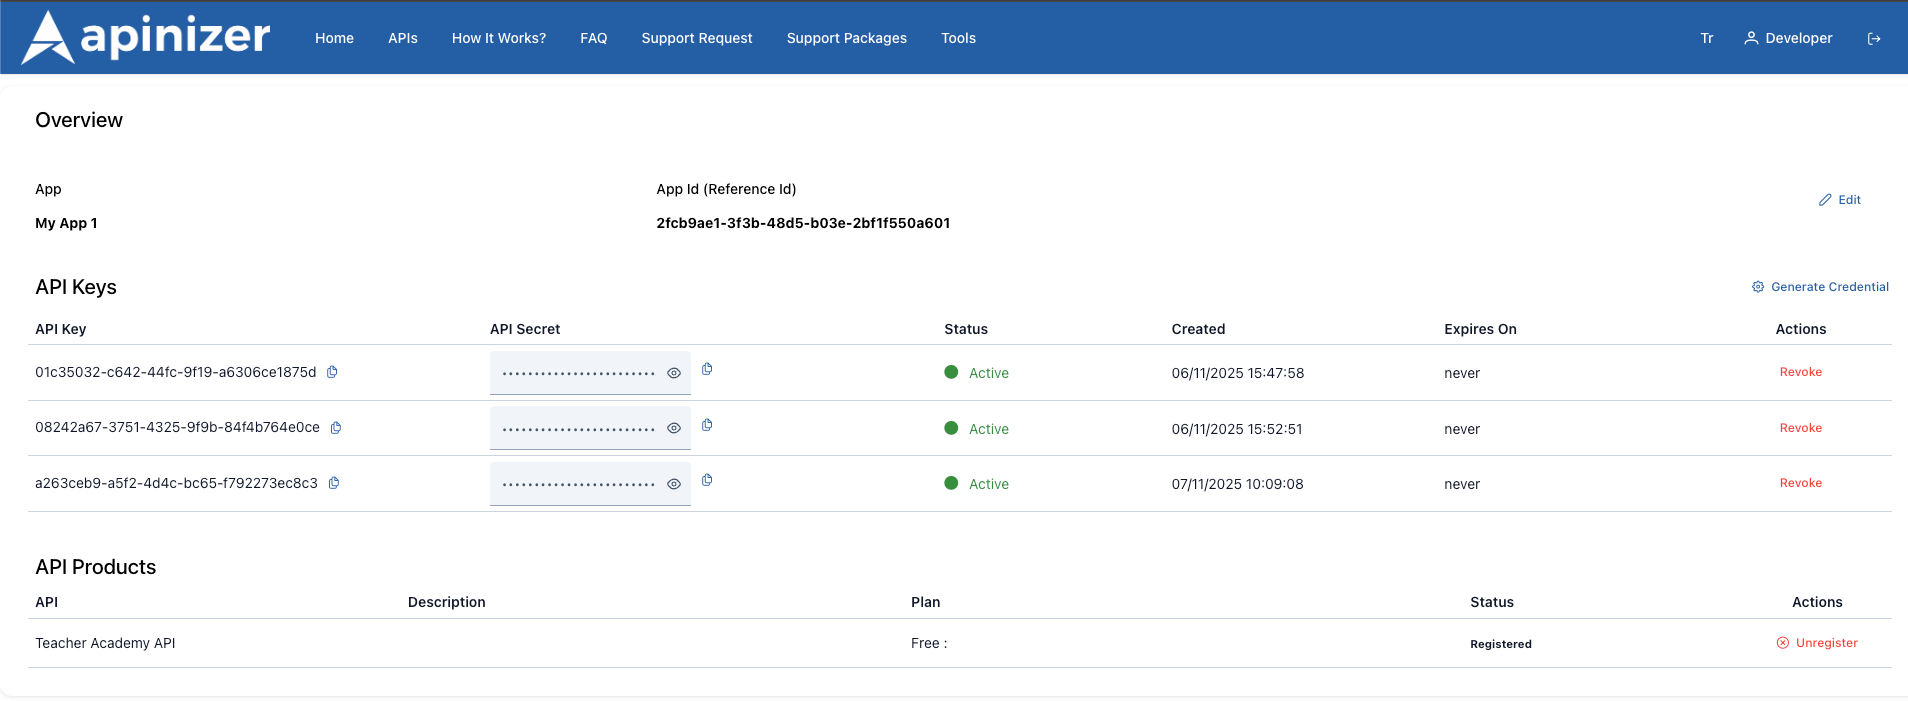
- API Key Creation Flow
- API Key Revocation Flow
- User clicks “Generate Key” button
- Username in UUID format is generated in the system
- Password in UUID format is generated in the system
- Credential object is created:
- username: UUID
- password: UUID
- appId: [Application ID]
- accountId: [Account ID]
- organizationId: [Organization ID]
- enabled: true
- CredentialUpdateDTO is created:
- credential: [Credential object]
- accessControlList: []
- accountCredential: true
- POST request is sent to backend
- Successful response is received
- Credential list is refreshed
- Success message is shown to user
API Product Registration Statuses
Status Descriptions:Usage Scenarios
Scenario 1: Creating a New Application (Portal User)
Scenario 1: Creating a New Application (Portal User)
- User logs into Portal
- Goes to “My Applications” page from menu
- Clicks ”+ Create” button
- Fills out the form:
- App Name: “Mobile iOS App”
- App Id: Automatic UUID
- Description: “API access for iOS application”
- Clicks “Save” button
- System automatically:
- Creates the application
- Generates the first API Key
- Shows success message to user
- User sees the new application in the list
- Application is ready
- First API Key is ready to use
- Can register to API Products
Scenario 2: Registering to API Product and Usage
Scenario 2: Registering to API Product and Usage
- User goes to “API Products” page
- Selects the desired API Product
- Selects a plan (Free, Subscription, etc.)
- Selects their application
- Clicks “Subscribe” button
- Registration is created (Status: WAITING)
- Admin approves registration (Status: APPROVED)
- User sees registration on application detail page
- Makes API calls using their API Key
- Application can access API
- Throttling/Quota limits are applied
- Usage is tracked and reported
Scenario 3: API Key Management and Rotation
Scenario 3: API Key Management and Rotation
- User goes to application detail page
- Sees existing API Keys
- Decides to change key for security reasons
- Creates new key with “Generate Key”
- Updates new key in their code
- Tests and verifies it works
- Revokes old key with “Revoke”
- Security increased
- Old key invalidated
- New key actively in use
Scenario 4: Application Deletion and Cleanup
Scenario 4: Application Deletion and Cleanup
- User decides to delete an application they no longer use
- Goes to “My Applications” page
- Clicks menu button (⋮) of the application to be deleted
- Clicks “Remove” option
- Checks the application in the confirmation dialog
- Clicks “Delete” button
- System:
- Deletes the application
- Revokes all API Keys
- Removes API Product registrations
- Success message is shown
- Application completely deleted
- All related resources cleaned up
- API calls fail
Scenario 5: Application Management by Admin
Scenario 5: Application Management by Admin
- Admin logs into API Manager
- Goes to Portal Management > Portal Apps page
- Sees all users’ applications
- Selects an application and goes to detail page
- Checks API Product registrations
- If necessary:
- Creates new API Key
- Revokes existing keys
- Approves/rejects API Product registration
- Cancels registration (unregister)
- Edits application information
- Changes are saved
- Admin can perform centralized management
- User applications are monitored
- Necessary interventions are made
Frequently Asked Questions
What is Portal App and why is it necessary?
What is Portal App and why is it necessary?
How many applications can a user create?
How many applications can a user create?
Can I create two applications with the same name?
Can I create two applications with the same name?
What happens if I forget the API Key password?
What happens if I forget the API Key password?
How many API Keys can there be in an application?
How many API Keys can there be in an application?
Can I reactivate a revoked key?
Can I reactivate a revoked key?
Can an application register to multiple API Products?
Can an application register to multiple API Products?
When will my WAITING status registration be approved?
When will my WAITING status registration be approved?
Can I reapply for a REJECTED registration?
Can I reapply for a REJECTED registration?
What is the difference between API Manager and API Portal?
What is the difference between API Manager and API Portal?
Can admin interfere with my application?
Can admin interfere with my application?