

Overview
What is its Purpose?
- Blocks access at unauthorized times by filtering API Proxy traffic according to day and time intervals.
- Automatically manages requests in certain time periods such as maintenance windows or campaign periods.
- Consistently evaluates calls from different time zones with Zone ID setting.
- Reuses same configuration in both allow and block scenarios with Allow/Restrict action modes.
Working Principle
- Request Arrival: For each HTTP/HTTPS request arriving at the API Gateway, the source IP address of the request is identified.
- Policy Check: If the Time Restriction policy is active, the system checks in the following order:
- Is a Condition defined? If so, is the condition met?
- Is the policy active (active=true)?
- Is a Variable used or is Apinizer default used?
- Time Block Evaluation: Defined hourWrapper rules are executed according to day, month and time intervals based on selected Zone ID; in Allow mode, at least one rule match is required, in Restrict mode, matching rule blocks request.
- Decision Making:
- Match Found: In Allow mode, request passes; in Restrict mode, default or customized error code is returned to request.
- No Match: In Allow mode, request is rejected with 403; in Restrict mode, request continues.
- Error Handling: Customizable HTTP status code and error message are returned for requests that do not comply with the policy rule.
Features and Capabilities
Basic Features
- Multiple Time Block Management: Different day and time intervals can be gathered in the same policy by defining unlimited hourWrapper in one policy.
- Dual-Mode Action Type: Same configuration can be applied to both allow and block scenarios with EnumRestrictionType (ALLOW/RESTRICT) support.
- Zone ID-Based Evaluation: Requests are evaluated according to selected time zone independent of default server time thanks to Zone ID field.
- Active/Passive Status Control: Easily change the active or passive status of the policy (active/passive toggle). In passive state, the policy is not applied but its configuration is preserved.
- Condition-Based Application: Determine when the policy will be applied by creating complex conditions with Query Builder (e.g., only for specific endpoints or header values).
Advanced Features
- Custom Day and Month Definitions: Rules such as single day, entire month of certain month, or same day of every month can be created with EnumDayType.CUSTOM selection.
- Full Day Rule: Full-day blocking or allowing is done on day basis without entering time detail with WholeDay option.
- Comprehensive Validation: Mandatory field checks, time interval integrity and name uniqueness are automatically validated with isValid() checks.
- Export/Import Feature: Export policy configuration as a ZIP file. Import to different environments (Development, Test, Production). Version control and backup capability.
- Policy Group and Proxy Group Support: Manage multiple policies within Policy Group. Bulk policy assignment to Proxy Groups. Centralized update and deploy operations.
- Deploy and Versioning: Deploy policy changes to live environment. See which API Proxies use it (Policy Usage). Proxy Group and Policy Group usage reports.
Usage Scenarios
Configuring Policy Parameters
In this step, users can create a new policy or configure existing policy parameters to define access rules. The defined parameters directly affect how the policy works (e.g., which IPs will be allowed, geographical restrictions, conditional activations, etc.). This allows the policy to be customized according to organization-specific requirements and managed centrally.Creating a New Time Restriction Policy
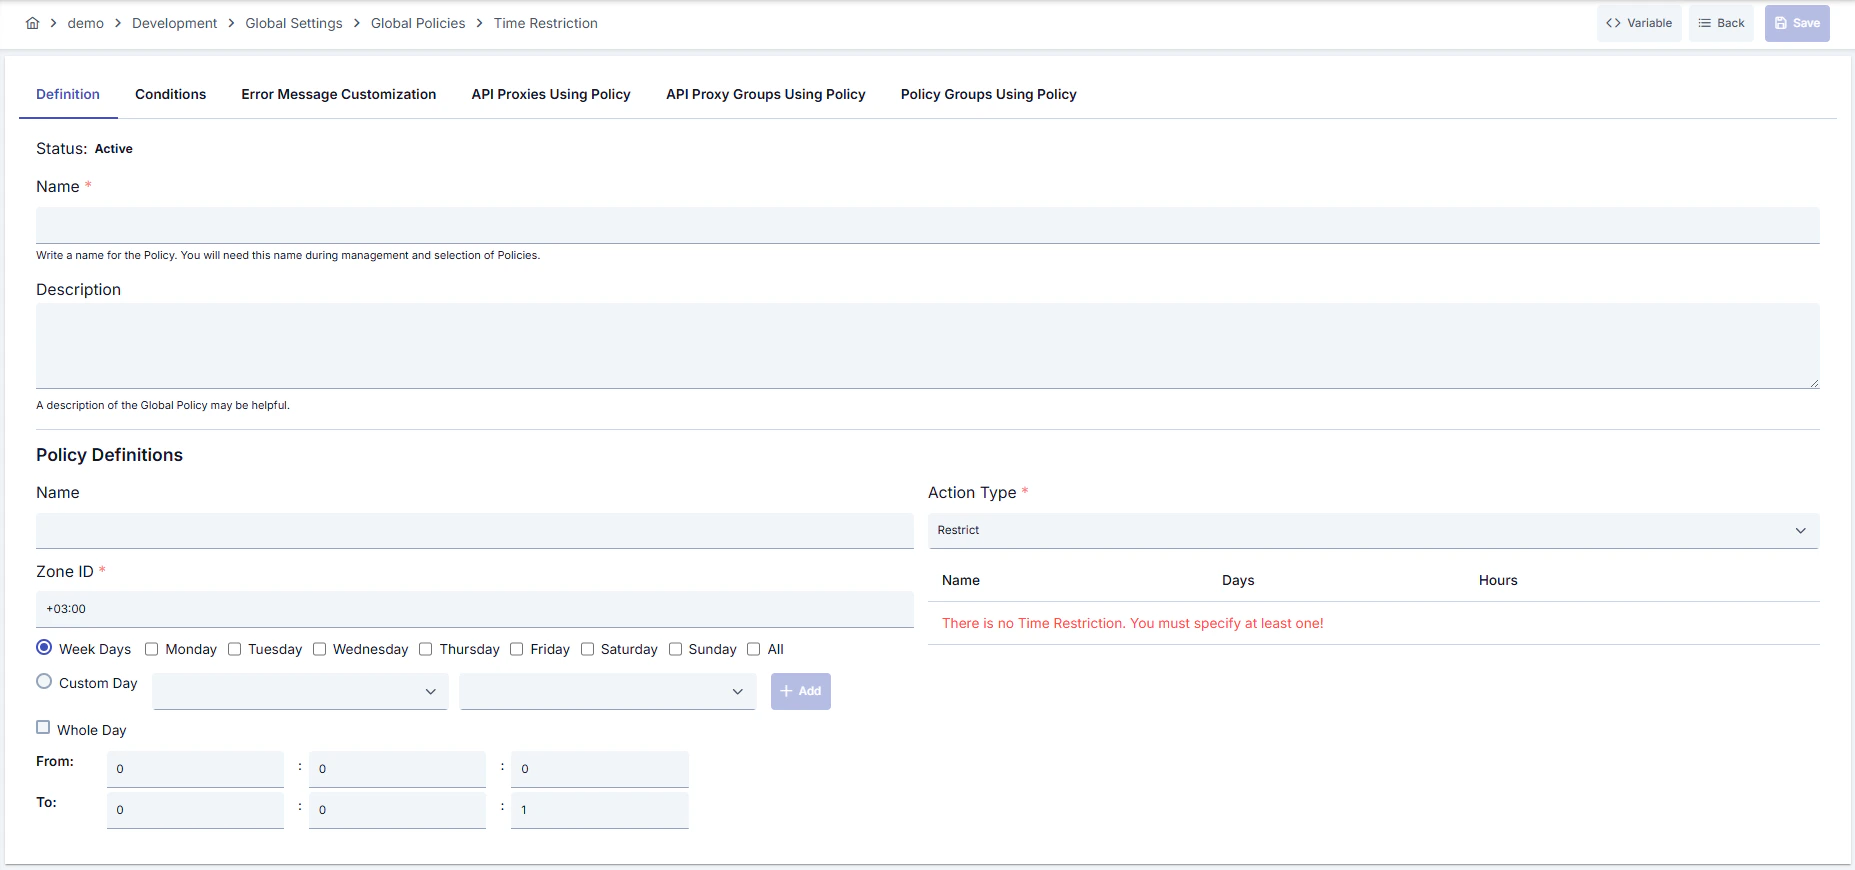
Configuration Steps
For the description of Conditions and Error Message Customization panels, you can review the Conditions and Error Message Customization sections on the What is Policy? page.
For a complete guide on all layers, priority order and scenario examples of the error message configuration system, see the Error Message Configuration Guide page.