

Access control settings made with Identity Management in Apinizer can be configured in 2 different ways:
- Through credentials: Go to the credential detail. In the credential detail, API Proxies that have been granted access permission and their settings are viewed and operations are performed.
- Through API Proxies: Go to the API Proxy detail. Credentials that have been granted access permission to the API Proxy are viewed and operations are performed.
Credential List
An image showing the list of existing credentials when the credentials page is first opened is shown below: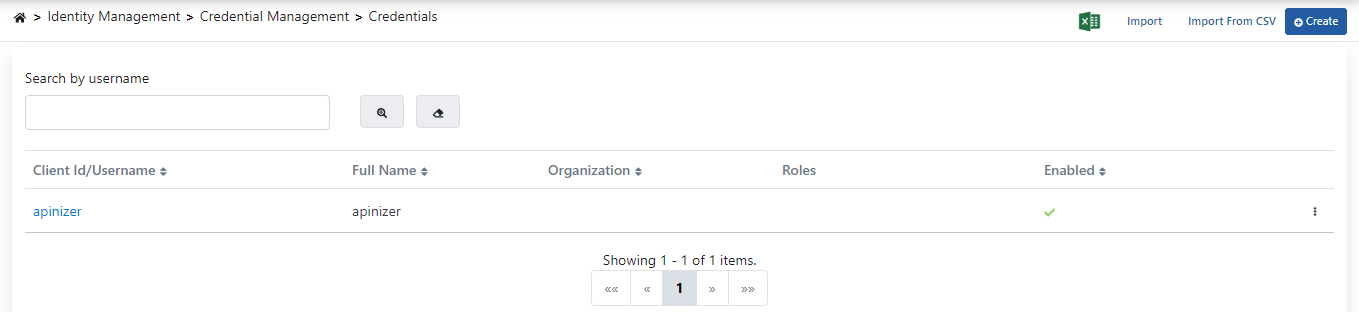
Bulk Credential Import via CSV
The import from CSV feature can be used to import existing credentials to Apinizer. If this feature is desired to be used;1
Data Format
Existing user information should be written with each record on one line.
2
Information Content
The record must contain username and password information together and the password information must be in plain text.
3
Separator Usage
The # sign should be placed as a separator between username and password information.
4
Line Separation
Each line should be separated with the Enter key.

Exporting Credential
To export the Credential, Export (Export) is selected from the menu at the end of the row.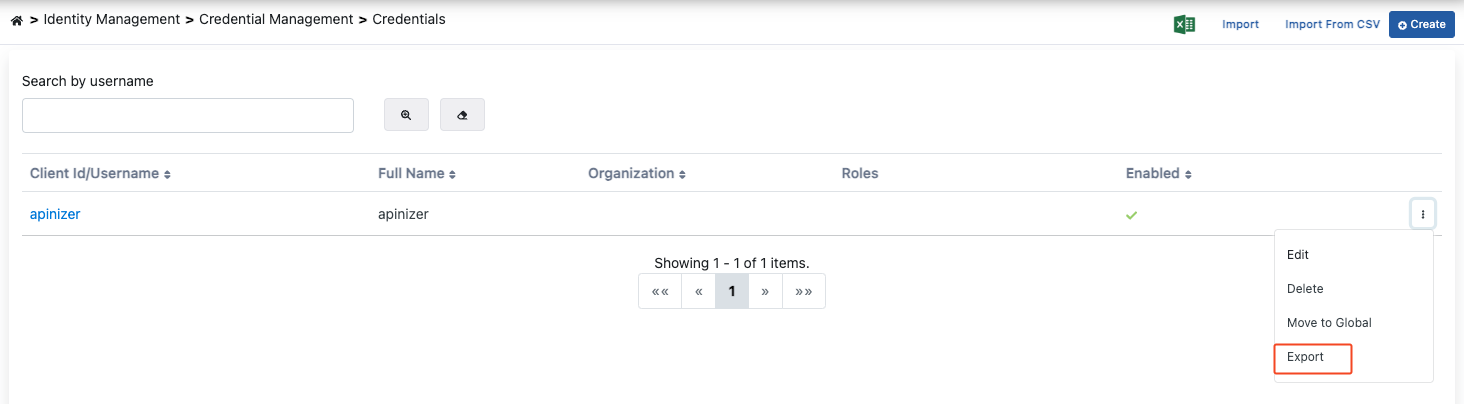
Globalizing Credential
Credentials are moved to the Admin page with the “Globalize” option, removed from this list, made available in all projects, and management is left to the Admin user. To globalize the Credential, Move to Global (Move to Global) is selected from the menu at the end of the row.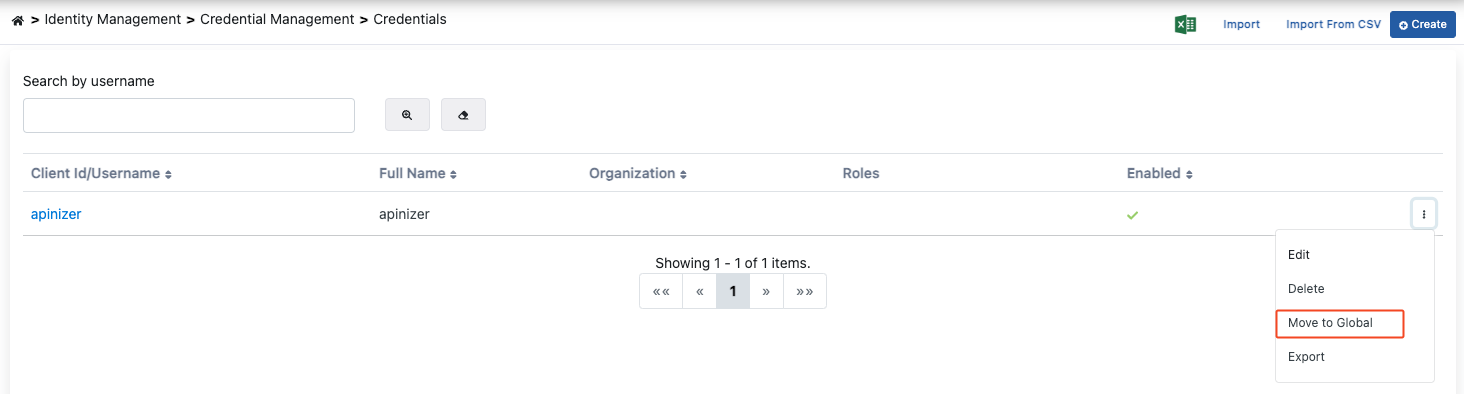
Creating Credential
To add credentials, when the Create button is pressed, the screen shown in the image below appears: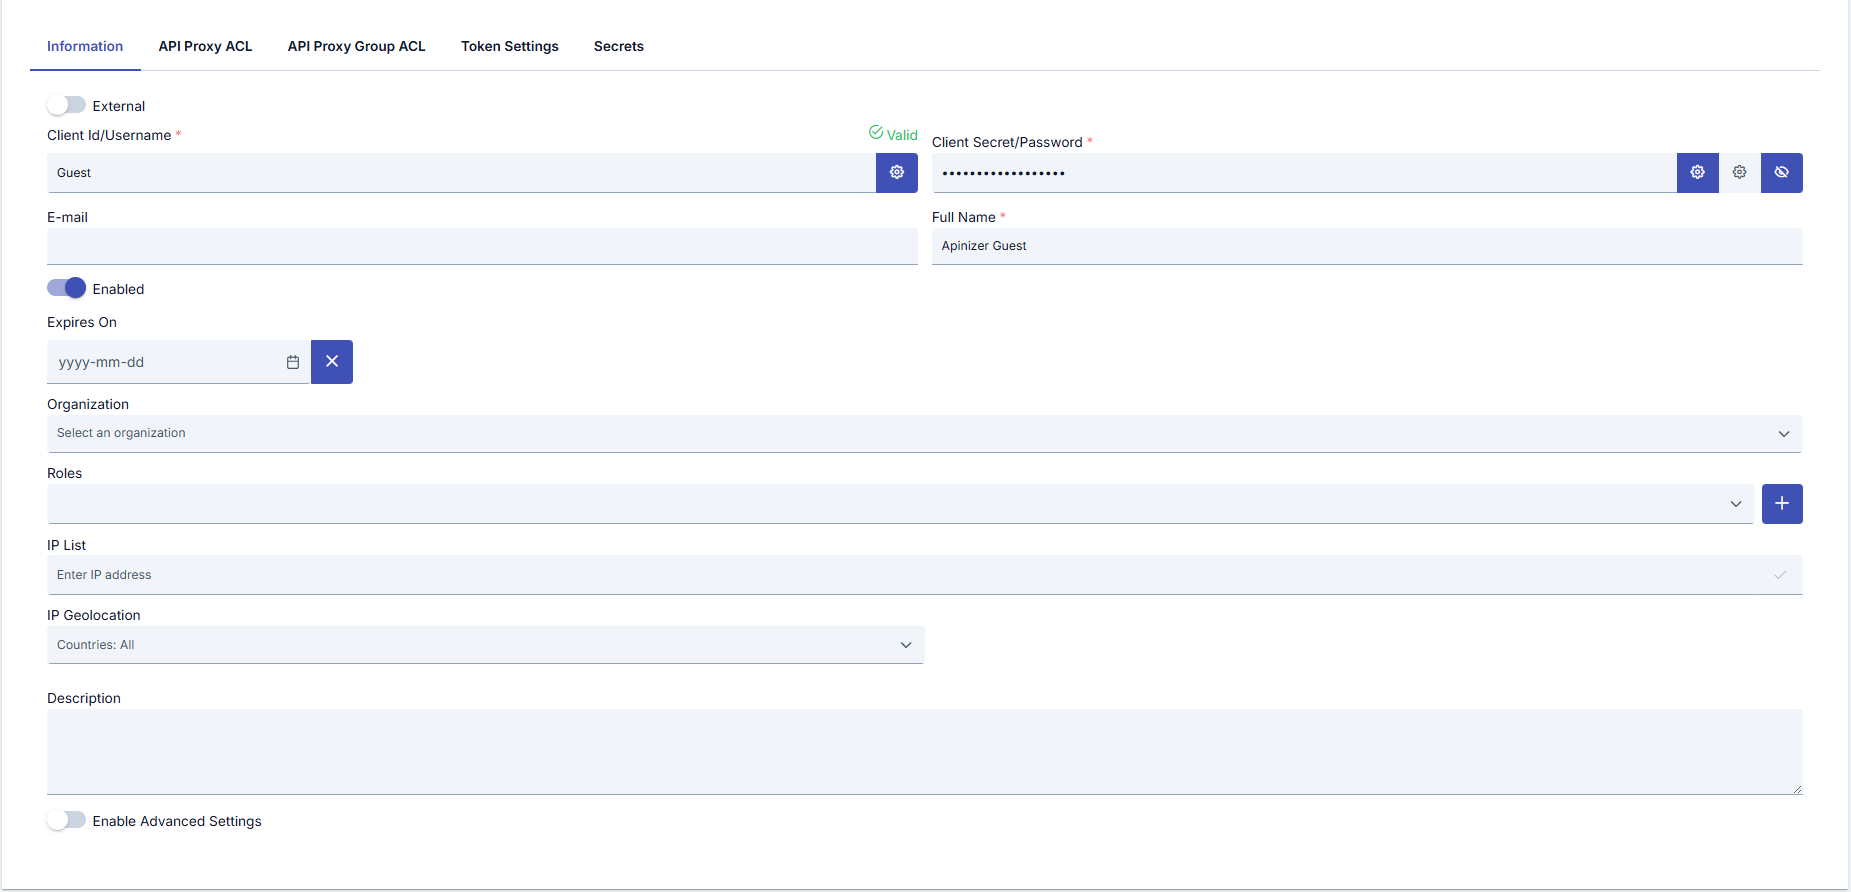
- Entering, creating, or updating credential details
- Creating or updating the credential’s access control list
Credential Access Control Settings
To set access permissions for the credential, operations are performed by switching to the Access Control List panel. In this panel, the API Proxy for which access permission is desired to be granted is selected from the screen that appears when the button marked in red in the image below is pressed.


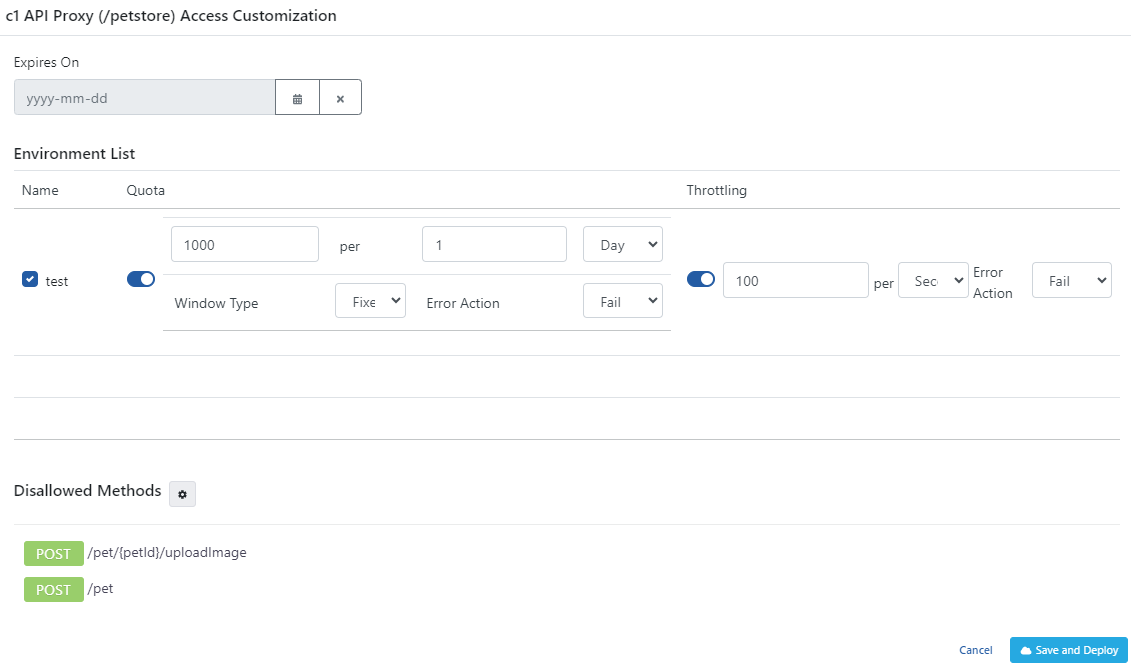
API Proxy-Based Customization
To customize the credential on an API Proxy basis, press the Edit link in the relevant API Proxy record.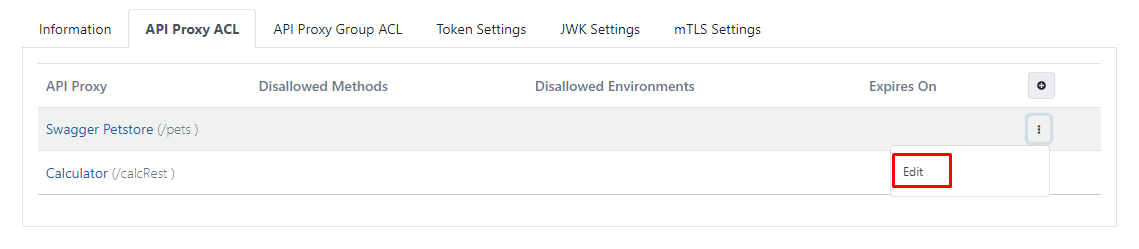
Token Settings
To perform operations for token settings, switch to the Token Settings panel. An image containing token settings is shown below: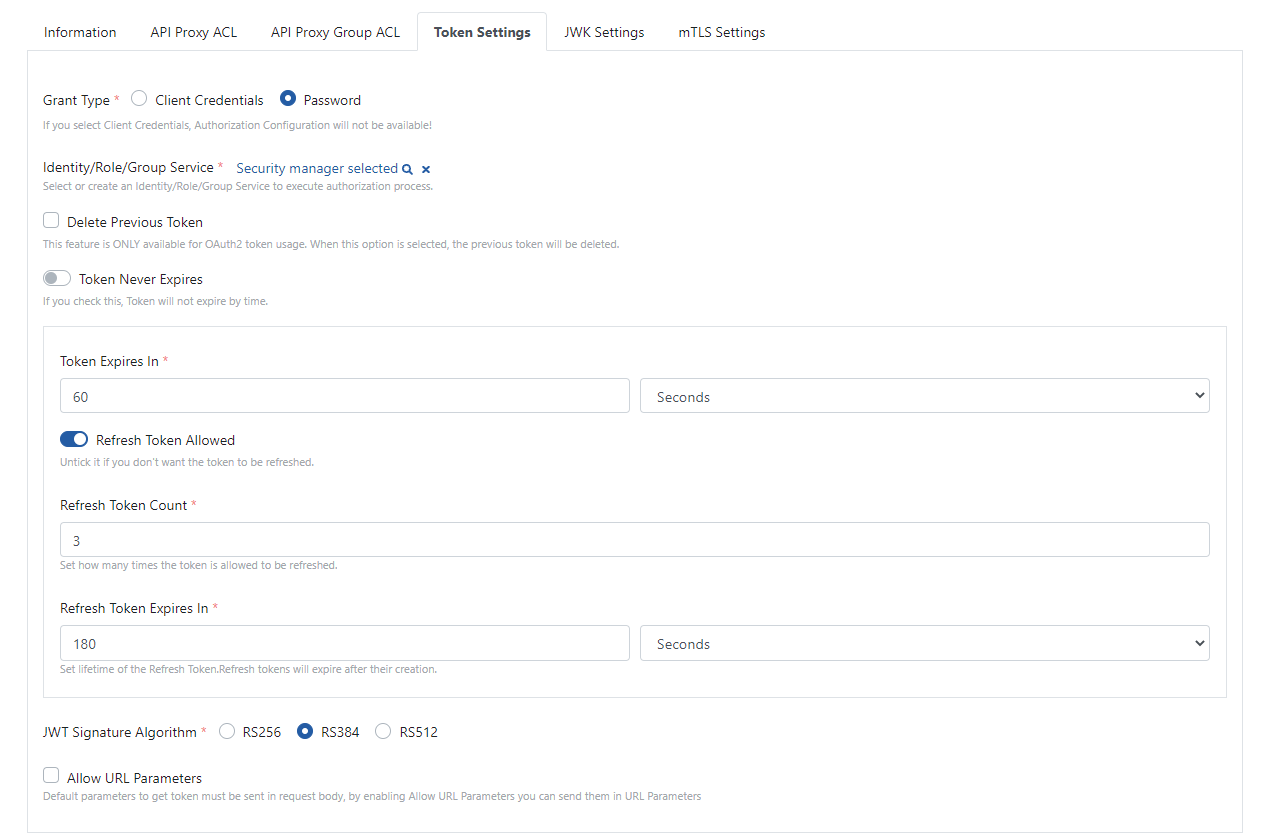
Client Authentication — Authorization Basic Header Support (RFC 6749 §2.3.1)
Getting a Token with Basic Authorization
Credentials can now be presented using HTTP Basic Authentication:Legacy Body-Parameter Method
Sending credentials in the request body is still supported:RFC Compliance Rules
- Do not mix methods: Sending both Basic header AND body parameters (
client_id/client_secret) results in aninvalid_requesterror (HTTP 400). - Valid Base64 required: Malformed Basic headers (invalid Base64 or missing
:separator) are rejected withinvalid_client(HTTP 401). - Non-Basic schemes ignored: Headers like
Authorization: Bearer ...are ignored; the server falls back to body-parameter validation. - Password grant credentials in body: The resource owner password (
usernameandpassword) must always be sent in the request body; the Basic header is for client credentials only.
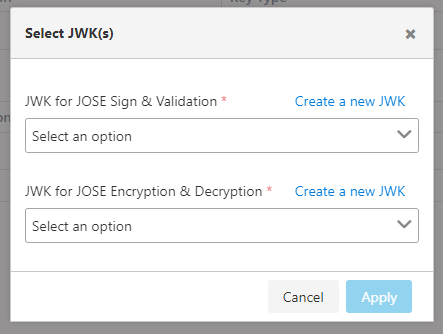
JWK Settings
In the JWK settings tab, selections of JWK keys required for decrypting and/or verifying the signature of the incoming credential’s JWK key-related data are made. An image containing JWK settings is shown below:
mTLS Settings
In the mTLS settings tab, the truststore selection required for the incoming credential’s certificate to be verified with the mTLS Authentication Policy is made. An image containing mTLS settings is shown below: